Installation Guide for Exit LED edgelit recessed Emergency, Nexus® LX, Nexus RF

Installation Guide for Exit LED edgelit recessed Emergency, Nexus® LX, Nexus RF

Brand: ABB

Category: Lighting

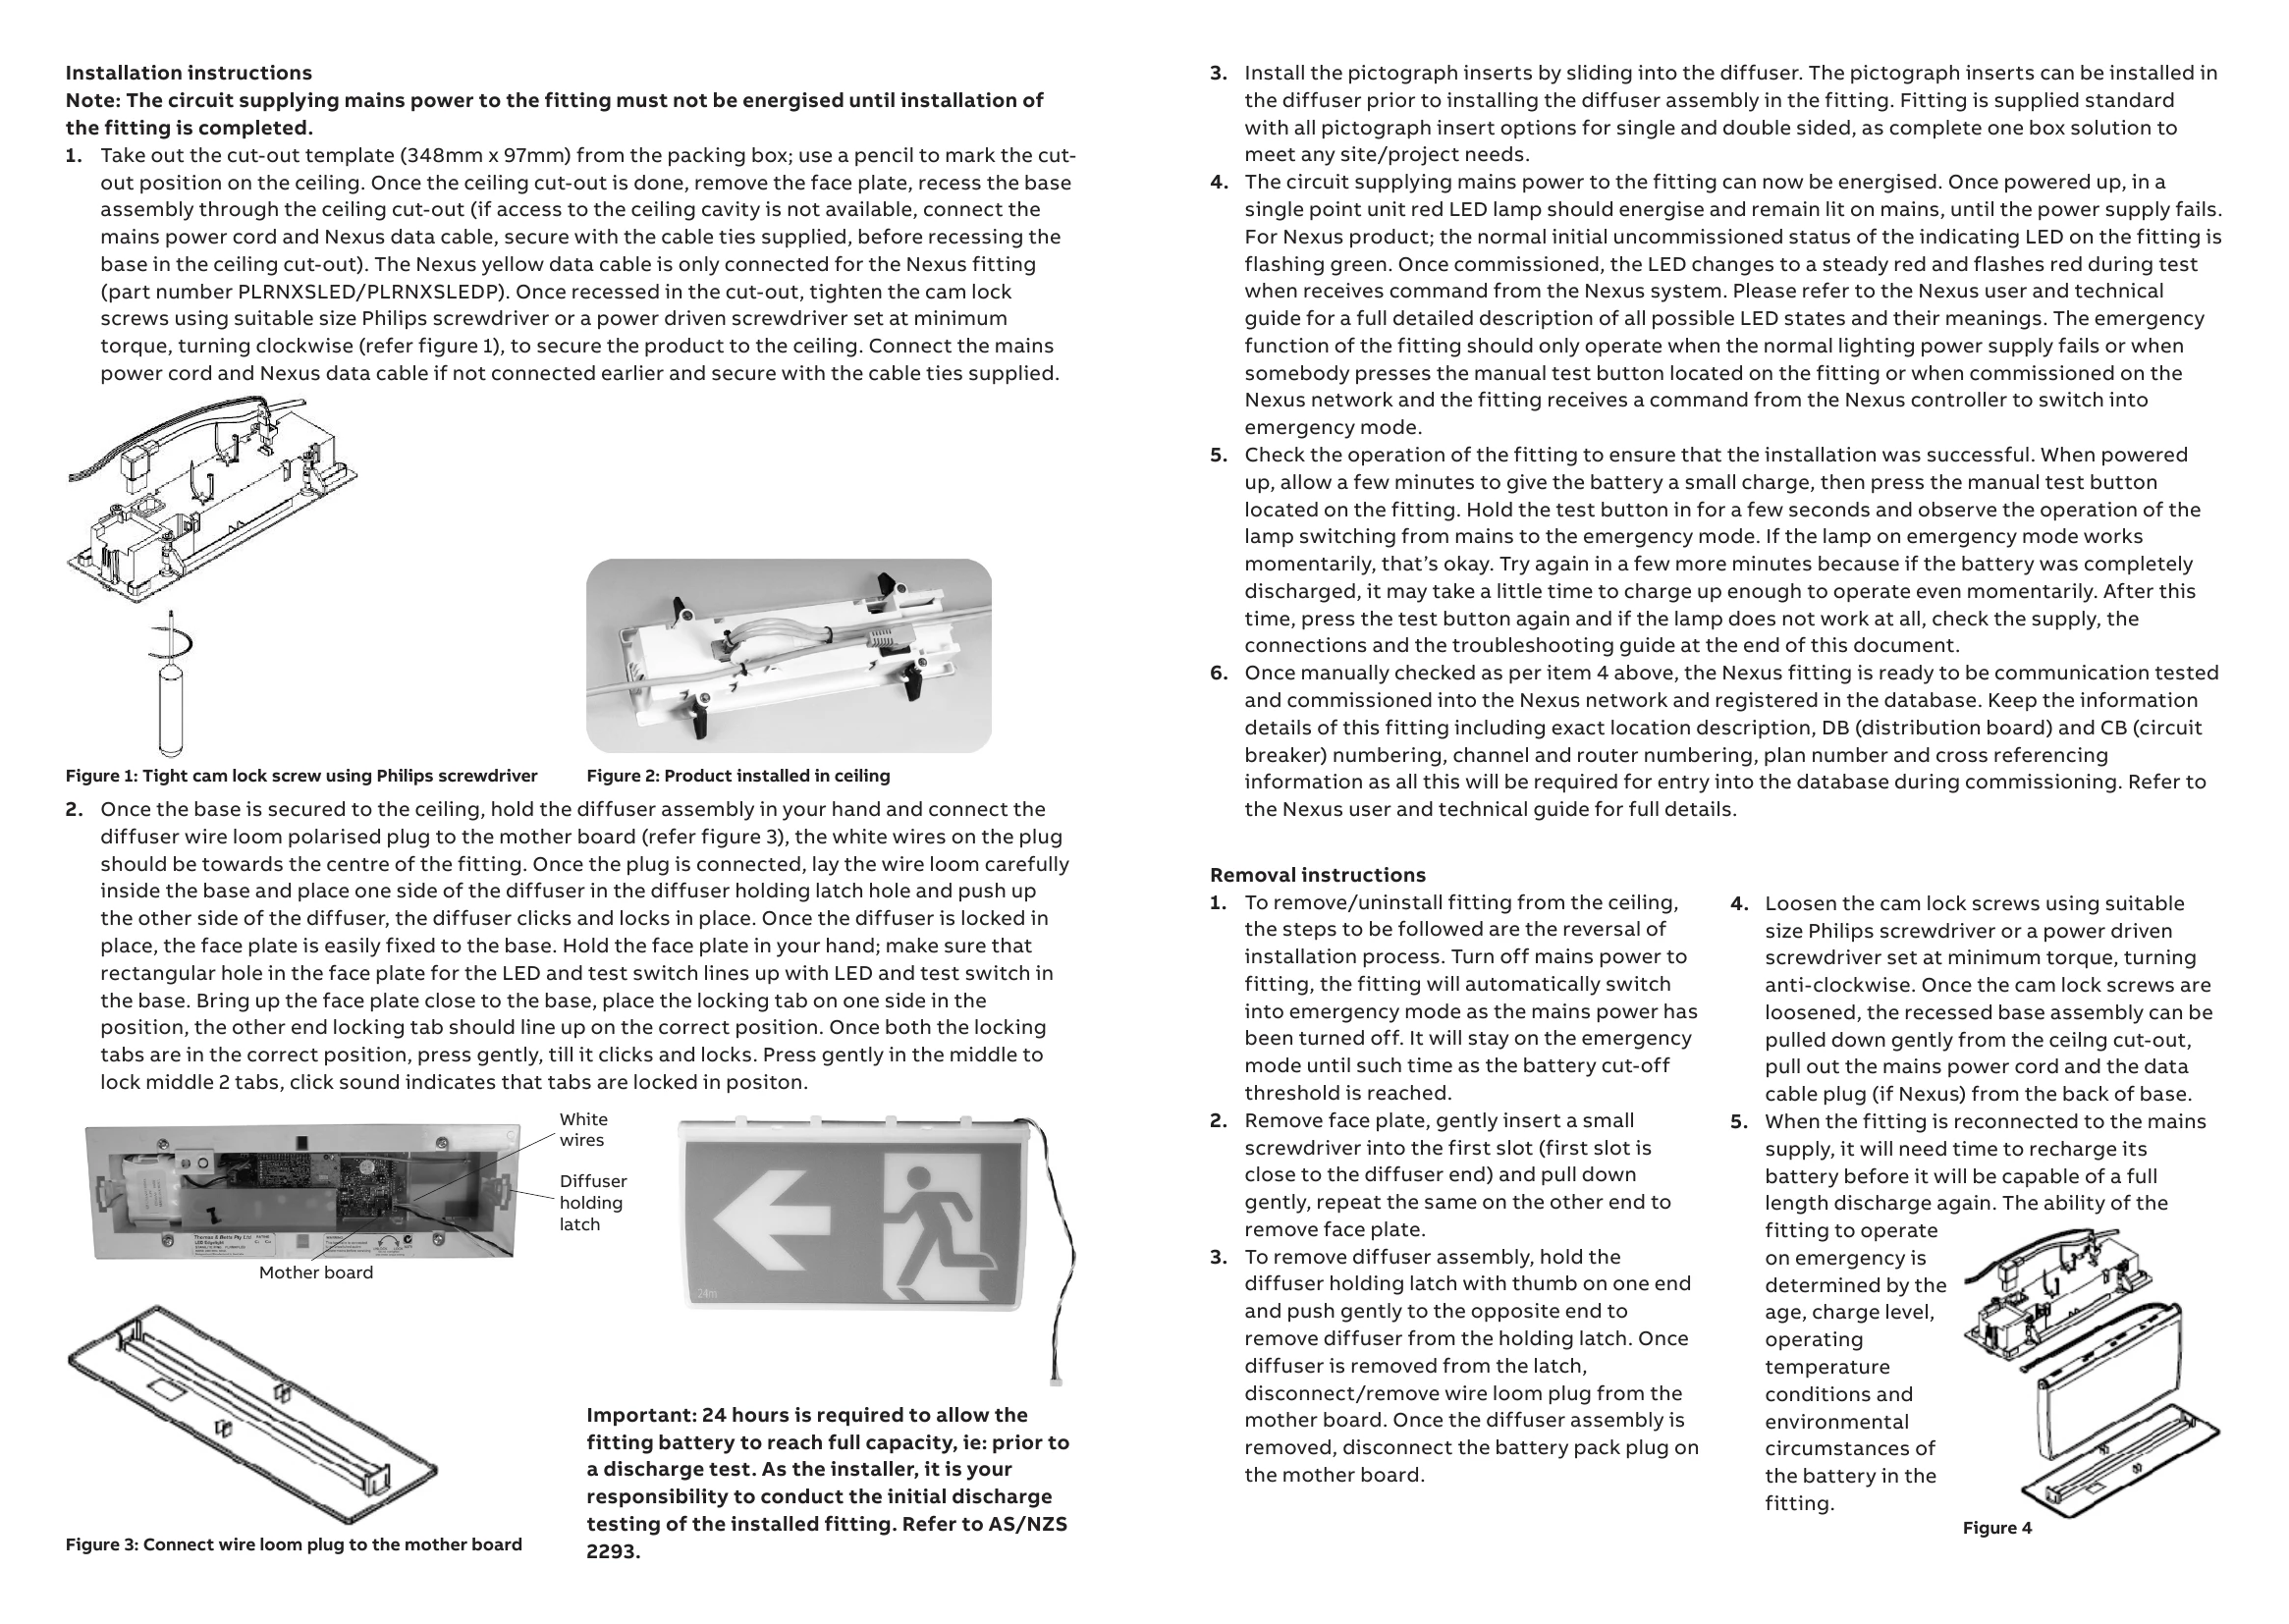
Document Type: Installation Guide

Language: EN

Uploaded: April 20, 2026, 8:11 p.m.

Manual Publish Date: 2020-02-01

Warranty Information

Warranty information is provided, and misuse such as frequent discharge/charge cycles may void the battery warranty.

**Testing Precautions:** - A commissioning discharge test per AS/NZS 2293.2 is required. - Allow 24 hours for battery to fully charge before testing. - Test duration: not less than 2 hours for commissioning, not less than 90 minutes for 6-monthly tests. - Keep records of tests. **Construction Sites:** - Avoid continuous switching off of mains power to fittings as it shortens battery life. - ABB does not recommend this and may void warranty. - Discharge testing is required every 6 months as per AS/NZS 2293.2. **Troubleshooting Guide:** - Use the provided table to identify and fix common faults. - Contact ABB customer service if the issue persists. **Installation:** - Mains power must not be energized until installation is complete. - Use the cut-out template to mark and cut the ceiling. - Secure the base assembly using cam lock screws. - Connect the mains power cord and Nexus data cable (if applicable). - Connect the diffuser wire loom plug to the mother board. - Install pictograph inserts. - Energize the circuit supplying mains power. - Check the LED indicators and perform a manual test. - For Nexus fittings, commission into the Nexus network. **Removal:** - Turn off mains power. - Remove face plate, diffuser assembly, and wire loom plug. - Disconnect the battery pack plug. - Loosen cam lock screws to remove the base assembly. - Allow time for battery to recharge after reconnection.

Troubleshooting and error codes

No. Fault Possible causes
1 LED lamp and indicator LED not lit AC supply not connected;
or
AC supply turned off;
or
Test switch damaged
2 LED lamp not lit but red indicator is lit LED lamp damaged;
or
LED lamp plug incorrectly inserted in the mother board
3 LED lamp not lit but indicator LED is flashing green LED lamp damaged;
or
LED lamp plug incorrectly inserted in the mother board
4 LED lamp is lit but red indicator LED not lit LED damaged;
or
Check battery connection
5 The LED lamp does not switch to emergency mode when the test button is pressed Test switch damaged
6 Indicator LED is constant green Test switch damaged;
or
Self check fail - return to factory
7 Indicator LED not red after commissioning Check battery connection and battery plug polarity
8 The LED lamp works momentarily on emergency when the test button is pressed or tested by command from the Nexus system Battery not yet charged (allow up to 24 hours)
Privacy Policy