Brand: Acer
Category: LCD TV
Document Type: Manual
Language: EN
Brand: Acer
Category: LCD TV
Document Type: Manual
Language: EN
Uploaded: April 20, 2026, 8:13 p.m.
Manual Publish Date: 2006-06
We would like to thank you for making this Acer LCD TV your choice. With proper care, your new Acer LCD TV will provide you with years of entertainment and satisfaction.
This User's Guide introduces you to the various features your LCD TV can offer, and provides clear and concise information about the product, so please read it thoroughly and retain it for future reference.
Your LCD TV package should contain the following accessories, in addition to the accessory box. Please ensure that they are all present. If any of the items is missing, then please contact your retailer.
* The power cord supplied varies according to your region.
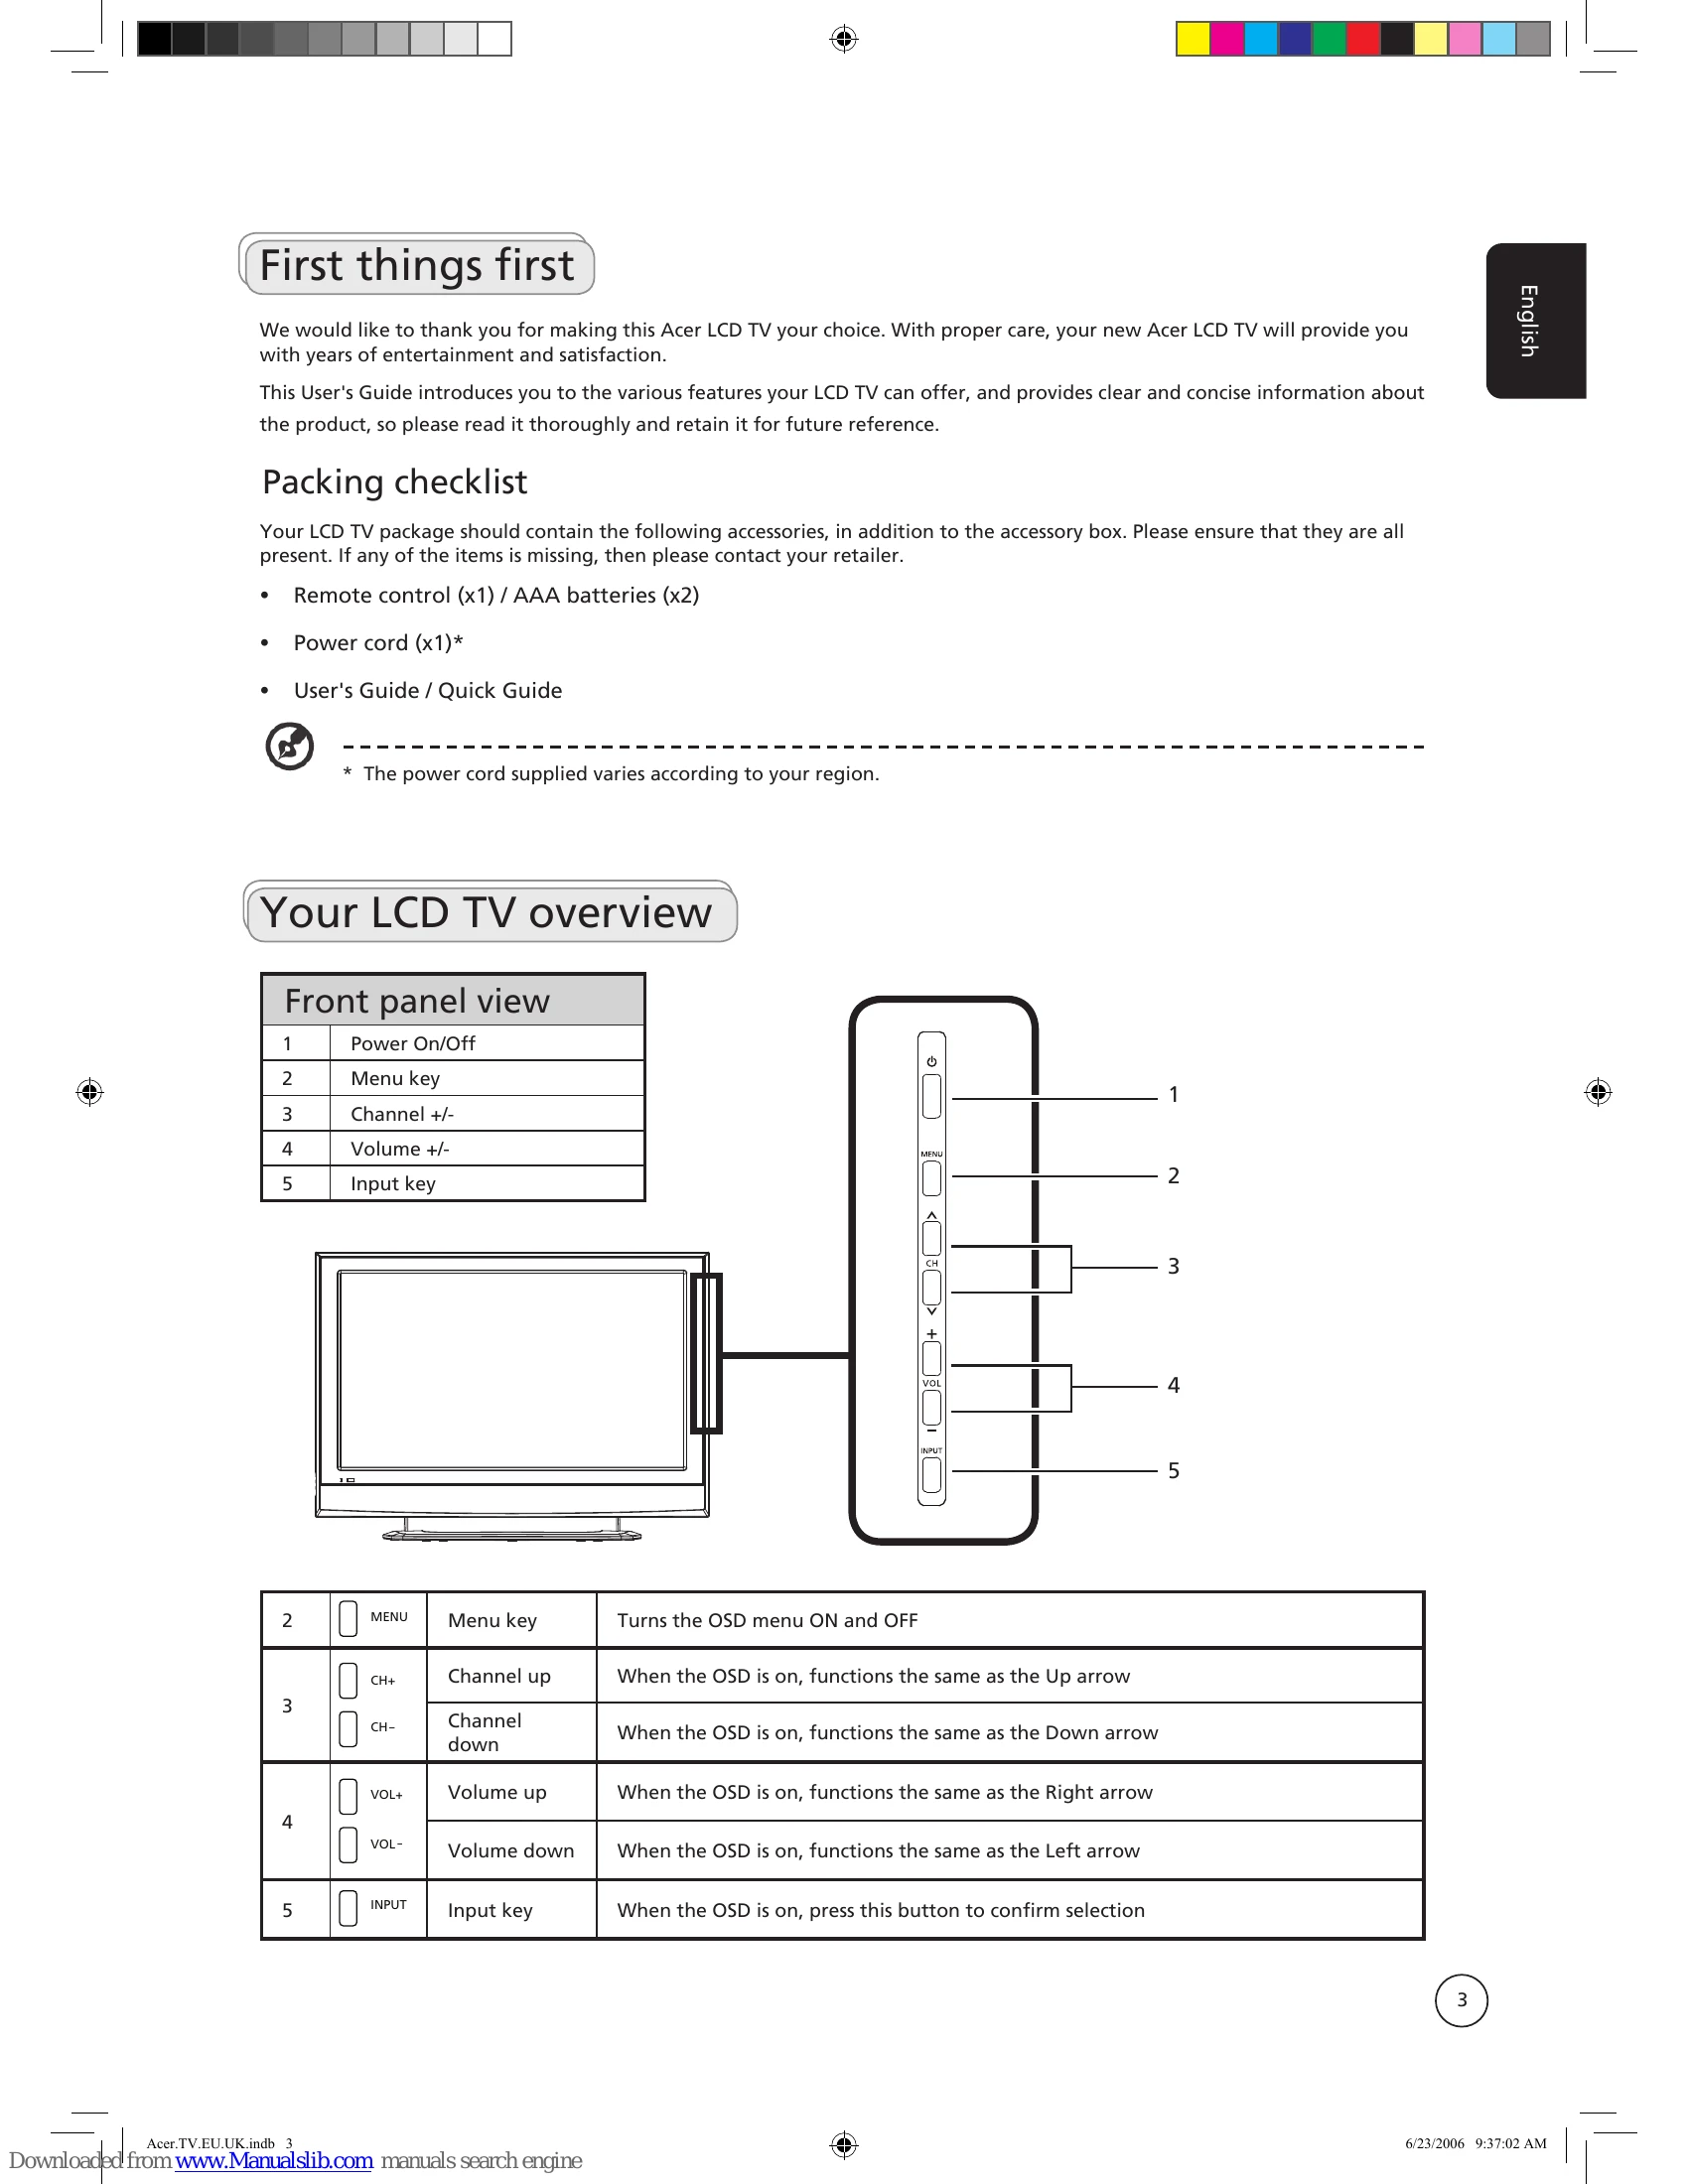
1 Power On/Off
2 Menu key
3 Channel +/-
4 Volume +/-
5 Input key
| 2 | MENU | Menu key | Turns the OSD menu ON and OFF |
| 3 | CH+ | Channel up | When the OSD is on, functions the same as the Up arrow |
| CH- | Channel down | When the OSD is on, functions the same as the Down arrow | |
| 4 | VOL+ | Volume up | When the OSD is on, functions the same as the Right arrow |
| VOL- | Volume down | When the OSD is on, functions the same as the Left arrow | |
| 5 | INPUT | Input key | When the OSD is on, press this button to confirm selection |
1 Connect the AC cord into the AC input on the back of the set.
2 Connect the plug to the wall outlet as shown.
1 Open the cover on the back of the remote unit.
2 Insert two AAA batteries (supplied) to match the polarity indicated inside the battery compartment.
Connect the antenna cable to the appropriate antenna terminal on the back of the TV set as shown below.
a. Turn on the power switch beneath the screen.
b. Press the power button, number keys or channel up / down button on the remote control.
The first time you switch on the TV, the Setup Wizard will guide you to complete the language selection and channel scanning.
Press the OK key to begin the setup process.
You can also adjust these settings using the front control panel. Please see "Front panel view" on page 3 for details.
Step 1. Select the setup language you prefer.
Step 2. Please select country.
Step 3. Ensure that your co-axial cables are connected correctly before proceeding.
Step 4. Scan for analog channels.
Step 5. Setup is now complete. You are ready to begin watching TV.
If you leave the setup process before it is complete, you will be given a choice of options:
Select an option and press OK to exit.
a. Press 0-9 on the remote control to select a channel. The channel changes after 2 seconds. Press ENTER to select the channel immediately.
b. Pressing the channel (CH) up / down button on the remote control will also change the channel.
Adjust the volume level using the (VOL) up/down button on the remote control.
Setup may vary due to local broadcast differences.
Connect your DVD player, VCR or audio/video equipment using the SCART port located at the rear of your LCD TV as shown below.
Connect your camera or camcorder to the video/audio ports on the rear of the TV set as shown below.
To display PC output on your TV, connect your PC or notebook computer to the TV as shown below.
For VGA input, Acer recommends setting your PC's external monitor resolution to 1360 x 768 pixels @ 60 Hz refresh rate.
Once you have connected your antenna or external equipment to the TV, you need to select the correct input source.
Press the corresponding button on the remote control to select the correct input source.
| TV | AV | SCART | PC |
|---|---|---|---|
| 1 | 2 | 3 | 4 |
Many of the advanced settings and adjustments are available through using the OSD (onscreen display) menus, as shown in the example screenshot below.
Basic operations required to navigate these menus (Picture, Audio, Channel management, Options, Settings) are described in this section.
You can also interact with these menus using the front panel controls. Please see "Front panel view" on page 3 for details.
There are five main OSD menus. These are: Picture, Audio, Channel management, Options and Settings.
Use the following method to navigate these menus.
The OSD can be used for adjusting the settings of your LCD TV.
Press the MENU key to open the OSD. You can use the OSD to adjust the picture quality, audio settings, channel settings and general settings. For advanced settings, please refer to following page:
The options available on the OSD may vary depending on the TV signal source.
Lock TV is a handy feature that can block all TV sources.
Lock TV allows you to enter a password and effectively stop anyone without the password from watching TV.
The default PIN for this TV is "0000." First enter "0000" when you want to change the PIN. If you forget your PIN, please enter 6163 to reset.
The first time you completed the setup wizard, all available channels were listed. If you need to reorder for new channels, please follow the steps below:
The first time you completed the setup wizard, all available channels were listed. If you need to re-scan for new channels, please follow the steps below:
Your Acer LCD TV has a special widescreen mode that allows you to toggle between 4:3, 16:9, Panorama, and Letterbox 1, 2 and 3 type views.
Press the WIDE key on the remote control to toggle the display between the four wide modes.
The Acer LCD contains four widescreen modes, including 4:3, 16:9, Panorama, and Letterbox 1, 2 and 3.
4:3
For 4:3 standard pictures. A side bar appears on each side.
16:9
In this mode, the whole picture is stretched toward each side of the screen.
Panorama
In this mode, the picture is progressively stretched toward each side of the screen.
Letterbox 1, 2, and 3
In this mode, the picture is enlarged linearly to fit the screen. The top and bottom portions of the picture may be cut off.
Before you call the Acer service center, please check the following items:
Here is a list of possible situations that may arise during the use of your LCD TV. Easy answers and solutions are provided for each.
If the above suggestions do not solve your technical issue, please refer to the warranty card for service information.
| Possible Problem | Solution |
|---|---|
| There is no picture or sound. |
|
| Picture is not clear. |
|
| Picture is too dark, too light or tinted. |
|
| Remote control does not work. |
|