Brand: Agfa
Category: Camera
Document Type:
Language: EN
Brand: Agfa
Category: Camera
Document Type:
Language: EN
Uploaded: Aug. 9, 2025, 11:36 p.m.
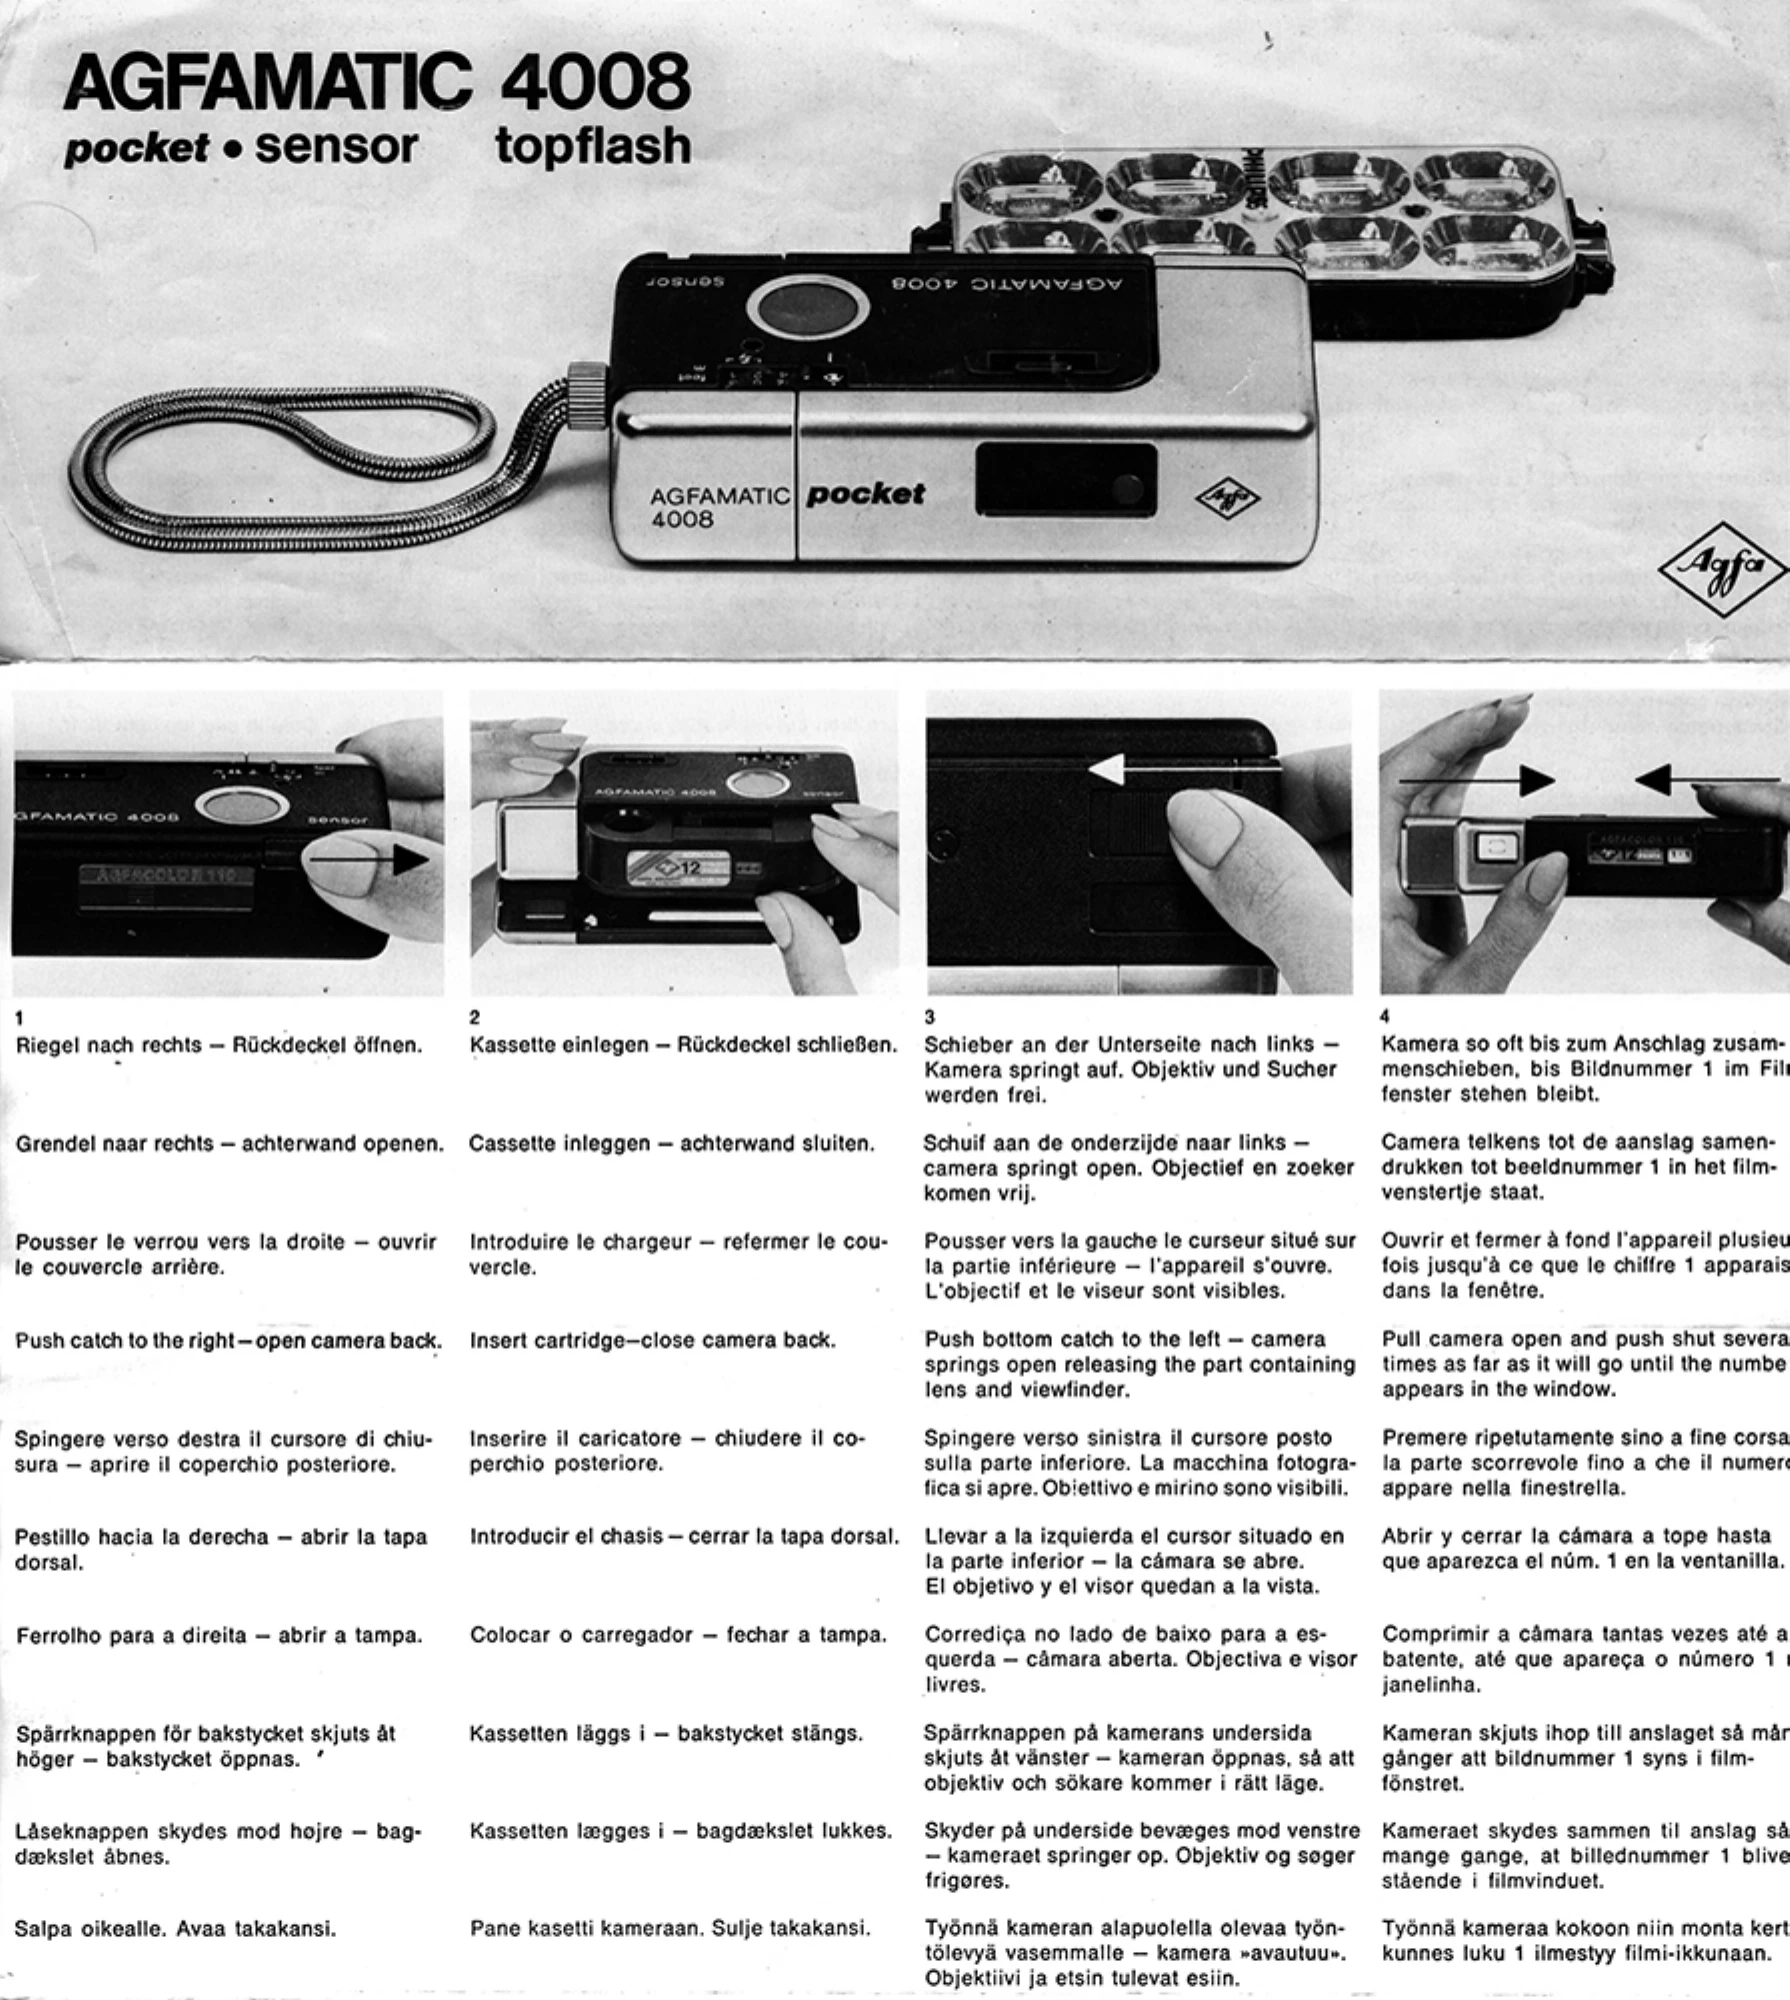
1. Open Back: Slide the latch to the right to open the camera back.
2. Insert Cartridge: Place the film cartridge in the camera and close the back.
3. Open Camera: Slide the bottom latch to the left. The camera will spring open, revealing the lens and viewfinder.
4. Advance Film: Push the camera halves together until image number 1 appears in the film window.
5. Film Transport Locked: The camera can now be opened and closed multiple times until the next shot.
6. Focusing: Set the distance: 1-2m, 2-5m, or 5m. Electronic shutter speed is from 30 sec. to 1/500 sec.
7. Framing & Firing: The crystal bright-line viewfinder shows the picture area. For close-ups, use the inner marks. Release the shutter by touching the red sensor spot.
8. Flash Assistance: If the red lamp in the viewfinder lights up when touching the sensor (for shutter speeds between 1/30 sec. and 30 sec.), use a tripod or flash.
9. Repitomatic Transport: Open and close the camera once for immediate readiness for the next shot.
10. Flash Bulb Replacement: Attach the topflash, set the flash range, and the flash time/aperture adjust automatically. After four exposures, turn the topflash to use the next four bulbs.
11. Flash Bulb Firing Sequence: Four flash bulbs fire sequentially, extinguishing corresponding color indicators.
12. After Four Flash Exposures: Turn the topflash over; four more bulbs are ready. Refer to topflash instructions.
13. Remove Cartridge: After the last exposure, advance film until the //// markings appear, then remove the cartridge.
14. Lock Sensor: Push the camera shut and slide the bottom latch to the right to lock the sensor release.
15. Battery Check: Cover the exposure meter and touch the sensor spot. If the red lamp in the viewfinder does not light up, replace batteries.
16. Replace Batteries: Pull out the battery compartment and insert two Varta 246, Varta 7203, or Mallory MN 625 G batteries as illustrated.
| Header 1 | Header 2 | Header 3 | Header 4 |
|---|---|---|---|
| Value 1a | Value 2a | Value 3a | Value 4a |
| Value 1b | Value 2b | Value 3b | Value 4b |
| Value 1c | Value 2c | Value 3c | Value 4c |