Brand: Apricot
Category: Computer
Document Type: Manual
Language: EN
Brand: Apricot
Category: Computer
Document Type: Manual
Language: EN
Uploaded: Nov. 21, 2025, 7:20 p.m.
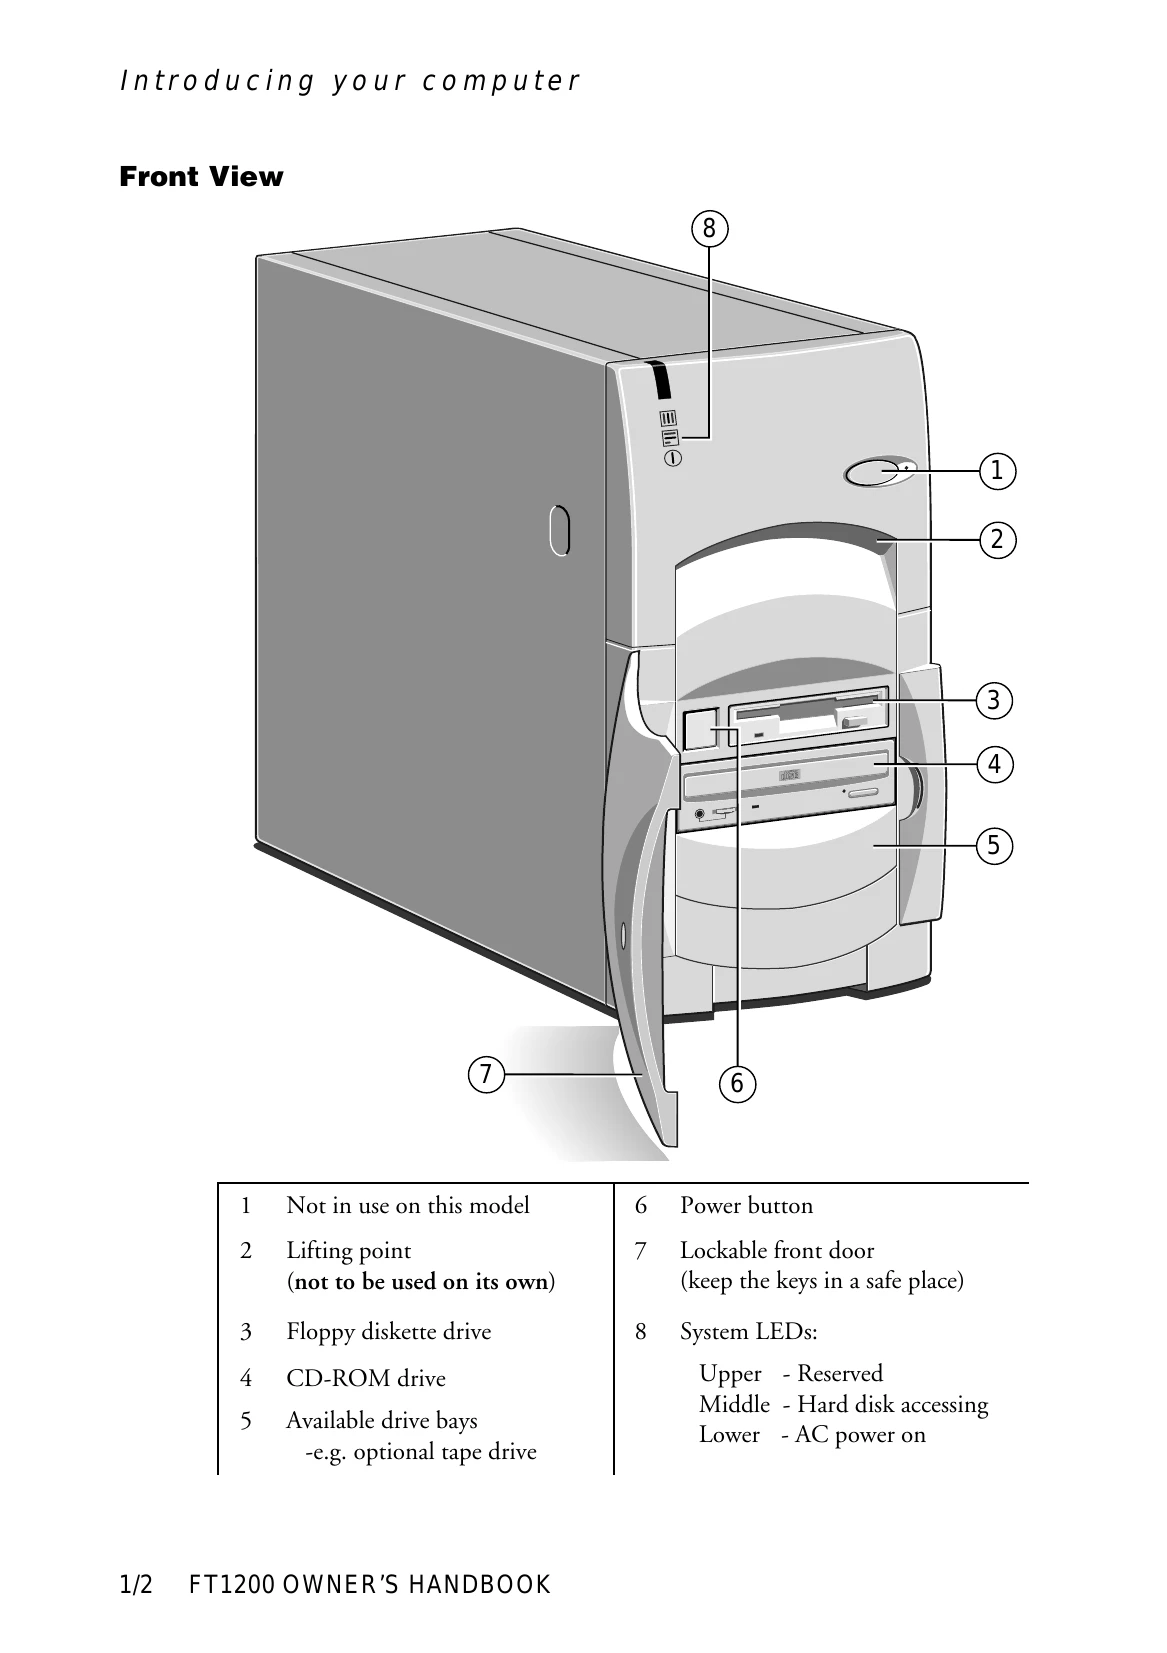
This chapter provides a quick tour of your Apricot computer, detailing its features and offering pictorial guides to familiarize you with its parts. Always read the power guidelines in the 'Safety and Regulatory Notices' section before first use.
The following pages show details of the front, back, and inside of the system, with instructions on how to remove panels to access internal components. Familiarize yourself with connections and controls before proceeding.
This chapter provides information on the correct operation of the drives fitted to your computer.
The floppy disk drive is usually configured as drive A: with a capacity of 1.44 Mbytes.
Insert diskettes shutter-foremost with the label side facing up. Push until the drive mechanism engages and the eject button pops out.
Ensure the drive is not in use. Press the eject button to disengage the mechanism and eject the diskette. If stuck, do not use tweezers; call an authorized maintainer.
The CD-ROM drive retrieves data from CD-ROMs and plays audio CDs. Warning: The laser beam is harmful; do not attempt to disassemble.
Press the button on the drive and place the CD label up on the platter. Push the button again or gently push the platter to retract.
Ensure the drive is not active. Press the Eject button. For manual ejection (e.g., power failure), turn off the computer and insert a thin metal rod into the emergency eject hole.
Recommended for regular backups of system hard drives. The drive can be obtained as an upgrade kit.
Hold the cassette with the metal plate downward and open tape edge towards the computer. Press against the slot; the dust cover will swing open. Push firmly home. The 'Cassette engaged' green light should illuminate.
Wait for the amber drive active light to go out. Press the Eject button; the cassette will move outwards for removal.
| Number of beeps | Meaning |
|---|---|
| 1-1-3 | CMOS write/read test failure |
| 1-1-4 | BIOS ROM checksum failure |
| 1-2-1 | Programmable Interval Timer test failure |
| 1-2-2 | DMA initialisation failure |
| 1-2-3 | DMA page register read/write test failure |
| 1-2-4 | RAM refresh verification failure |
| 1-3-1 | First 64K RAM test failure |
| 1-3-2 | First 64K RAM parity test failure |
| 1-3-3 | Slave DMA register test failure |
| 1-3-4 | Master DMA register test failure |
| 1-4-1 | Master interrupt mask register test failure |
| 1-4-2 | Slave interrupt mask register test failure |
| 1-4-4 | Keyboard controller test failure |
| 2-2-2 | Search for video ROM test failure |
| 2-2-3 | Screen believed inoperable |
| 2-2-4 | Timer tick interrupt test failure |
| 2-3-1 | Interval timer channel 2 test failure |
| 2-3-3 | Time-of-day clock test failure |
| 2-4-3 | CMOS memory size against actual compare failure |
| 2-4-4 | Memory size mismatch occurred |