Brand: ASUS
Category: Desktop PC
Document Type: Manual
Language: EN
Brand: ASUS
Category: Desktop PC
Document Type: Manual
Language: EN
Uploaded: April 20, 2026, 7:42 p.m.
Manual Publish Date: 2023-01-01
No specific warranty period is mentioned in the provided text.
Welcome to your new ASUS Desktop PC. This section guides you through the initial setup and helps you get acquainted with your computer. Please read the ASUS Warranty Card before setting up. Note that Windows® 7 is not supported. Be careful when handling the PC to avoid injury.
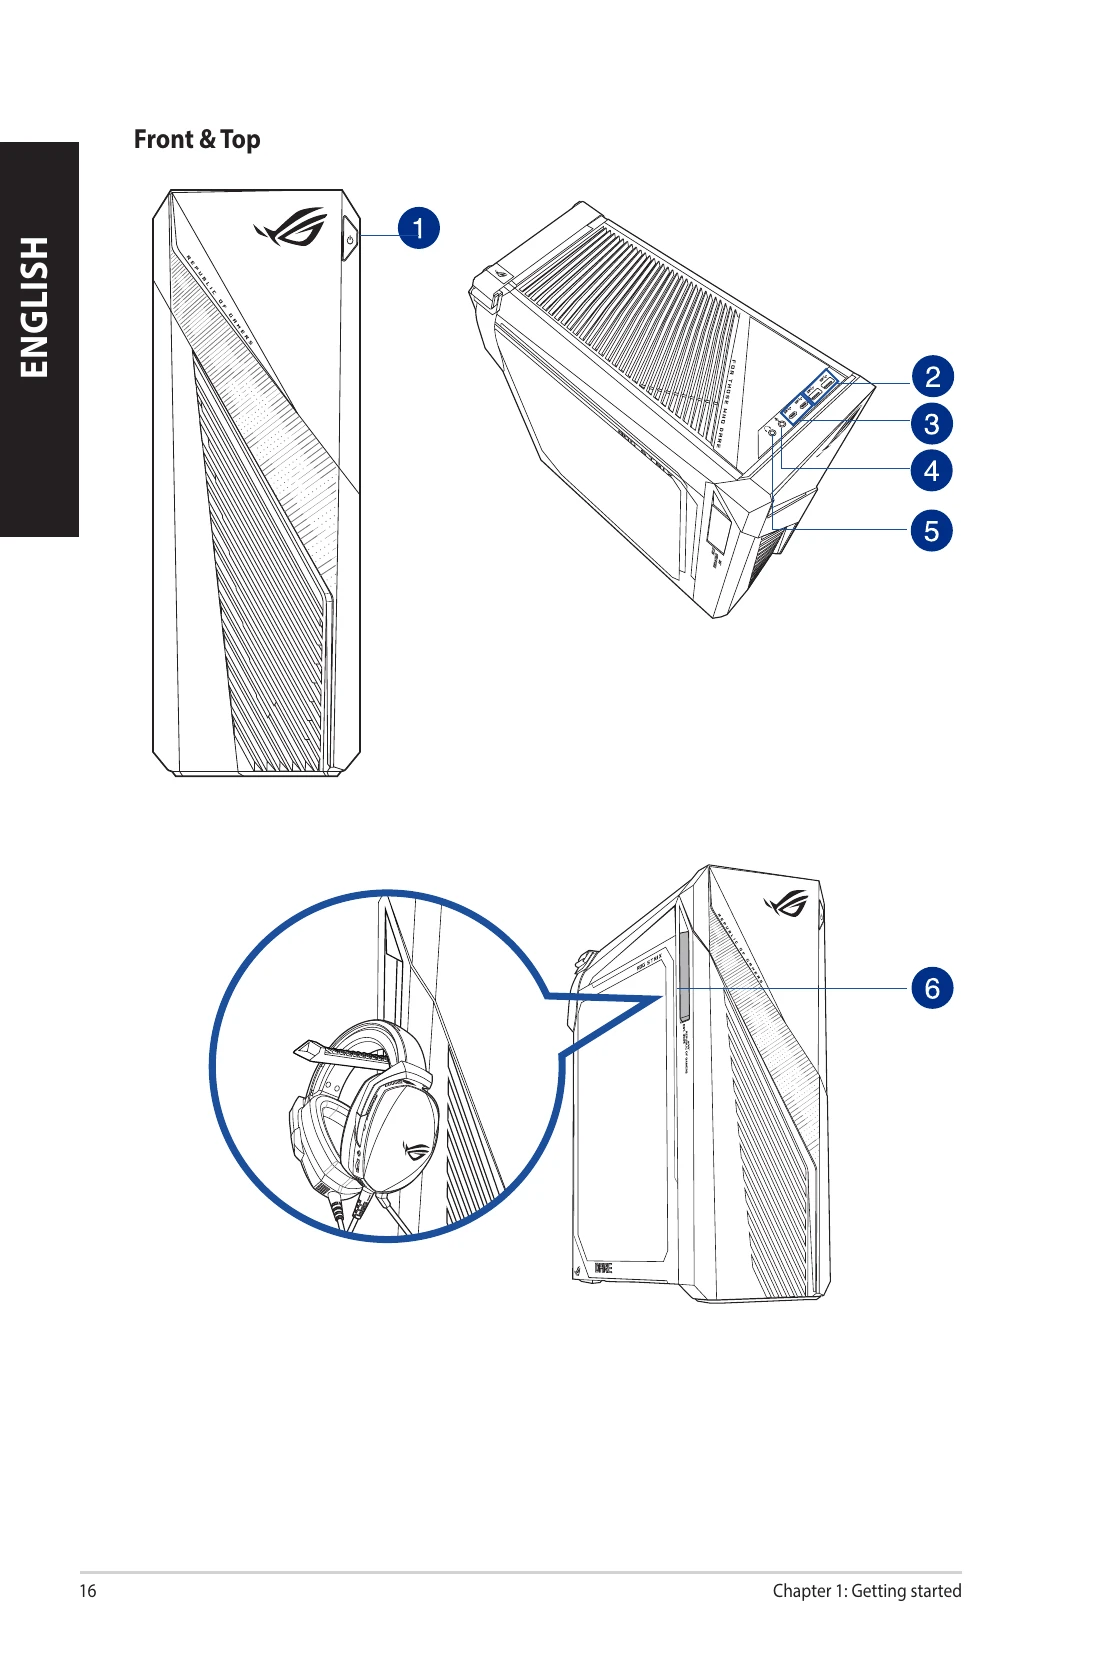
Familiarize yourself with the ports and components of your computer. Illustrations are for reference only, and actual ports and chassis colors may vary. Important: This PC is not intended for cryptocurrency mining due to high electricity consumption.
Your PC has four DDR4 DIMM sockets. Follow the recommended configurations and installation steps carefully. Ensure the computer is off and unplugged before installing memory.
Connect Wi-Fi antennas to the ports at the back of the chassis. Ensure they are securely installed and at least 20 cm away from people for optimal performance.
| Problem | Possible Cause | Action |
|---|---|---|
| No power (The power indicator is off) | Incorrect power voltage |
• Set your computer's power voltage switch to your area's power requirements. • Adjust the voltage settings. Ensure that the power cord is unplugged from the power outlet. |
| Your computer is not turned on. | Press the power key on the front panel to ensure that your computer is turned on. | |
| Your computer's power cord is not properly connected. |
• Ensure that the power cord is properly connected. • Use other compatible power cord. |
|
| PSU (Power supply unit) problems | Contact the ASUS Service Center about installing another PSU on your computer. | |
| No display output after turning the computer on (Black screen) | The signal cable is not connected to the correct VGA port on your computer. |
• Connect the signal cable to the correct display port (onboard VGA or discrete VGA port). • If you are using a discrete VGA card, connect the signal cable to the discrete VGA port. |
| Signal cable problems | Try connecting to another monitor. | |
| Cannot access the Internet | The LAN cable is not connected. | Connect the LAN cable to your computer. |
| LAN cable problems | Ensure the LAN LED is on. If not, try another LAN cable. If it still does not work, contact the ASUS service center. | |
| Your computer is not properly connected to a router or hub. | Ensure that your computer is properly connected to a router or hub. | |
| Network settings | Contact your Internet Service Provider (ISP) for the correct LAN settings. | |
| Problems caused by the anti-virus software | Close the anti-virus software. | |
| Driver problems | Reinstall the LAN driver | |
| No Audio | Speaker or headphone is connected to the wrong port. |
• Refer to your computer's user manual for the correct port. • Disconnect and reconnect the speaker to your computer. |
| Speaker or headphone does not work. | Try using another speaker or headphone. | |
| The front and back audio ports do not work. | Try both the front and back audio ports. If one port failed, check if the port is set to multi-channel. | |
| Driver problems | Reinstall the audio driver | |
| System speed is too slow | Too many programs are running. | Close some of the programs. |
|
• Use an anti-virus software to scan for viruses and repair your computer. • Reinstall the operating system. |
||
| Computer virus attack | - | |
| Hard disk drive failure |
• Send the damaged hard disk drive to ASUS Service Center for servicing. • Replace with a new hard disk drive. |
|
| Memory module problems |
• Replace with compatible memory modules. • Remove the extra memory modules that you have installed, then try again. • Contact the ASUS Service Center for assistance. |
|
| There is not enough air ventilation for your computer. | Move your computer to an area with better air flow. | |
| Incompatible softwares are installed. | Reinstall the OS and reinstall compatible softwares. | |
| CPU | Too noisy right after turning on the computer. | It is normal. The fan runs on its full speed when the computer is powering on. The fan slows down after entering the OS. |
| Computer is too noisy when in use. |
• Update the BIOS. • If you know how to reinstall the motherboard, try to clean the inner space of the chassis. • Contact the ASUS Service Center for assistance. |