Brand: ASUS
Category: Monitor
Document Type: Manual
Language: EN
Brand: ASUS
Category: Monitor
Document Type: Manual
Language: EN
Uploaded: April 20, 2026, 7:45 p.m.
Manual Publish Date: 2024-09-01
This product comes with a 24-month warranty for optimal performance and support.
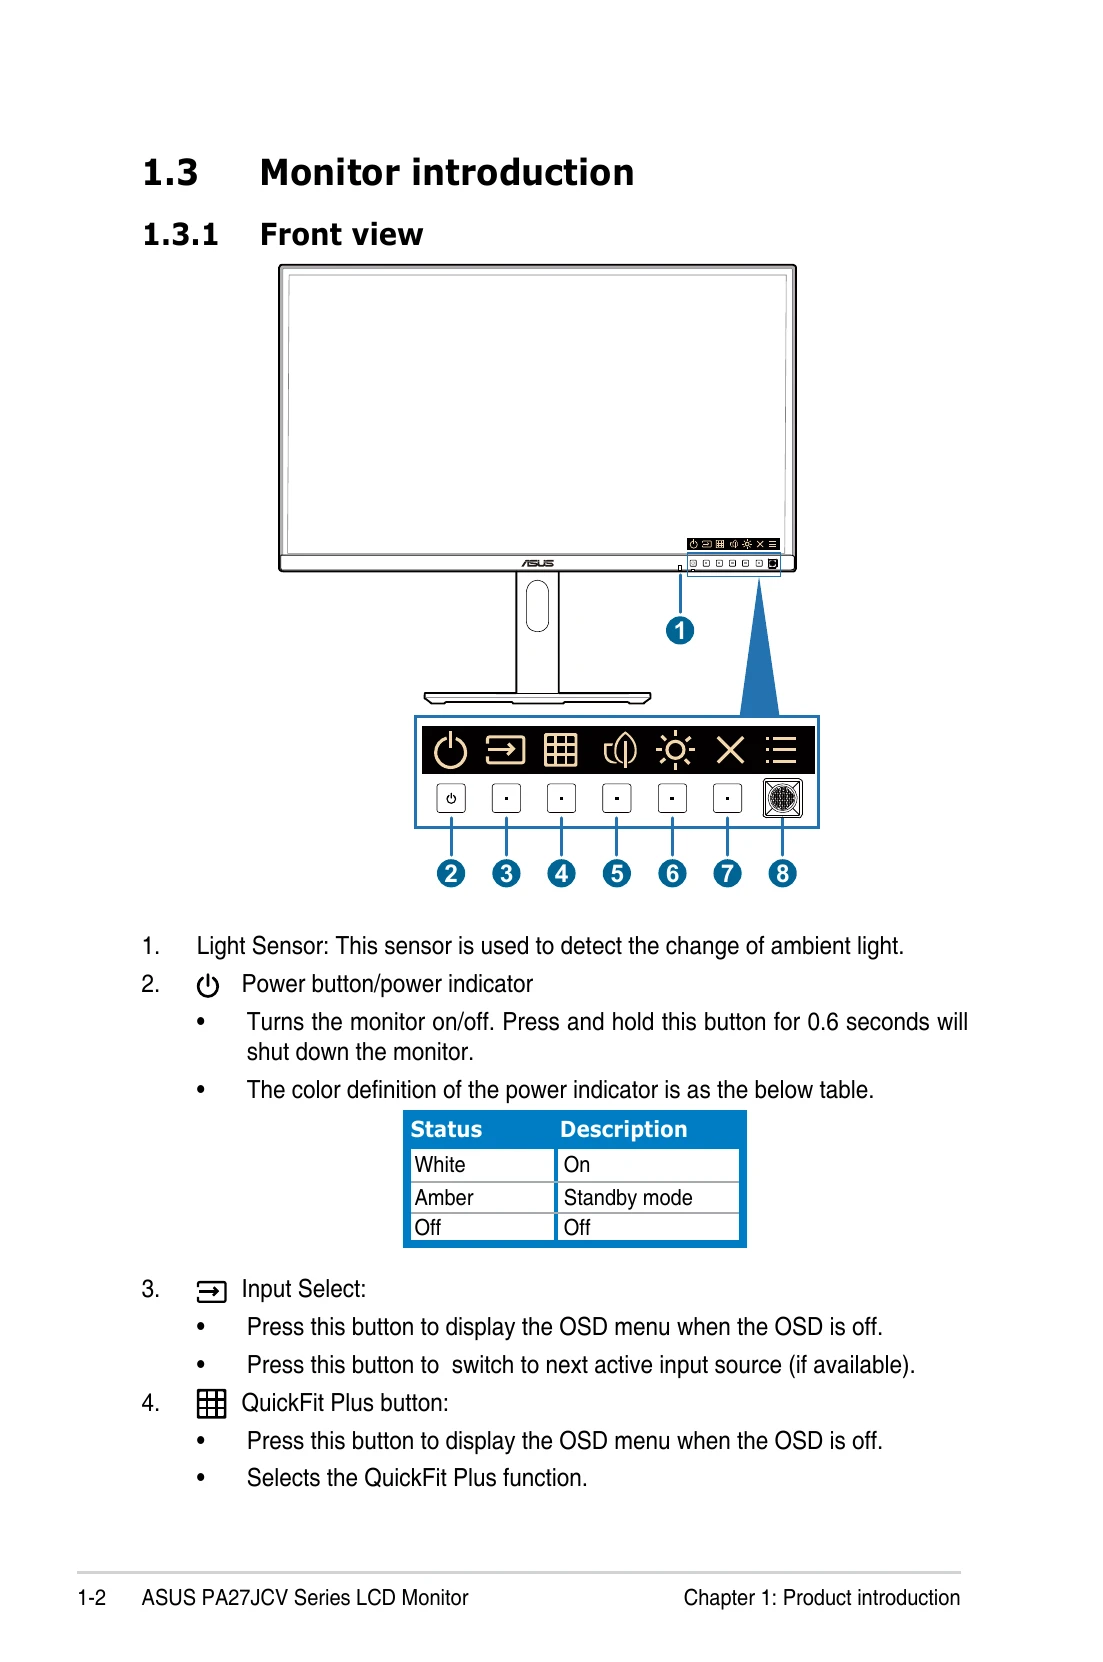
Setup:
OSD Menu Navigation:
Key Features:
| Problem | Possible Solution |
|---|---|
| Power LED is not ON | • Press the button to check if the monitor is in the ON mode. • Check if the power cord is properly connected to the monitor and the power outlet. • Check if the power switch is ON. |
| The power LED lights amber and there is no screen image | • Check if the monitor and the computer are in the ON mode. • Make sure the signal cable is properly connected the monitor and the computer. • Inspect the signal cable and make sure none of the pins are bent. • Connect the computer with another available monitor to check if the computer is properly working. |
| Screen image is too light or dark | • Adjust the Contrast and Brightness settings via OSD. • Make sure the signal cable is properly connected to the monitor and the computer. |
| Screen image bounces or a wave pattern is present in the image | • Move electrical devices that may cause electrical interference. |
| Screen image has color defects (white does not look white) | • Inspect the signal cable and make sure that none of the pins are bent. • Perform All Reset via OSD. • Adjust the R/G/B color settings or select the Color Temperature via OSD. |
| No sound or sound is low | • Ensure that the HDMI/DisplayPort/USB Type C cable is properly connected to the monitor and the computer. • Adjust the volume settings of both your monitor and HDMI/DisplayPort/USB Type C device. • Ensure that the computer sound card driver is properly installed and activated. |