Brand: Bronica
Category: Camera
Document Type:
Language: EN
Brand: Bronica
Category: Camera
Document Type:
Language: EN
Uploaded: Aug. 9, 2025, 11:44 p.m.
Manual Publish Date: 1969-03-31
| Malfunction | Cause | Method of repair |
|---|---|---|
| Film wind crank-handle turns freely. Film wind crank-handle turns too lightly and there is no sign of shutter charging or film advance. | 1. Rotation is not conveyed to Gear #2 due to breakdown of Gear #1. | 1. Replace Gear #1 and Gear #2. |
| Film wind crank-handle turns freely. Film wind crank-handle turns too lightly and there is no sign of shutter charging or film advance. | 2. Rotation is not conveyed to the gear assembly due to loosening of the caulking of Winding Wheel #3 and Winding Pin Bearing #4. | 2. Re-caulk or replace parts. |
| Swelling on a part of the right side-cover plate. | Screw #2 for fixing Gear #1 in position became loose through contact with the inner surface of the side-cover plate during rotation and pushes out the side-cover plate. | 1. After applying bonding agent to prevent loosening, tighten Screw #2 securely. 2. Replace Gear #3 and Screw #2 with improved parts featuring left-motion screw thread. |
| Film wind crank-handle tends to recoil when grip is release in the course of shutter charging. | 1. Caulking of Stud #2 of Film Wind Ratchet #1 has become loose. | 1. Re-caulk the stud. |
| Film wind crank-handle tends to recoil when grip is release in the course of shutter charging. | 2. Poor function of Spring #3. | 2. After checking the function of Film Wind Ratchet #1, adjust Spring #3 so that it provides greater recoiling power. |
| Film wind crank-handle tends to recoil when grip is release in the course of shutter charging. | 3. Deterioration of the shape of Film Wind Ratchet #1. | 3. Re-form the tip with a whet-stone or replace Film Wind Ratchet. |
| Film wind crank-handle does not come to a stop after shutter charging and therefore shutter release button fails to operate. | 1. Spring #3 pressing Stopper Lever #1 is too weak. | 1. Adjust Spring #3 so that it produces sufficient recoiling power. |
| Film wind crank-handle does not come to a stop after shutter charging and therefore shutter release button fails to operate. | 2. Hook Section #4 of Stopper Lever #1 is bent and is liable to slip off the catch. | 2. Re-form Hook Section #4 of Stopper Lever #1 and Catch #5 of Stopper Ring. |
| Film wind crank-handle rotates freely. Shutter fails to function even when shutter release button is depressed, and film wind crank-handle still turns without any resistance. | 1. Spring #5 of Winder Advancing Claw #4 is disengaged and Advancing Claw #4 fails to convey the rotation to Shutter-Mirror Charging Gear #6 and Winding Roller #7. | 1. Replace the spring. |
| Film wind crank-handle rotates freely. Shutter fails to function even when shutter release button is depressed, and film wind crank-handle still turns without any resistance. | 2. Caulking or Stud #8 of Advancing Claw #4 and Winding Stopper Ring #1 has become loose. | 2. Replace the stud. |
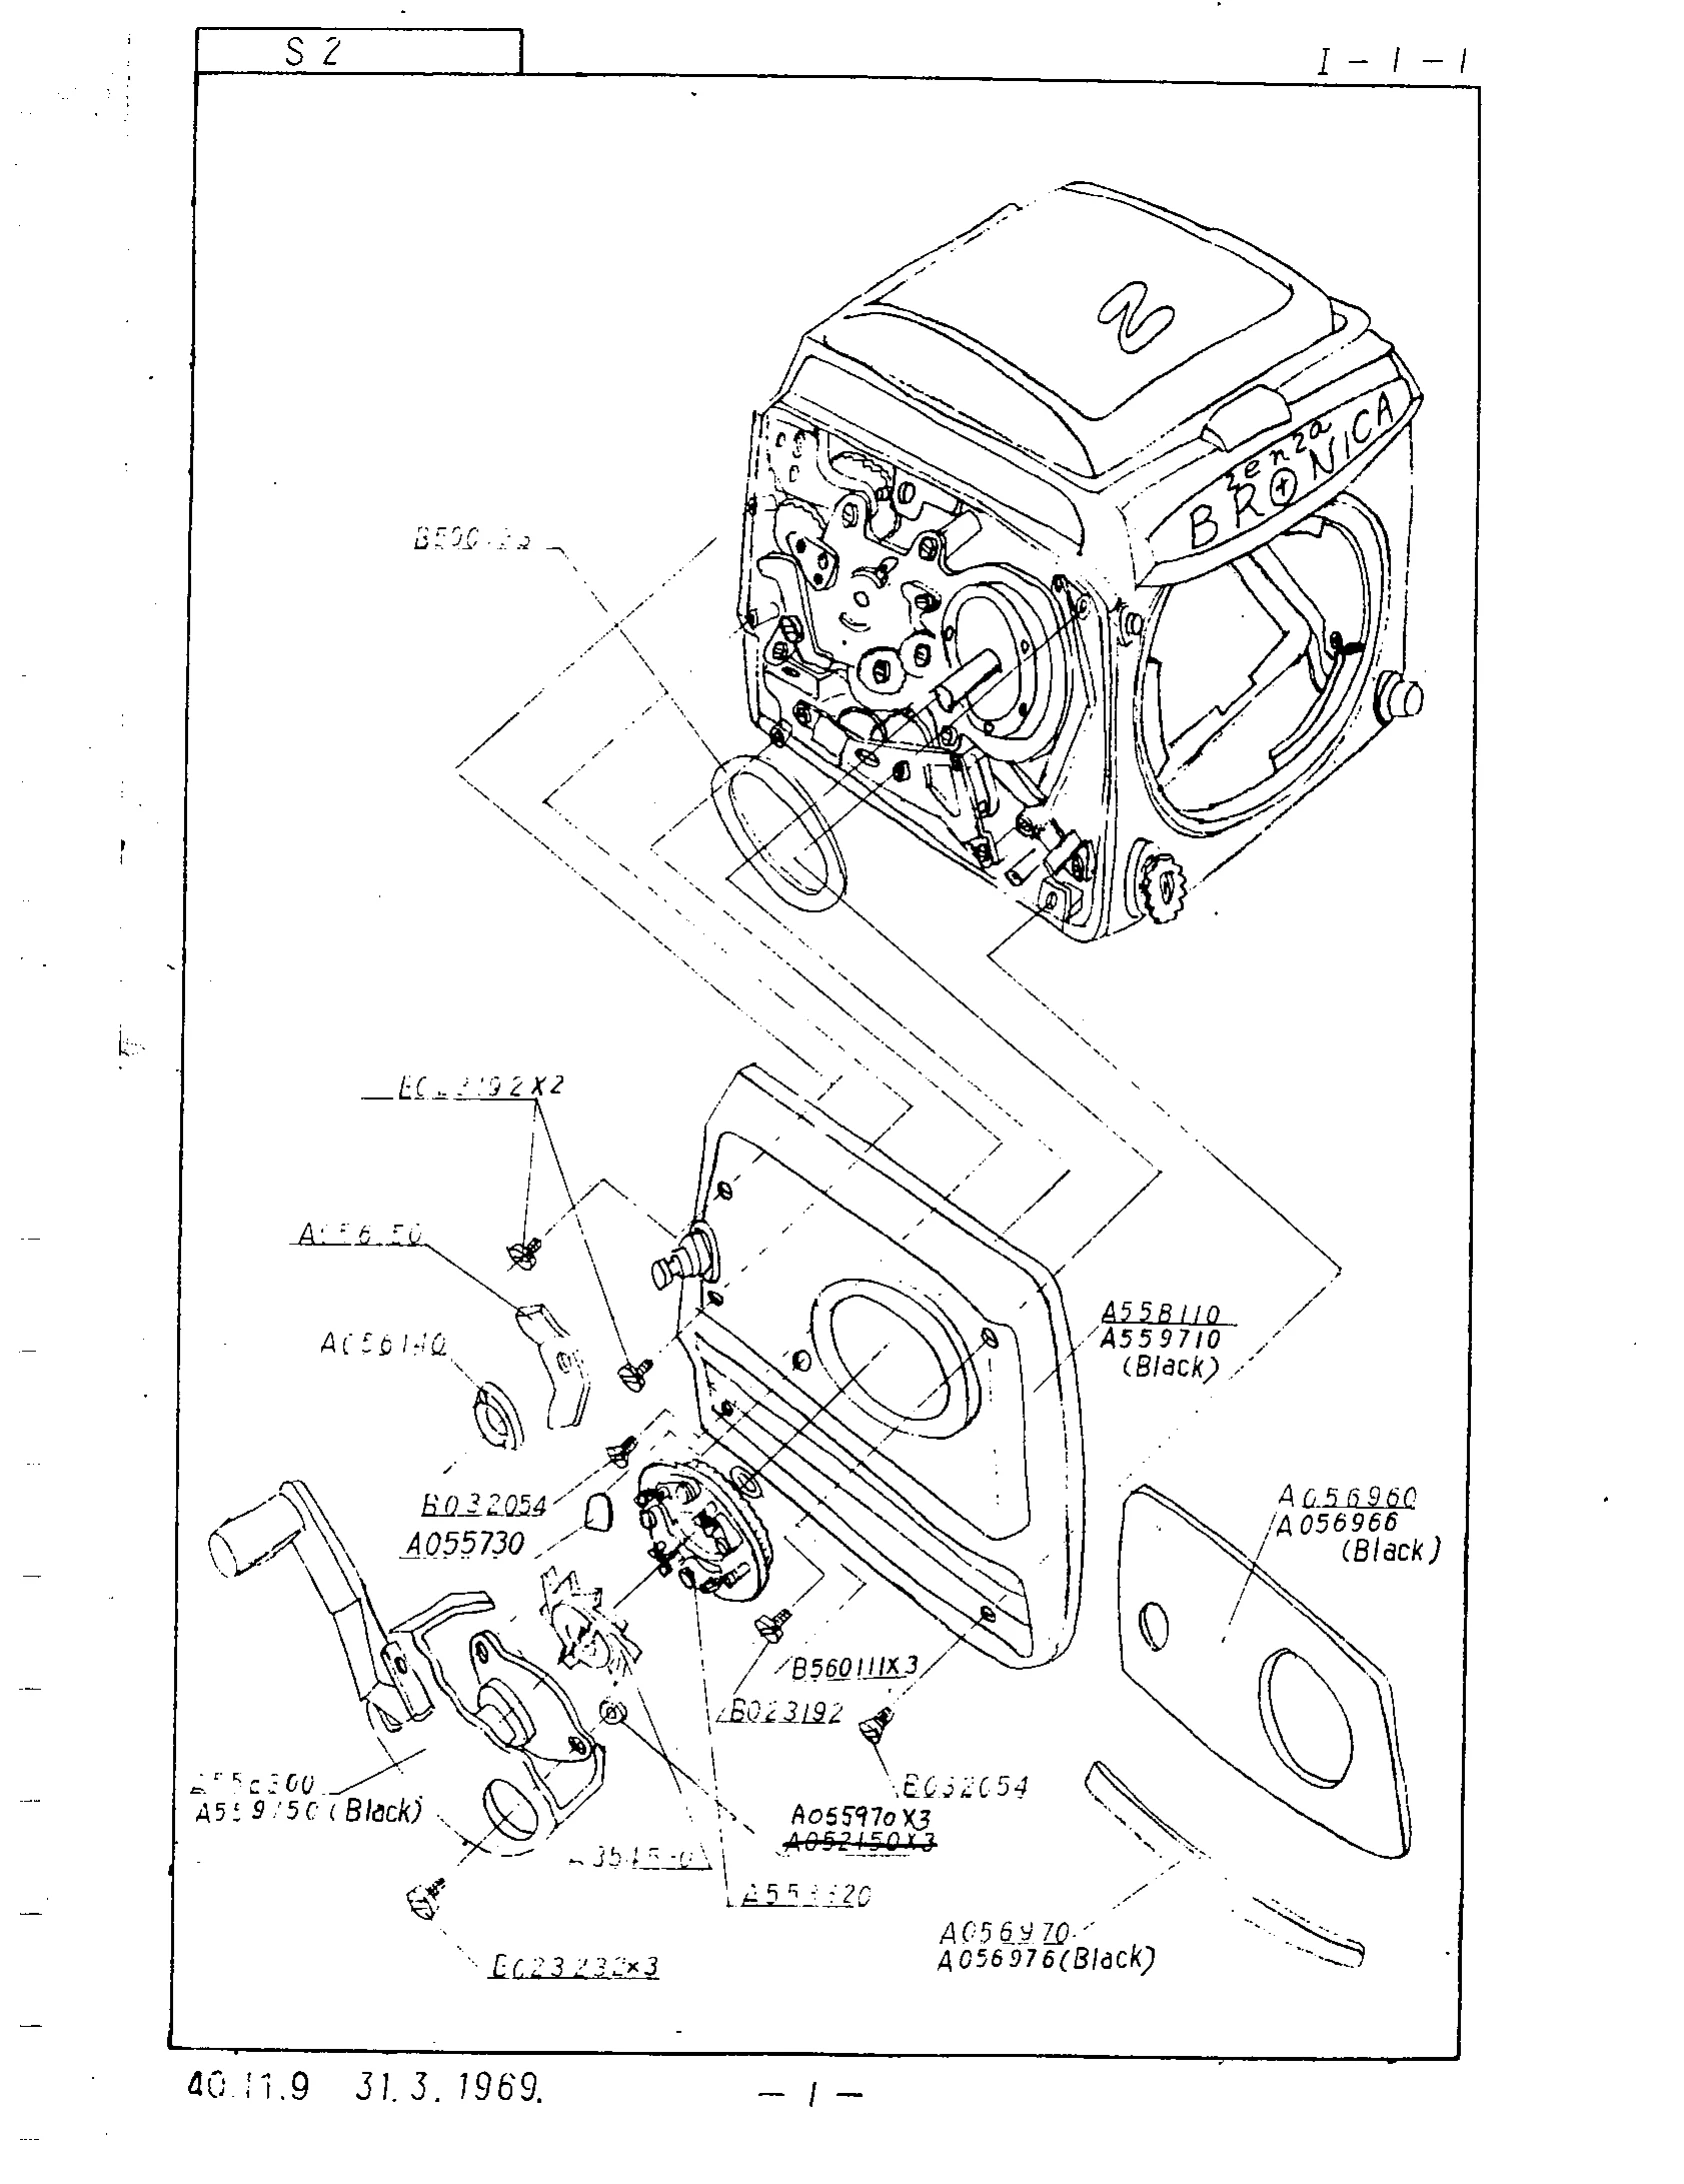
| A big rattling noise is produced immediately after shutter charging, and both mirror and shutter fail to operate. (When the shutter curtain is in a released state.) | 1. The teeth of Intermediate Shutter Charging Gear #2 and Shutter Charging Gear #1 of the Winding Block are not properly engaged. | 1. Demount the Winding Block and tighten Screws #3 fixing Winding Release Roller Stud from the rear, if they are found to be loose. (Fig. 2) Advance SM Charging Gear #4 by one tooth in a clockwise motion and M Charging Gear also by one tooth in a counter-clockwise motion; then, mount the Winding Block seeing to it that the teeth are engaged properly. (Figs. 1 to 3) |
| A big rattling noise is produced immediately after shutter charging, and both mirror and shutter fail to operate. (When the shutter curtain is in a released state.) | 2. SM Charging Gear #4 and M Charging Gear #5, as well as Intermediate S Charging Gear #2 are not engaged properly. | 2. Demount the Winding Block and tighten Screws #3 on the rear. (Fig. 2) After shifting SM Charging Gear #4 by one tooth in a clockwise motion, mount the Winding Block seeing to it that the gears are properly engaged. (Figs. 1 to 4) |
| Overlapping of frames (Overlaps at irregular intervals) | 1. a. Weak tension of Spring #2. | 1. a. Regulate Spring #2 so as to provide greater tension. |
| Overlapping of frames (Overlaps at irregular intervals) | b. Deformation of Stopper Claw #1. | b. Reshape Stopper Claw #1 into proper form. |
| Overlapping of frames (Overlaps at irregular intervals) | c. Improper function of Calibration Lever #3. | c. Make adjustment to assure smooth function of Calibration Lever #3. |
| Overlapping of frames (Overlaps at irregular intervals) | 2. Deformation of Calibration Plate #4. | 2. Reshape Calibration Plate #4 into proper form. |
| Overlapping of frames (Frames overlap one over the other, showing hardly any trace of film advance.) | 1. a. Weak tension of Spring #4. | 1. a. Regulate Spring #4 so as to provide greater tension. |
| Overlapping of frames (Frames overlap one over the other, showing hardly any trace of film advance.) | b. Calibration Plate #5 and Auxiliary Calibration Plate #1 are in contact with each other. | b. Replace Calibration Plate Unit. |
| Overlapping of frames (Frames overlap one over the other, showing hardly any trace of film advance.) | 2. a. Deformation of Calibration Lever #2. | 2. a. Reshape Calibration Lever #2 into proper form. |
| Overlapping of frames (Frames overlap one over the other, showing hardly any trace of film advance.) | b. Deformation of F Film Advance Release Lever #6. | b. Reshape F Film Advance Release Lever #6 into proper form. |
| Exposure counter fails to reset to "0". | 1. Tip #2 or #3 of Calibration Lever #1 comes into contact with Auxiliary Calibration Plate #4. | 1. a. Regulate Starter Spring #5 so as to provide greater tension. |
| Exposure counter fails to reset to "0". | a. Weak tension of Starter Spring #5. | b. Reshape Calibration Lever #1 into Proper form. |
| Exposure counter fails to reset to "0". | b. Deformation of Calibra-tion Lever #1. | c. Reshape Starting Relay Lever #6 into proper form. |
| Exposure counter fails to reset to "0". | c. Deformation of Starting Relay Lever #6. | d. Tighten Screw #7 securely. |
| Exposure counter fails to reset to "0". | d. Loosening of Screw #7 of Calibration Lever #1. | 2. Regulate Resetting Spring #8 of Counter Plate so as to provide greater tension. |
| Exposure counter fails to reset to "0". | 2. Weak tension of Resetting Spring #8 of Counter Plate. | 3. Reshape Starting Relay Lever #6 into Proper form. |
| Exposure counter fails to reset to "0". | 3. Starting Relay Lever #6 comes into contact with lower surface of Calibration Plate #29 due to deformation of the lever. | 4. Readjust the seating of Free Wind Lever #10 in proper position. |
| Exposure counter fails to reset to "0". | 4. Tip #11 of Free Wind Lever #10 comes into contact with Counter Gear #12. | 5. Reshape Switch Lever #13 into proper form. |
| Exposure counter fails to reset to "0". | 5. Switch Lever #13 comes into contact with the lower surface of Counter Plate #14 due to deformation of the lever. | 6. Reshape Side Cover #15 into proper form. |
| Exposure counter fails to reset to "0". | 6. Side Cover #15 comes into contact with Counter Plate #14 due to deformation. | 7. Reshape Indicator Plate #16 into proper form. |
| Exposure counter fails to reset to "0". | 7. Indicator Plate #16 comes into contact with Stopper Screw #17 of Counter Plate #24. |