Brand: CANON
Category: Camera
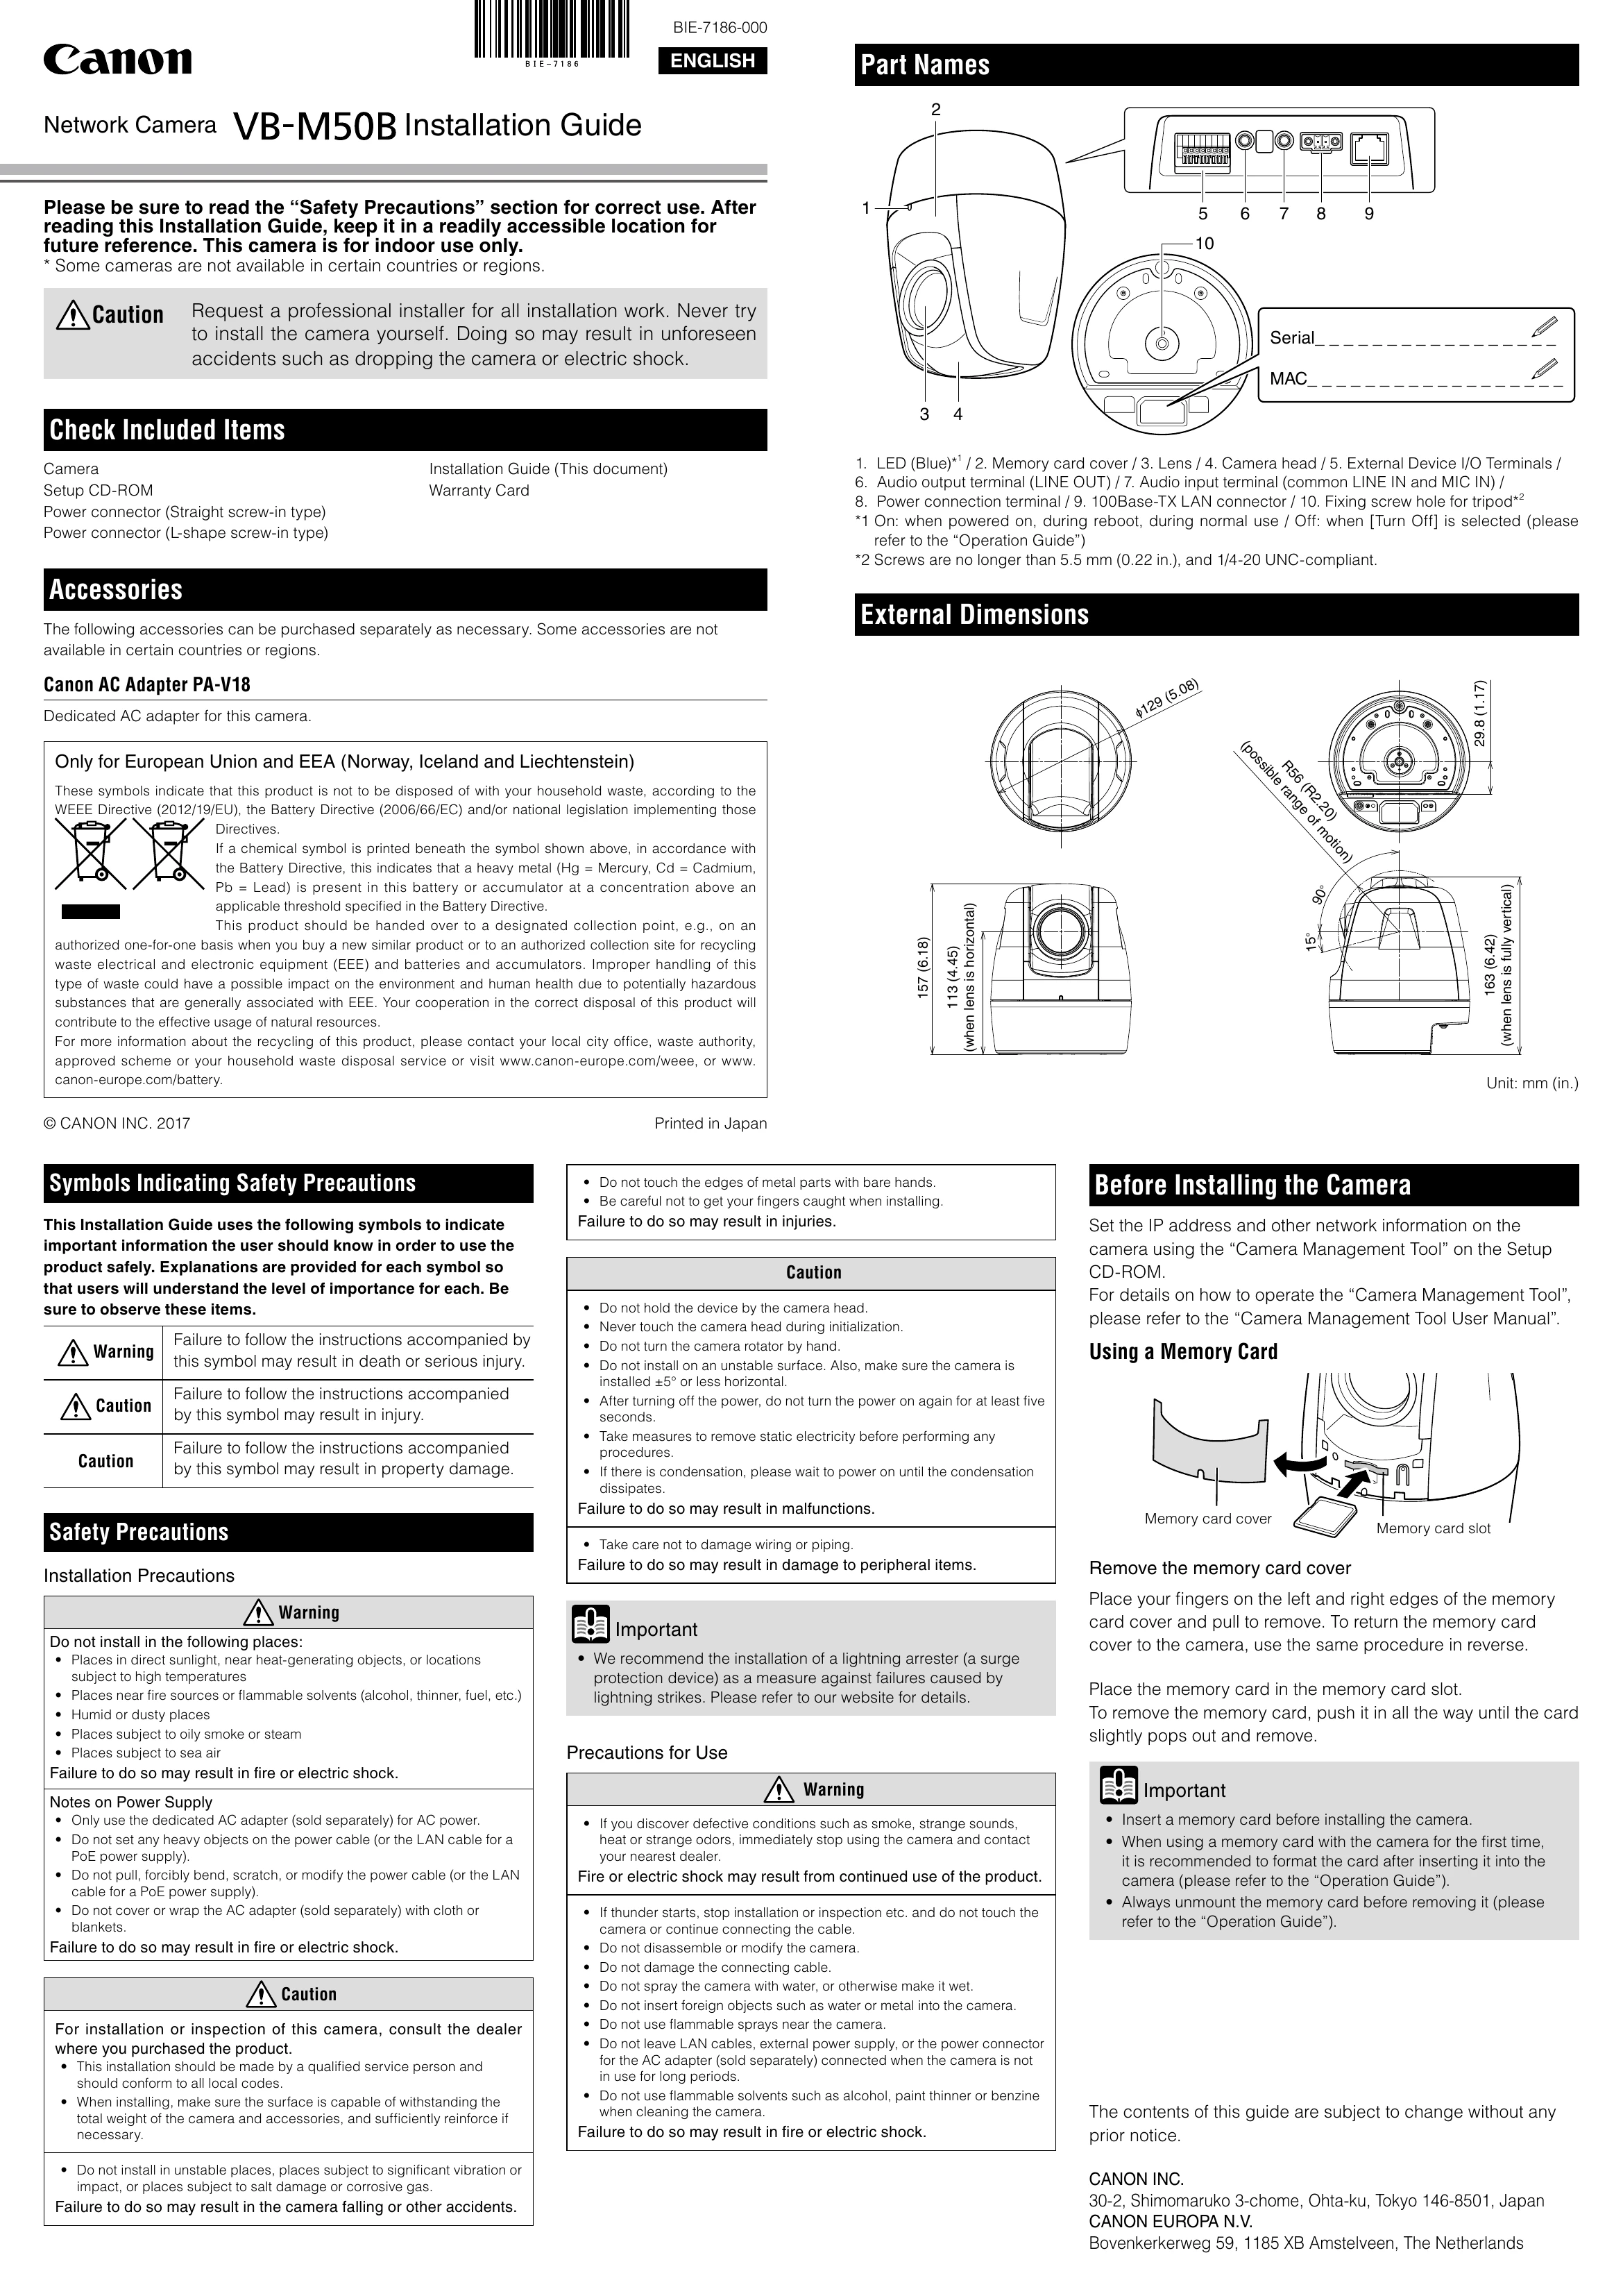
Document Type: Installation Guide
Language: EN
Brand: CANON
Category: Camera
Document Type: Installation Guide
Language: EN
Uploaded: Sept. 12, 2025, 4:22 a.m.
Manual Publish Date: 2017-01-01
No warranty period specified.
Rebooting/Resetting the Camera:
Connecting the Camera:
Before Installing:
| Problem | Possible Cause | Solution |
|---|---|---|
| Warning: If you discover defective conditions such as smoke, strange sounds, heat or strange odors, immediately stop using the camera and contact your nearest dealer. Fire or electric shock may result from continued use of the product. | ||
| Warning: If thunder starts, stop installation or inspection etc. and do not touch the camera or continue connecting the cable. | ||
| Caution: Do not touch the edges of metal parts with bare hands. Be careful not to get your fingers caught when installing. Failure to do so may result in injuries. | ||
| Caution: Do not hold the device by the camera head. Never touch the camera head during initialization. Do not turn the camera rotator by hand. Do not install on an unstable surface. Also, make sure the camera is installed ±5° or less horizontal. After turning off the power, do not turn the power on again for at least five seconds. Take measures to remove static electricity before performing any procedures. If there is condensation, please wait to power on until the condensation dissipates. Failure to do so may result in malfunctions. | ||
| Caution: Take care not to damage wiring or piping. Failure to do so may result in damage to peripheral items. | ||
| Important: We recommend the installation of a lightning arrester (a surge protection device) as a measure against failures caused by lightning strikes. Please refer to our website for details. | ||
| Camera not powering on. | Power cable is not connected properly. | Check the power connection. |
| Camera not powering on. | AC adapter or PoE HUB is faulty. | Check the AC adapter or PoE HUB. |
| Camera not powering on. | Incorrect voltage is supplied. | Ensure the correct voltage is supplied (12 V DC or 24 V AC). |
| Network connection not established. | LAN cable is not connected properly. | Check the LAN cable connection. |
| Network connection not established. | Network settings are incorrect. | Verify network settings (IP address, subnet mask, gateway). |
| Image is distorted or not clear. | Lens is dirty or obstructed. | Clean the lens. |
| Image is distorted or not clear. | Camera is not properly focused. | Adjust focus. |
| Camera is not responding. | Camera has frozen. | Reboot the camera by pressing the reboot switch. |
| Camera is not responding. | Factory default settings are required. | Reset the camera to factory default settings. |