Brand: CANON
Category: Camera
Document Type: Installation Guide
Language: EN
Brand: CANON
Category: Camera
Document Type: Installation Guide
Language: EN
Uploaded: Sept. 12, 2025, 4:27 a.m.
Refer to the product's terms and conditions for specific warranty information.
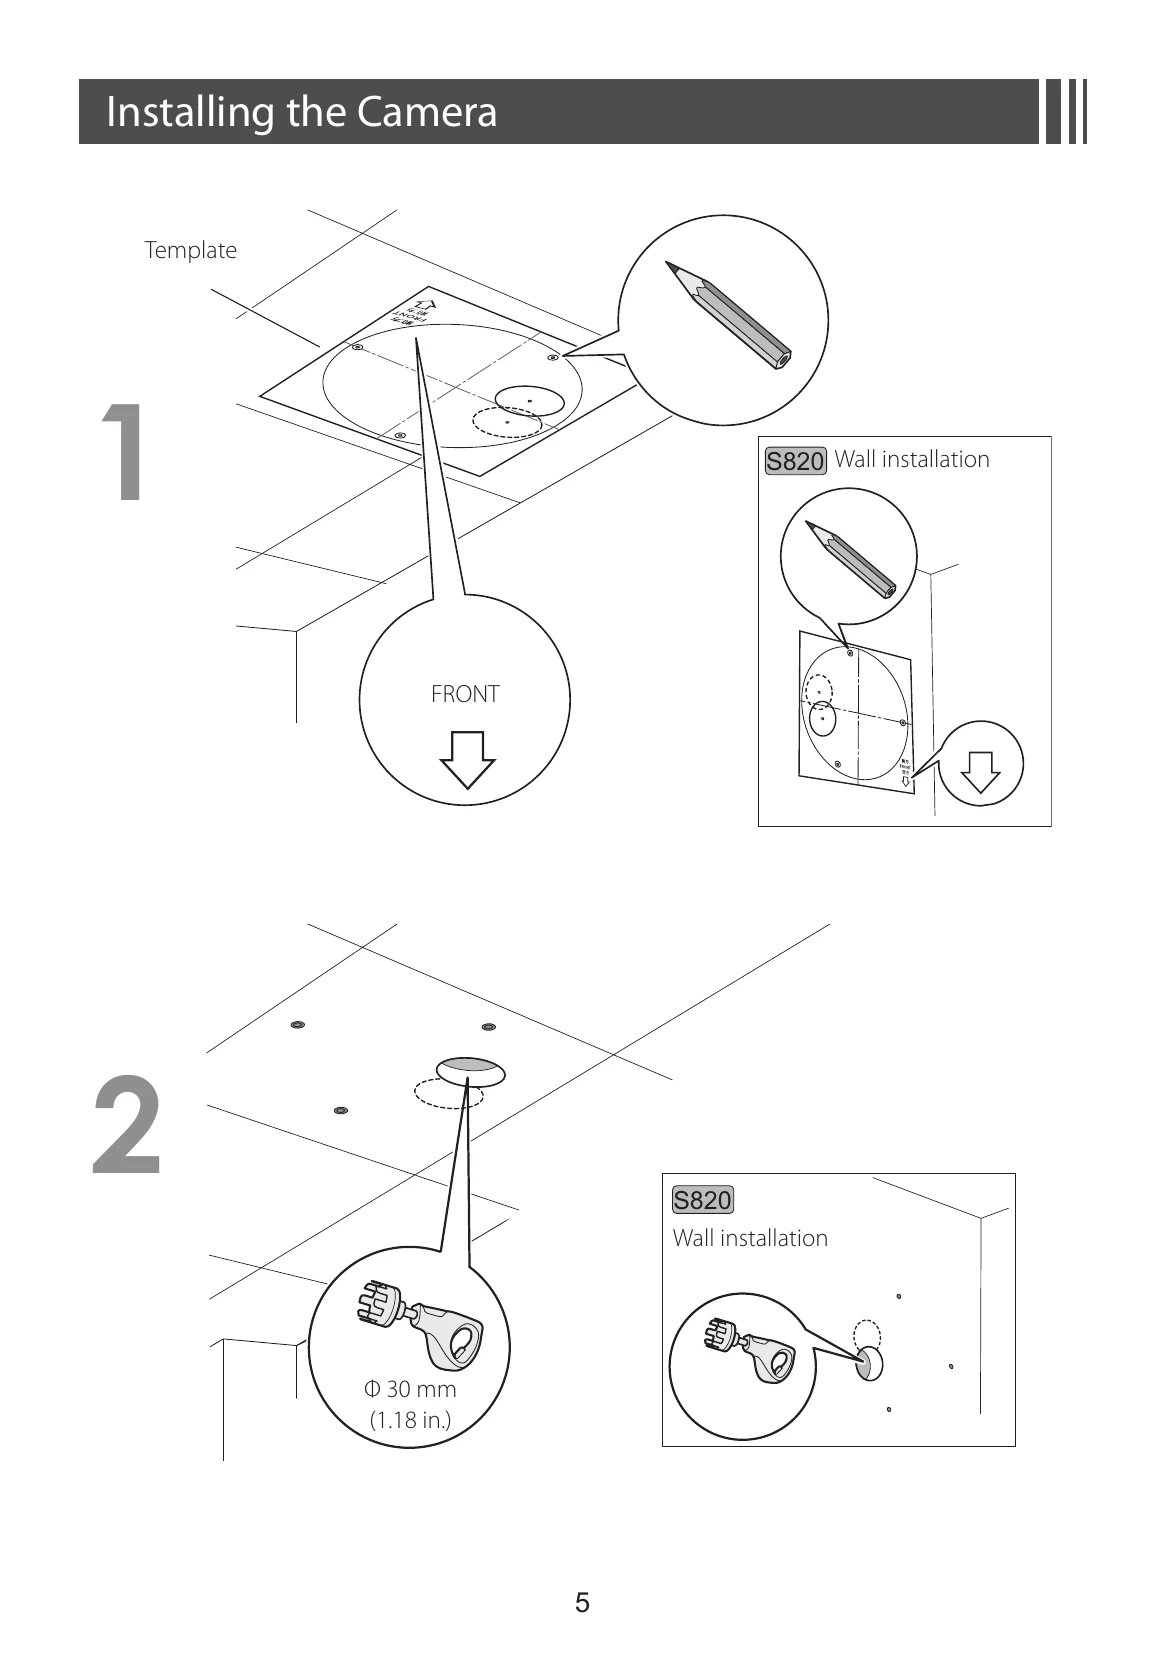
1. Template: Use the provided template to mark mounting points on the surface. Ensure the FRONT indicator is oriented correctly.
2. Drilling Holes: Drill holes as indicated by the template (e.g., Φ 30 mm (1.18 in.) for some installations).
3. Safety Wire: Attach the safety wire to an anchor or structure for added security, connecting it to the camera's safety wire mounting section.
4. Network Connection: Connect the LAN cable to the network terminal and note the LED status.
5. External Device/Audio Terminals: If using, connect external devices or audio equipment to the respective terminals, ensuring protective covers are in place.
6. Camera Head Adjustment (S32): Manually adjust the camera head by rotating it as shown.
7. Mounting (General): Prepare mounting screws (M4, pan head x 3) and secure the camera to the prepared surface.
8. Camera Rotation (S820/S32): Rotate the camera to the desired position as illustrated.
9. Final Mounting: Secure the camera in its final position.
10. Angle Adjustment: Adjust the camera angle on the Settings page using the camera's software.
| LED | Status |
|---|---|
| On | When power supply is on, restarted, or in normal use (when set to "ON"*) |
| Blinking | Updating the firmware, or initializing settings |
| Off | Lights up for a few seconds at startup, then turns off (when set to "OFF"*) |