Brand: Canon
Category: Camera
Document Type: Manual
Language: EN
Brand: Canon
Category: Camera
Document Type: Manual
Language: EN
Uploaded: Aug. 10, 2025, 12:26 a.m.
This limited warranty covers defects in materials and workmanship for one year from the date of original purchase.
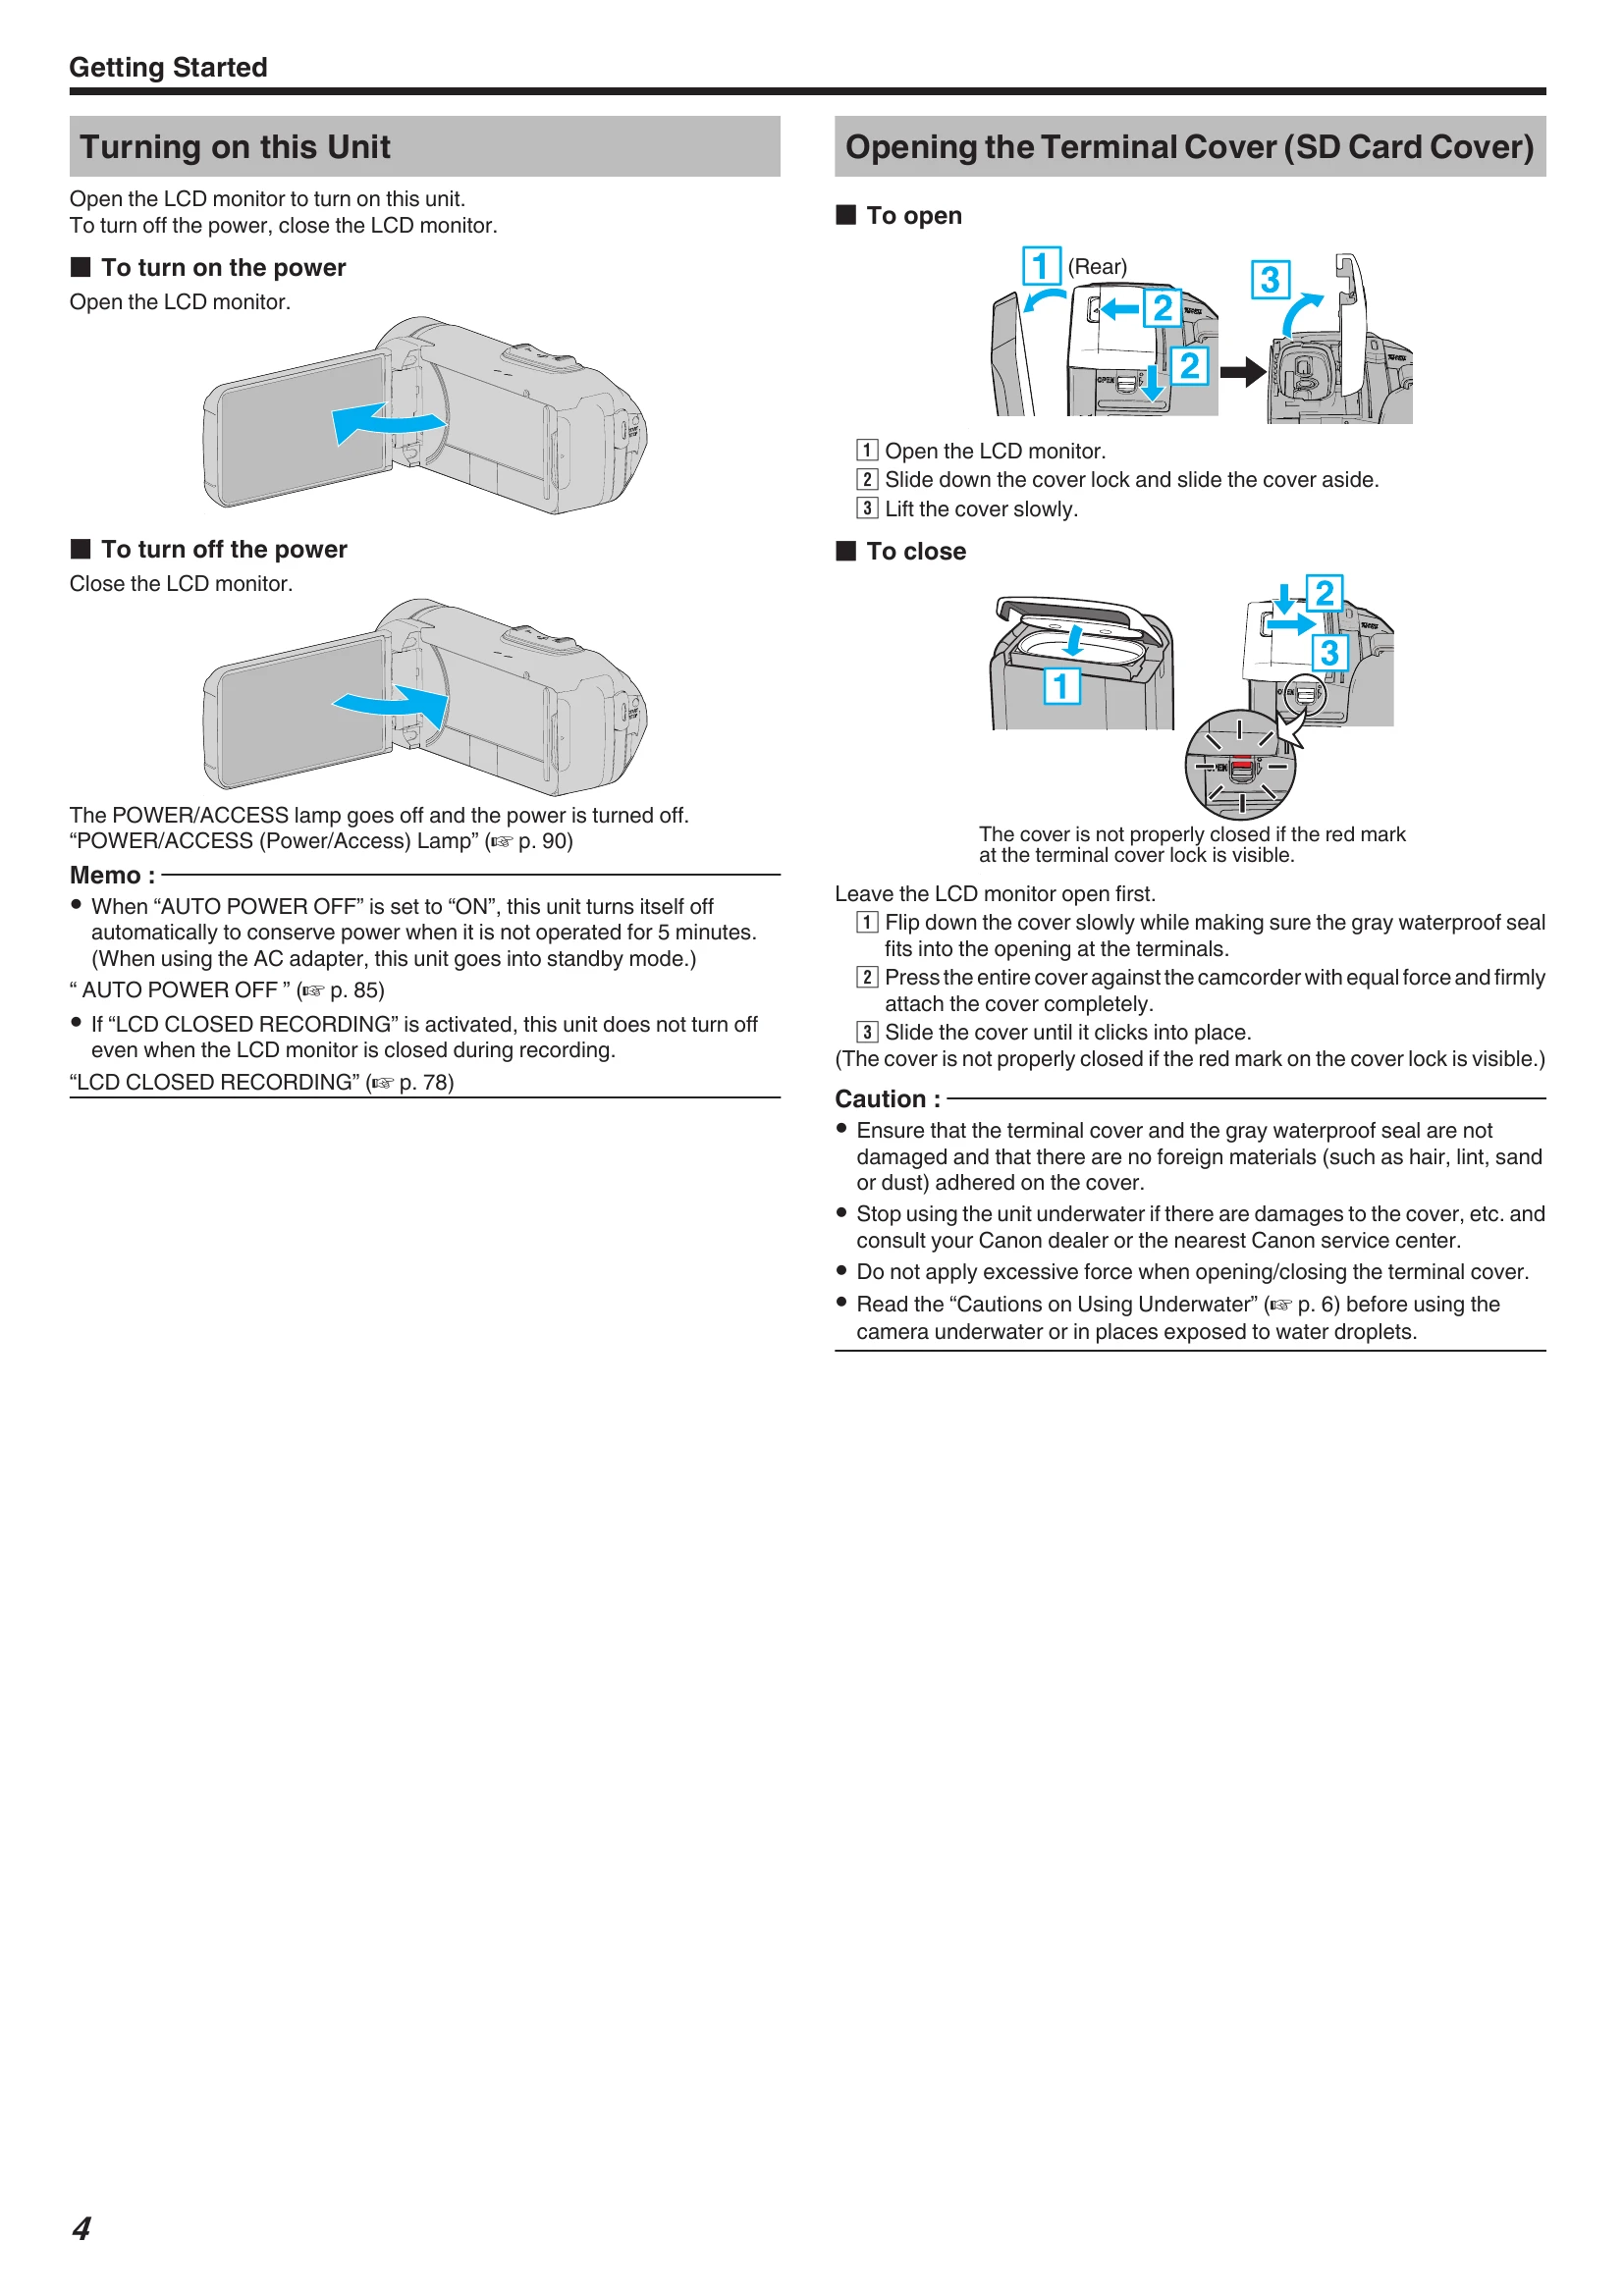
Open the LCD monitor to turn on this unit.
To turn off the power, close the LCD monitor.
To open:
To close:
Caution: Ensure that the terminal cover and the gray waterproof seal are not damaged and that there are no foreign materials adhered on the cover.
This unit is equipped with a built-in battery. Open the connector cover and connect the AC adapter for charging.
Caution: The built-in battery is not charged at the time of purchase. Charge the battery for more than 40 minutes before turning on the power if the remaining battery power is low.
When a malfunction occurs, reset the unit by opening the terminal cover, removing all cables, closing the LCD monitor, and pressing the Reset button gently.
The unit is equipped with Waterproof, Dust-proof, Drop-proof and Freeze-proof features.
Cautions on Using Underwater: Ensure the cover is closed tightly, do not use within a water depth of 5m for more than 1 hour, and avoid high pressure or vibration.
Maintenance after Use: Rinse with clean water and dry completely. After using underwater or on the beach, rinse with fresh water to remove salt particles.
Cautions on Using under Low Temperature: Battery performance may drop, and charging may not be possible below 10°C.
| Problem | Solution |
|---|---|
| Unable to turn on the power. | Charge the battery for more than 40 minutes. If the unit does not turn on even after charging, reset the unit. |
| Recording cannot be performed. | Check the [REC] button. Set to the recording mode by tapping the [REC] button on the screen. |
| Recording stops automatically. | Recording stops automatically after 12 consecutive hours. Turn off the unit, wait, and turn it on again. This unit stops automatically to protect the circuit when the temperature rises. |
| The focus is not adjusted automatically. | Adjust focus manually. Wipe the lens with a lens cleaning cloth. Cancel manual focus. |
| Zoom does not work. | Digital zoom is not available in still image recording mode. Set "ZOOM" in the menu accordingly. |
| Mosaic-type noise occurs when recording scenes with fast movements or extreme changes in brightness. | Set the "VIDEO QUALITY" to "UXP" or "XP" for recording. |
| The inside of the lens is foggy. | Open the terminal cover, close the LCD monitor, and leave as is for a while to reduce the temperature. |
| Cannot insert the SD card. | Ensure the SD card is inserted in the correct direction. Do not use miniSD or microSD cards. |
| Unable to copy to SD card. | Set "REC MEDIA FOR VIDEO"/"REC MEDIA FOR IMAGE" to SD card. Format the SD card using "FORMAT SD CARD" in the "SETUP" menu. Release the write protect switch. |
| There is no sound. | Turn off Silent mode. Set "OPERATION SOUND" to "ON" in the "SETUP" menu. Audio is not recorded for videos taken in TIME-LAPSE RECORDING. |
| The same image is displayed for a long time. | Use a high-speed SD card. Clean the SD card terminals. Format the SD card. |
| The motion is choppy. | Use a high-speed SD card. Clean the SD card terminals. Format the SD card. |
| Cannot find a recorded file. | Change the playback media. Select "PLAYBACK OTHER FILE" in the menu. |
| Images do not appear on the TV properly. | Disconnect and reconnect the cable. Reset the unit. |
| Images are projected vertically on the TV. | Set "VIDEO OUTPUT" to "4:3". Adjust the TV's screen. |
| The image displayed on TV is too small. | Set "VIDEO OUTPUT" to "16:9". |
| When connected to the TV via the HDMI mini cable, proper images and sounds are not output. | Disconnect and reconnect the HDMI mini cable. Turn the unit off and on again. |
| HDMI-CEC functions do not work properly, and the TV does not work in conjunction with this unit. | Set "HDMI CONTROL" to "OFF". |
| The unit operates slowly when switching between video mode and still image mode, or when switching the power on or off. | Copy all videos and still images to your computer and erase them from this unit. |
| This unit does not function properly and error messages appear. | Close the monitor screen to turn off the power, remove the AC adapter, then press the Reset button to reset this unit. |
| CHARGE lamp and POWER/ACCESS lamp are blinking and operation is disabled | Close the monitor screen to turn off the power, remove the AC adapter, then press the Reset button to reset this unit. |
| SET DATE/TIME! | The clock is reset when the battery is depleted. Set the clock again after charging the battery. |
| COMMUNICATION ERROR | Reconnect the USB cable. Turn off and on the devices. Reset this unit. |
| FORMAT ERROR! | Check the operating procedure and perform again. Reset this unit. |
| ERROR IN BUILT-IN MEMORY! | Reset this unit. Back up files and execute "FORMAT BUILT-IN MEM." in the "SETUP" menu. |
| MEMORY CARD ERROR! | Check if the card is supported. Reset this unit. Turn off the unit, then remove and re-insert the SD card. Format the SD card. |
| NOT FORMATTED | Select "OK", then select "YES" to format the card. |
| RECORDING FAILURE | Reset this unit. |
| CANNOT TAKE MORE STILL IMAGES AT THIS TIME | Stop video recording before taking still images. |
| PLAYBACK FAILED | Remove and re-insert the SD card. Clean the SD card terminals. Insert the SD card before turning on the power. Do not subject the unit to strong impact or vibration. |
| UNSUPPORTED SCENE! / UNSUPPORTED FILE! | Use files recorded with this unit. |
| THIS FILE IS PROTECTED | Switch off the "PROTECT/CANCEL" function in the "EDIT" menu. |
| CHECK CARD'S WRITE PROTECTION SWITCH | Set the write protect switch of the SD card to off. |
| INSUFFICIENT AVAILABLE SPACE | Delete files, move files to a computer, or replace the SD card. |
| RECORDABLE MANAGEMENT CAPACITY LEVEL HAS BEEN REACHED | Move files to a computer or format the built-in memory/SD card. |
| SCENE QUANTITY EXCEEDED LIMIT | Move files to a computer or format the built-in memory/SD card. |
| NUMBER OF FOLDERS OVERFLOW | Move files to a computer or format the built-in memory/SD card. |
| FILE QUANTITY LIMIT EXCEEDED | Move files to a computer or format the built-in memory/SD card. |
| NO FILES | Check "REC MEDIA FOR IMAGE"/"REC MEDIA FOR VIDEO" settings. |
| RECORDING CANCELLED | Set "REC MEDIA FOR VIDEO" to "SD CARD". Record to an SD card. Reset this unit. |
| DATA RECORDED FILE IS TOO SMALL TO BE SAVED (CONTINUE RECORDING?) | If time-lapse recording is stopped when the actual recorded time is too short, the video cannot be saved. |
| CAMERA TEMPERATURE IS HIGH PLEASE TURN CAMERA OFF TO ALLOW IT TO COOL DOWN PLEASE WAIT | Turn off the power and let the unit cool down. |