Brand: CANON
Category: Scanner
Document Type: Manual
Language: EN
Brand: CANON
Category: Scanner
Document Type: Manual
Language: EN
Uploaded: Sept. 12, 2025, 4:23 a.m.
Manual Publish Date: 2010
Verify all items are present. If any are missing or damaged, contact your dealer.
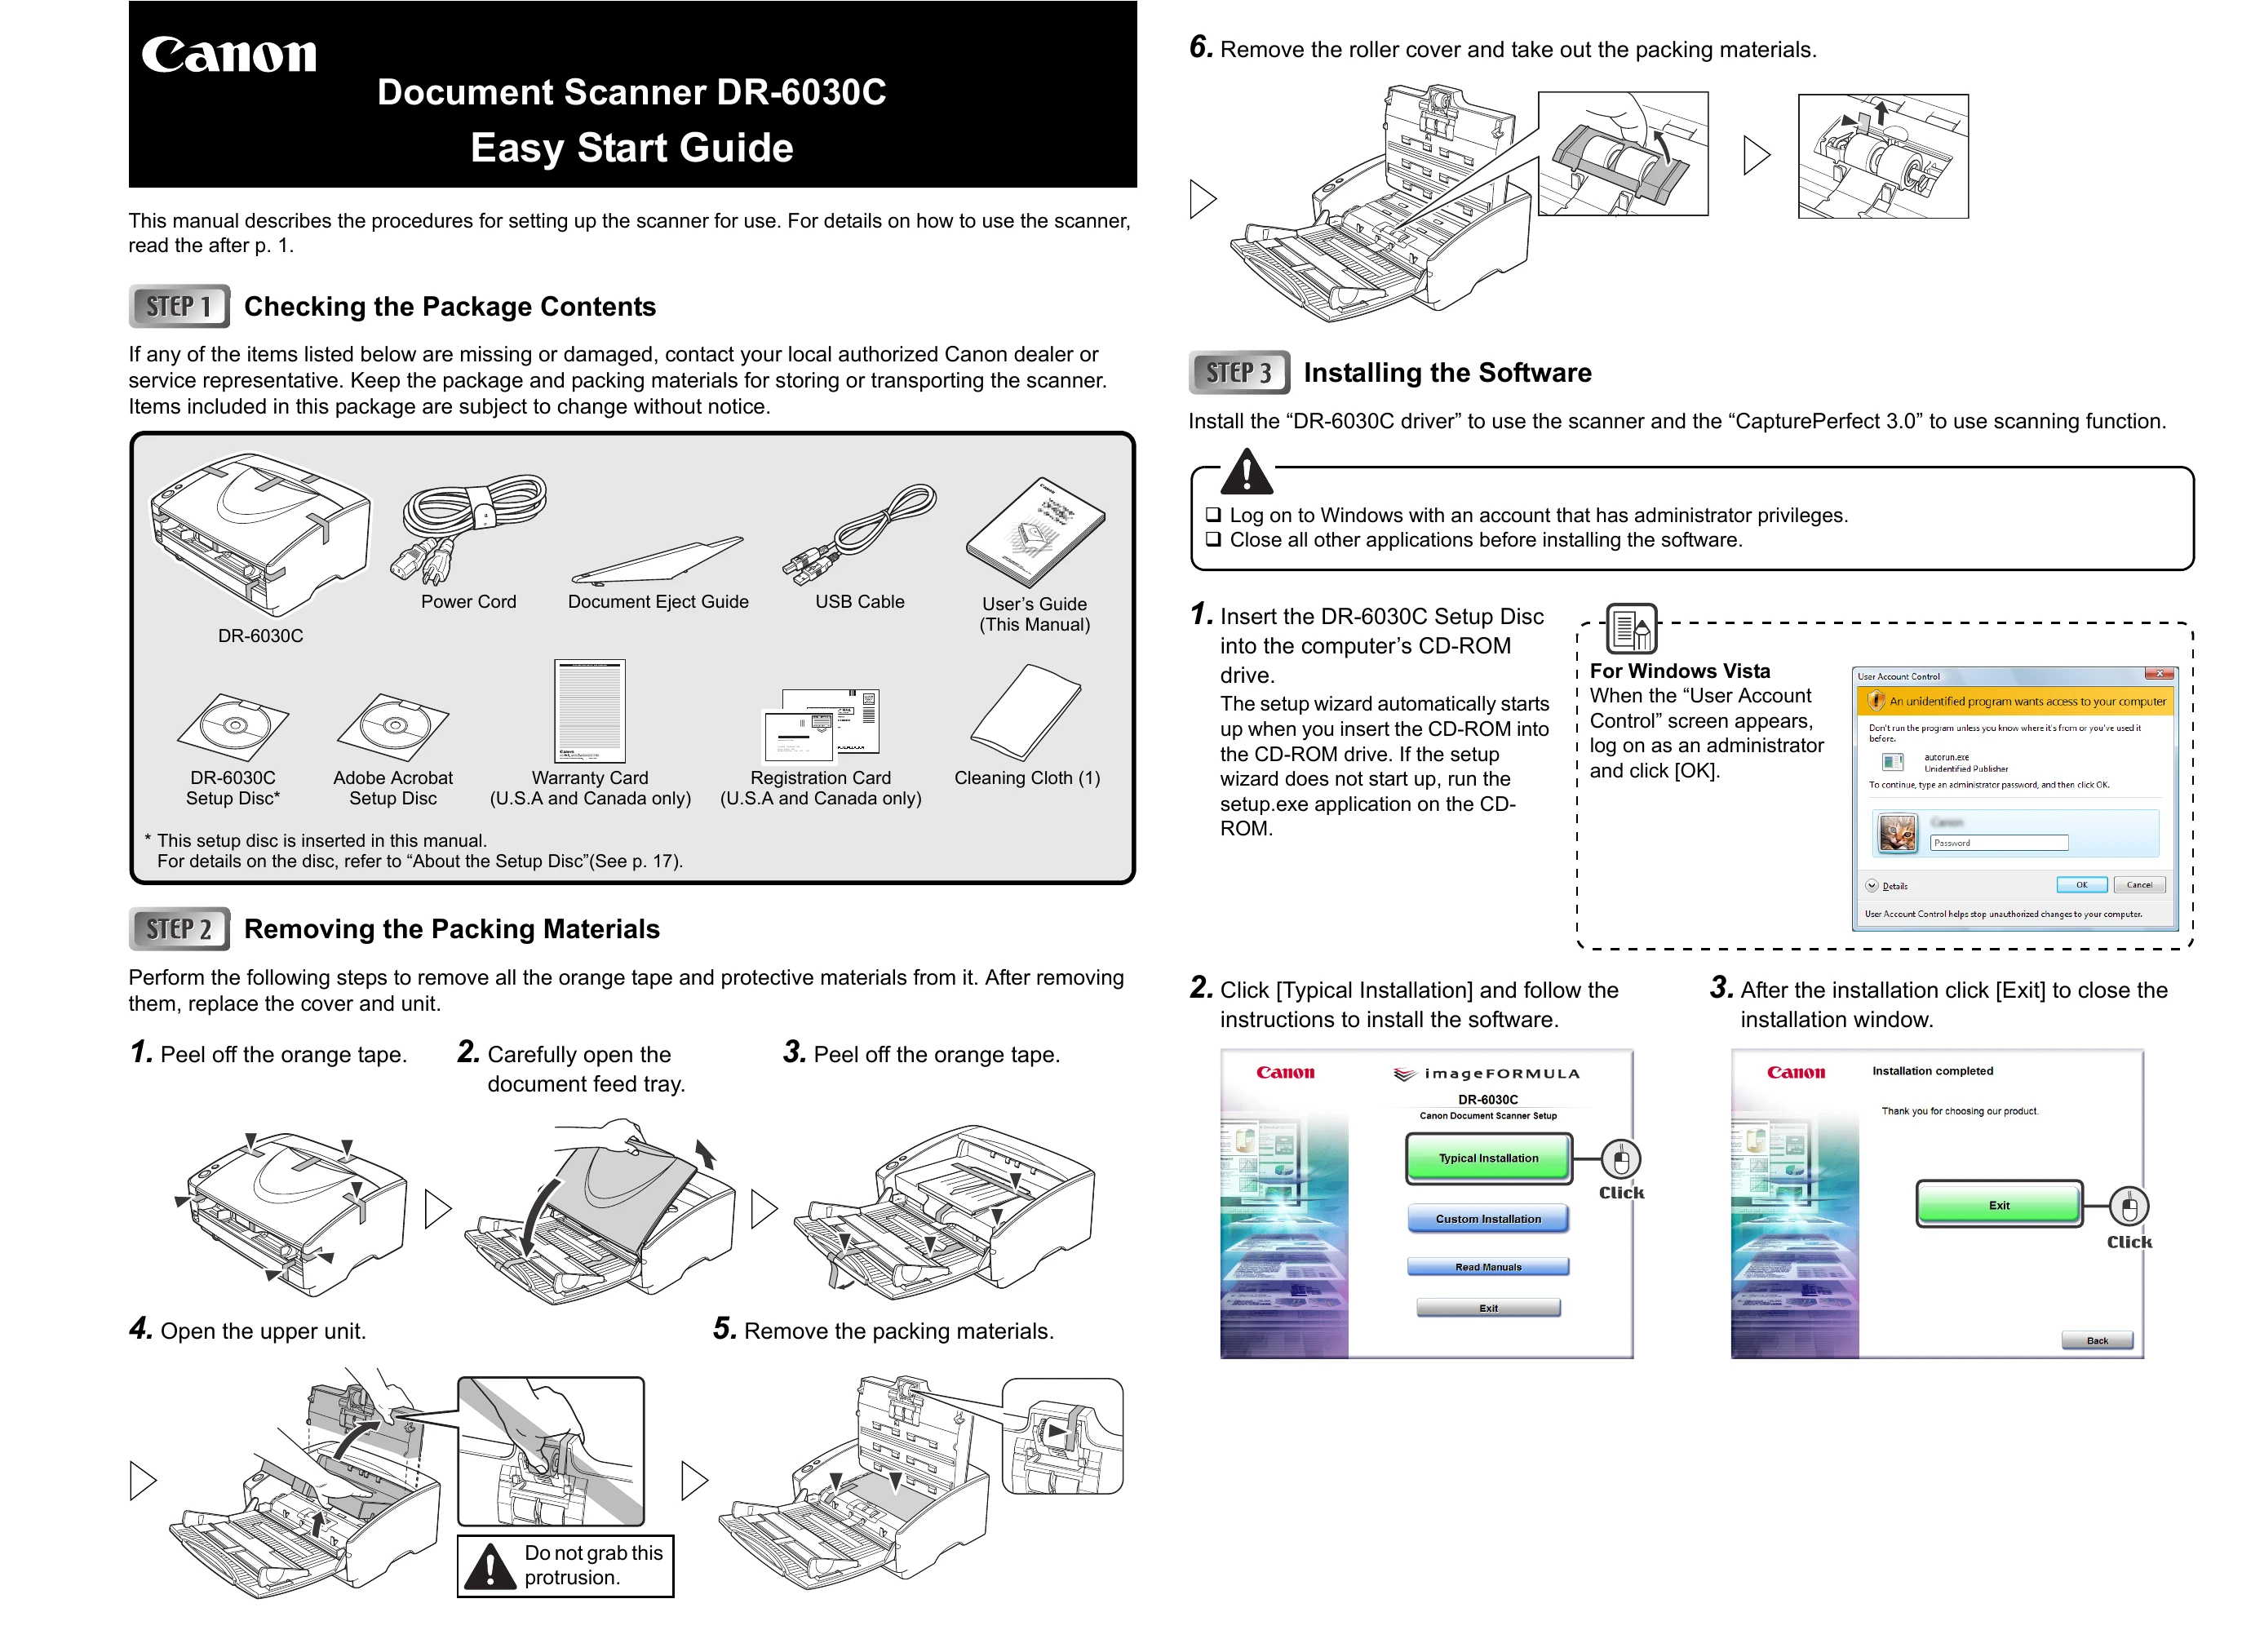
Carefully remove orange tape and protective materials. Open document feed tray, then upper unit. Remove packing materials.
Insert the Setup Disc and follow the on-screen instructions for typical installation. Log on with administrator privileges and close other applications before starting.
Connect the scanner to your PC using either a USB or SCSI connection. Turn off the scanner and computer before connecting cables. Then, turn on the scanner and computer.
Turn on the scanner, then the computer. Windows will automatically detect and install the scanner driver. A balloon help message will appear upon completion.
Select the scanner within your scanning application, such as CapturePerfect 3.0, to begin scanning.
| Problem | Solution |
| The USB cable does not support Hi-Speed USB 2.0. | Use the USB cable provided with the scanner. |
| The USB hub does not support Hi-Speed USB 2.0. | Remove the USB hub. |
| Documents Do Not Feed Properly | |
| Static electricity, etc., is causing the pages of the document to stick together, and they cannot be separated correctly by the scanner. | Before you place your document, thoroughly fan the stack of papers. (See "Placing Documents,” on p. 27.) |
| Attempting to scan a document of a size, thickness, or weight that the scanner cannot scan. | Check the size, thickness, and weight of the document. For precautions concerning documents, see “Documents,” on p. 20. |
| The rollers inside the scanner are dirty or worn. | Refer to p. 103 and clean the rollers. If the rollers are worn, then they need to be replaced. Contact your local authorized Canon dealer or service representative to purchase a roller replacement kit. |
| Saved Image Files Do Not Open | |
| A multi-page TIFF file saved in CapturePerfect 3.0 cannot be opened by other applications. | The application you are using to open the TIFF file does not support multi-page TIFF files. Open the file with an application that supports multi-page TIFF files. |
| A TIFF file saved in CapturePerfect 3.0 cannot be opened by other applications. | If the TIFF file saved in CapturePerfect 3.0 has been compressed, the application you are using to open the TIFF file does not support the compression type that was used to save the file in CapturePerfect 3.0. Set the compression type for the image file to [None] and save the file again in CapturePerfect 3.0. |
| Scanning Results Are Not as Expected | |
| The scanned image is too dark (or faint). | The [Brightness] setting is not set to an appropriate value. If the image is dark, set a higher [Brightness] setting, or if the image is faint, set a lower [Brightness] setting. (See “Brightness," on p. 72.) |
| Text or images on the rear side of your document appear in the scanned image. | The [Brightness] setting is too low, or the paper is too thin. Set a higher [Brightness] setting. If the paper is too thin, make a copy of the documents and then scan the copy. (See “Brightness,” on p. 72.) |
| Double-sided scanning is not possible. | "Scanning Side” is set to [Simplex]. Set "Scanning Side" to [Duplex]. |
| A black margin appears around the scanned document. | A document smaller than the preset paper size has been scanned. Or, the loaded document has shifted out of position. Set [Page size] to [Auto-detection]. Or, set [Border Removal] to on. (See “Page Size,” on p. 68, and "[Border Removal] Check Box," on p. 79.) |
| The scanned image is skewed. | The document has been fed at an angle. (skew) Use the document guide adapter to prevent document skew, and set [Deskew] to on. (See "[Deskew] Check Box," on p. 70.) |
| Lines, smudges, or dirt appear on the scanned image. | The scanning glass or rollers inside the scanner are dirty. Clean the scanning glass and rollers. (See “Regular Maintenance," on p. 102.) If lines still appear on the image even after cleaning the scanning glass and rollers, the scanning glass inside the scanner may be scratched. Contact your local authorized Canon dealer or service representative. |
| The scanned image is abnormal for certain documents. | Functions such as [Auto-detection], [Deskew], or [Border Removal] were used when scanning documents containing text or photos up to their edges. (The scanner cannot accurately process the edges of documents.) Turn off functions such as [Auto-detection], [Deskew], or [Border Removal] when scanning documents containing text or photos up to their edges. |
| The scanned image is abnormal in some applications. | A function not supported by the application was used. Some applications do not support functions such as auto-detection of the paper size. Scanning documents with an application such as this will result in an abnormal scanned image. Try scanning with auto-detection of the paper size set to "off.” |
| Black-and-white documents are saved in color. Color documents are saved in black and white. | The auto color detection setting is not set appropriately. Adjust [Color Sensitivity] and [Color Pixel Ratio] on the [Auto Color Detection Settings] dialog box. Decrease those to force the scanner to recognize the document as black-and-white; increase them to force the scanner to recognize it as color. |