Brand: CASIO
Category: Digital Camera
Document Type:
Language: EN
Brand: CASIO
Category: Digital Camera
Document Type:
Language: EN
Uploaded: Aug. 9, 2025, 11:40 p.m.
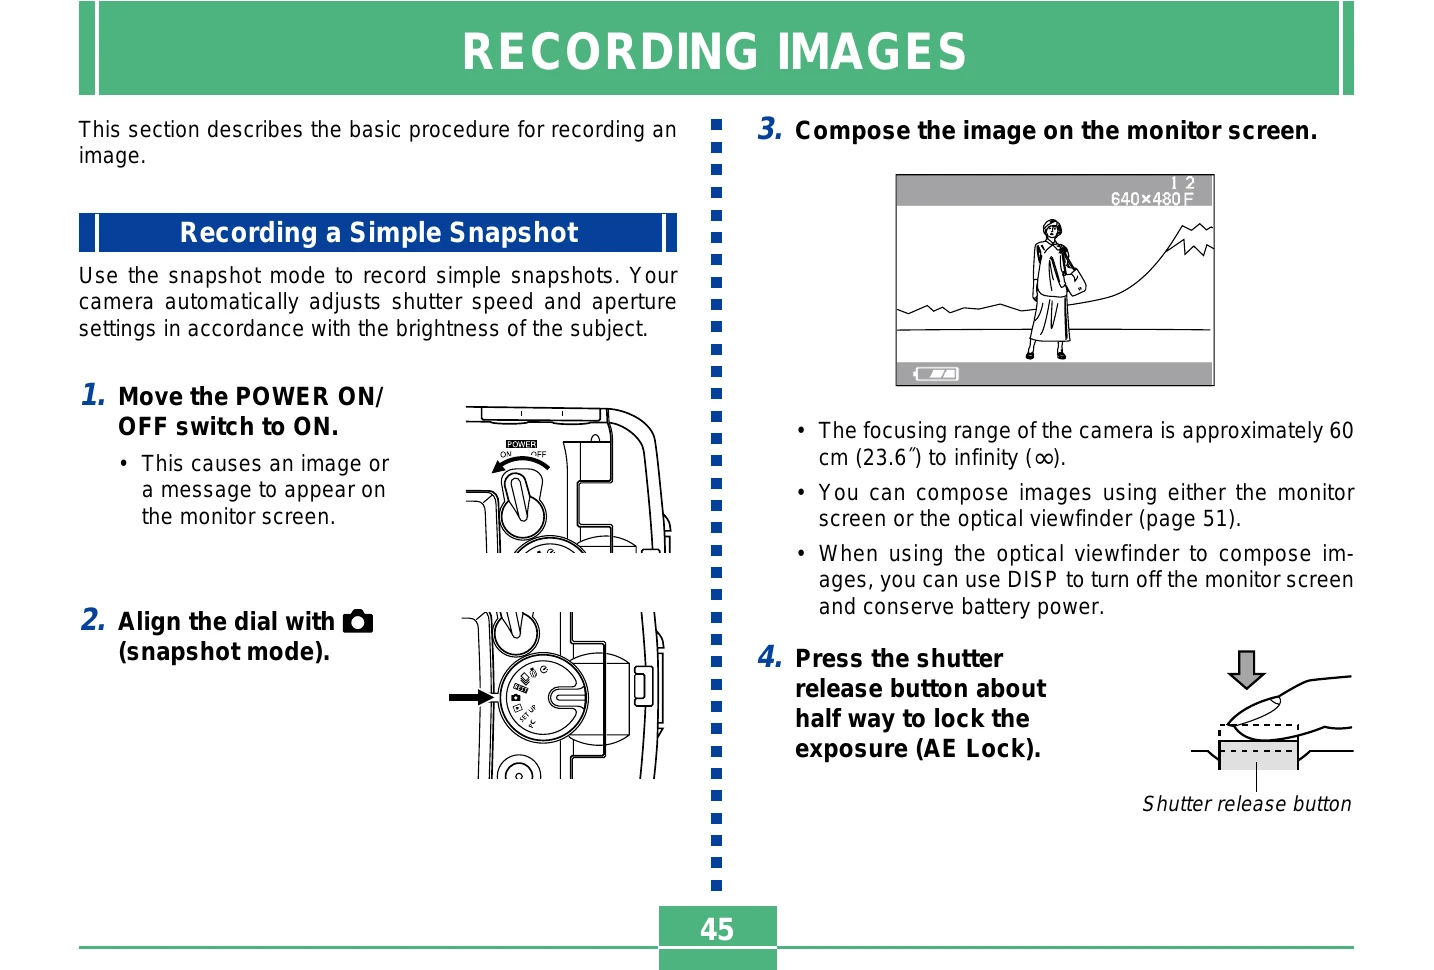
Details on folder and file structure on the memory card.
| Problem | Possible Cause | Action |
|---|---|---|
| Power does not turn on. | 1. Batteries are not oriented correctly. | 1. Orient batteries correctly (page 30). |
| 2. Batteries are dead. | 2. Replace batteries with a full set of new ones (page 30). | |
| 3. Wrong AC adaptor type being used. | 3. Use only an AD-C620/C630 AC adaptor. | |
| Camera suddenly powers down. | 1. Auto Power Function activated (page 37). | 1. Turn power back on. |
| 2. Batteries are dead. | 2. Replace batteries with a full set of new ones (page 30). | |
| indicator on the monitor screen | Batteries are low. | Replace batteries with a full set of new ones (page 30). |
| No recording when the shutter release button is pressed | 1. Dial is not set to a recording mode. | 1. Set the dial to a recording mode. |
| 2. Flash unit is being charged. | 2. Wait until flash unit charging finishes. | |
| 3. The message “MEMORY FULL” is on the monitor screen. | 3. Delete images you no longer need, or use a different memory card. | |
| 4. No memory card is loaded in the camera. | 4. Load a memory card. | |
| Camera powers down during self-timer countdown. | Batteries are dead. | Replace batteries with a full set of new ones (page 30). |
| Monitor screen image is out of focus. | 1. Macro mode being used for scenery or portraits. | 1. Set the Normal/Macro selector to (Normal) for scenery and portraits. |
| 2. Normal mode being used for macro images. | 2. Set the Normal/Macro selector to (Macro) for macro images. | |
| Recorded images are not saved in memory. | 1. Camera powers down before the save operation is complete. 2. Opening of the memory card slot cover before the image save operation is complete. |
1. If the indicator is on the monitor screen, replace batteries with a full set of new ones as soon as possible. 2. Keep the memory card cover closed until the image save operation is complete. |
| Color of the playback image is different from the image on the monitor screen during recording. | 1. Sunlight or light from another source is shining directly into the lens during recording. 2. Image quality setting |
1. Position the camera so sunlight does not shine directly into the lens. 2. Change to a higher image quality for recording. |
| [+] and [-] operations do not work while the 9-image view is on the monitor screen. | You are operating [+] and [–] while the scroll operation is still being performed. | Wait until image scrolling is complete before pressing [+] or [-]. |
| Images are not displayed. | A memory card with non-DCF images recorded with another camera is loaded in the camera. | This camera cannot display non-DCF images recorded onto a memory card using another digital camera. |
| All buttons and switches are disabled. | Circuit problem caused by electrostatic charge, impact, etc. while the camera was connected to another device. | Remove the camera's batteries, disconnect the AC adaptor, replace the batteries, and turn on power again. |
| Monitor screen is off. | 1. USB cable is connected. 2. Monitor screen is turned off in a recording mode. |
1. After confirming that the computer is not accessing the memory card, disconnect the USB cable. 2. Press DISP to turn on the monitor screen. |
| Cannot transfer images or perform PC camera operations after connecting to a computer with the USB cable. | 1. Wrong USB mode is selected. 2. USB driver is not installed. 3. Camera is turned off. |
1. Select the USB mode that suits the operation you are trying to perform (page 71). 2. Install the USB driver in accordance with the "Bundled Software User's Manual". 3. Turn on the camera (page 37). |