Brand: Cisco
Category: Networking
Document Type: Manual
Language: EN
Brand: Cisco
Category: Networking
Document Type: Manual
Language: EN
Uploaded: Sept. 12, 2025, 4:28 a.m.
This chapter provides instructions for installing and performing the initial setup of the Cisco Video Surveillance IP Camera. It also describes how to access the IP camera through a web browser so that you can configure it or view video from it, and how to perform other important tasks.
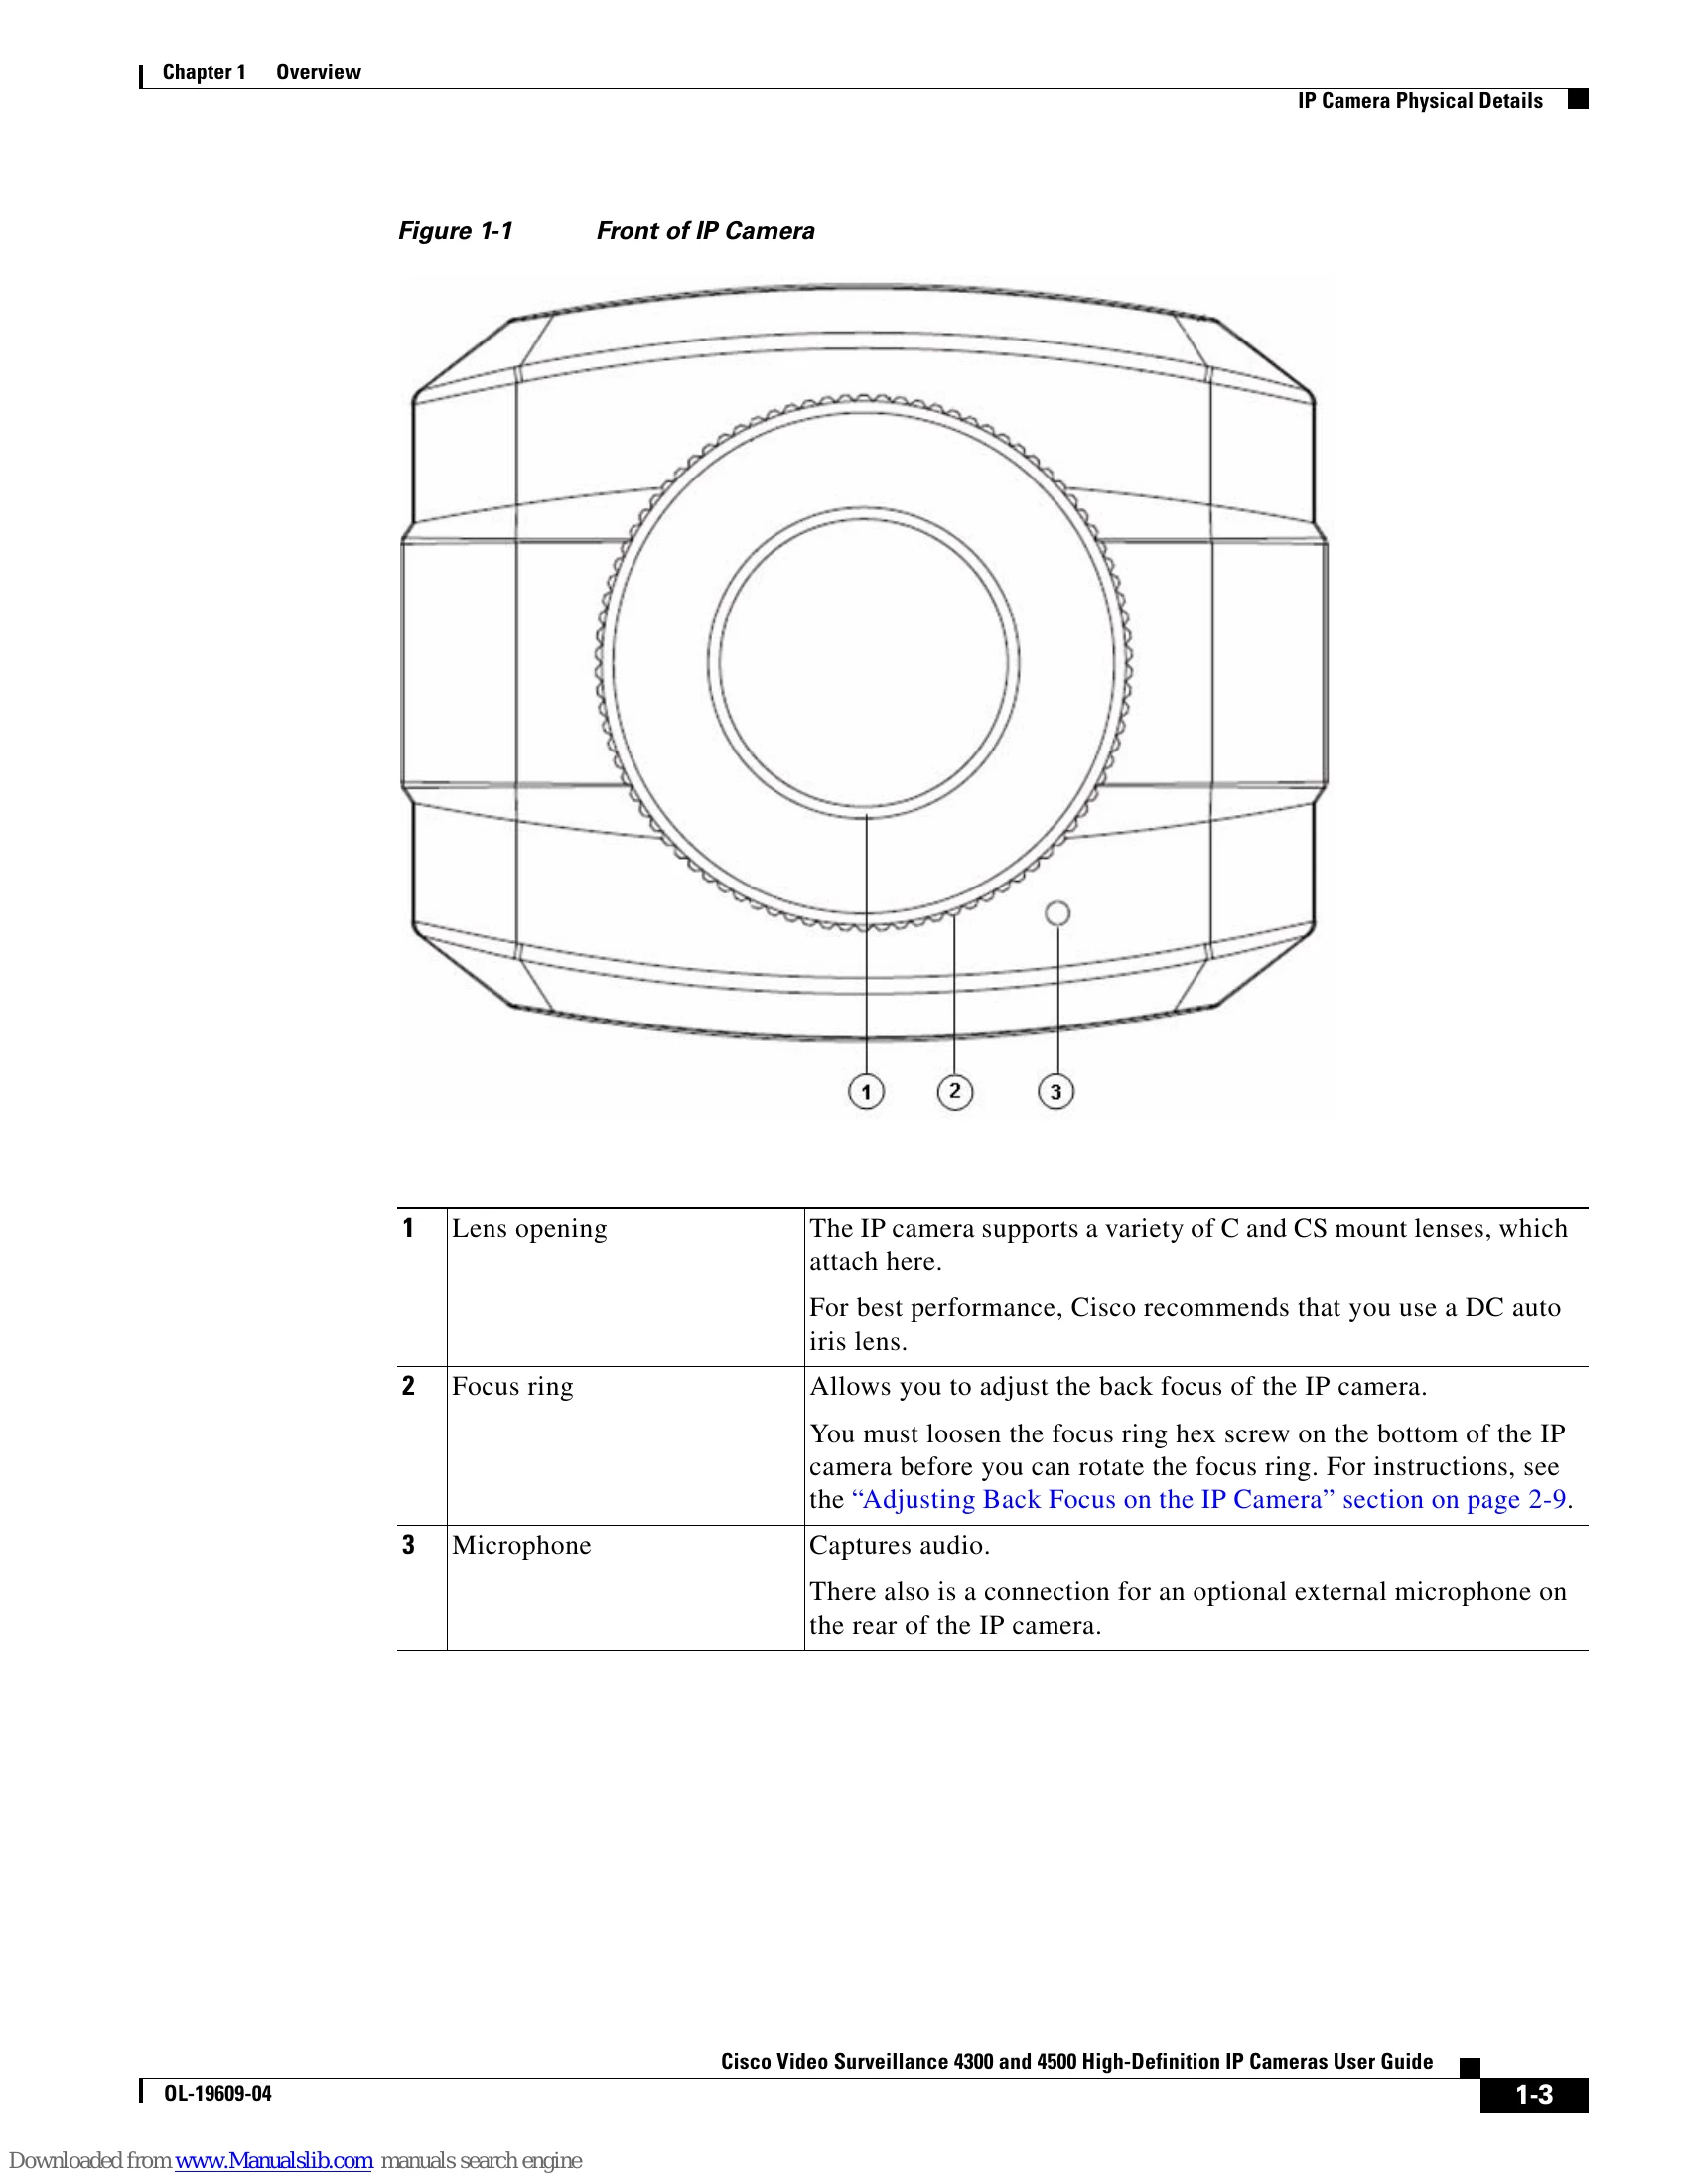
To obtain the sharpest image from the camera, you may need to adjust its back focus. This adjustment is useful if the focus control on a lens does not allow you to obtain a sharp enough image.
The IP camera does not include an on/off switch. You power it on or off by connecting it to or disconnecting it from a power source. When you power off the IP camera, configuration settings are retained.
You reset the IP camera by pressing the Reset button on the rear of the device. There are various reset types.
| Symptom | Possible Cause | Recommended Action |
|---|---|---|
| Cannot connect to an IP camera through a web browser. | You are not using a supported PC operating system or web browser, you entered an incorrect IP address for the IP camera, the PC that you are using is not on the same LAN as the IP camera, you are entering an invalid port number for an HTTP or HTTPS connection, or you are trying to access the IP camera from a device with an IP address that is restricted from access. | Make sure that you are using a PC that is running Microsoft Windows XP with Service Pack 2 or 3 and that your are using Internet Explorer 6.0 with Service Pack 2 or higher. Make sure that you enter the correct IP address. If you are connecting through a LAN, make sure that the PC is on the same network as the IP camera. If you are connecting through the Internet, make sure to enter the correct port number. Make sure that the device does not have an IP address that is restricted from access (see the "IP Addressing Window" section on page 3-17.) |
| Cannot log in to the IP camera as the administrator. | You are entering the log in credentials incorrectly or have forgotten the administrator password. | The administrator user name is admin and the password is the one that you configured. Both credentials are case sensitive, so make sure to enter them exactly as they are configured. If you forget the administrator password, you must perform a factory reset as described in the "Resetting the IP Camera” procedure on page 2-10, then reconfigure the IP camera. If you take these actions, do not use the Upload option in the Maintenance window to reload a saved configuration file because that process restores the password that you forgot. |
| The motion detection feature does not send e-mail alerts. | The e-mail alert feature is not properly configured or the SMTP server that the IP camera uses to send the e-mail may be filtering e-mail to prevent spam from being sent from your server. | Configure e-mail alerts as described in the "Event Notification Window" section on page 3-10. Try using a different SMTP server or contact your ISP to see if SMTP access is being blocked. |
| The motion detection feature is configured but video files that are provided in e-mail alerts do not show moving objects. | The motion detection feature does not actually detect motion. It compares frames to see if they are different. Major differences between frames are assumed to be caused by moving objects, but the motion detector can also be triggered by sudden changes in light level or movement of the IP camera itself. | Try to avoid situations with sudden changes in light level and do not bump or move the IP camera. The motion detection feature works best when the IP camera is mounted securely in locations where there is steady. This feature may not work properly if the IP camera is outdoors. |
| Blurry images when viewing video. | The lens may be dirty, back focus may not be adjusted properly, or video settings may not be configured for optimal clarity. | Clean the lens on the IP camera. Adjust the back focus as described in the "Adjusting Back Focus on the IP Camera" section on page 2-9. Configure options for video as described in the "Streaming Settings Window" section on page 3-3. |