Brand: Cisco
Category: Networking
Document Type: Installation Guide
Language: EN
Brand: Cisco
Category: Networking
Document Type: Installation Guide
Language: EN
Uploaded: Sept. 12, 2025, 4:23 a.m.
Refer to the Cisco documentation for specific warranty information for this product.
The switch chassis supports two types of power supplies: AC-input and DC-input. You can install them in various combinations: two AC-input, two DC-input, or one of each. The power supplies can operate in Redundant Mode (default and recommended for production, ~50% capacity per supply) or Combined Mode (~83% capacity per supply, not recommended).
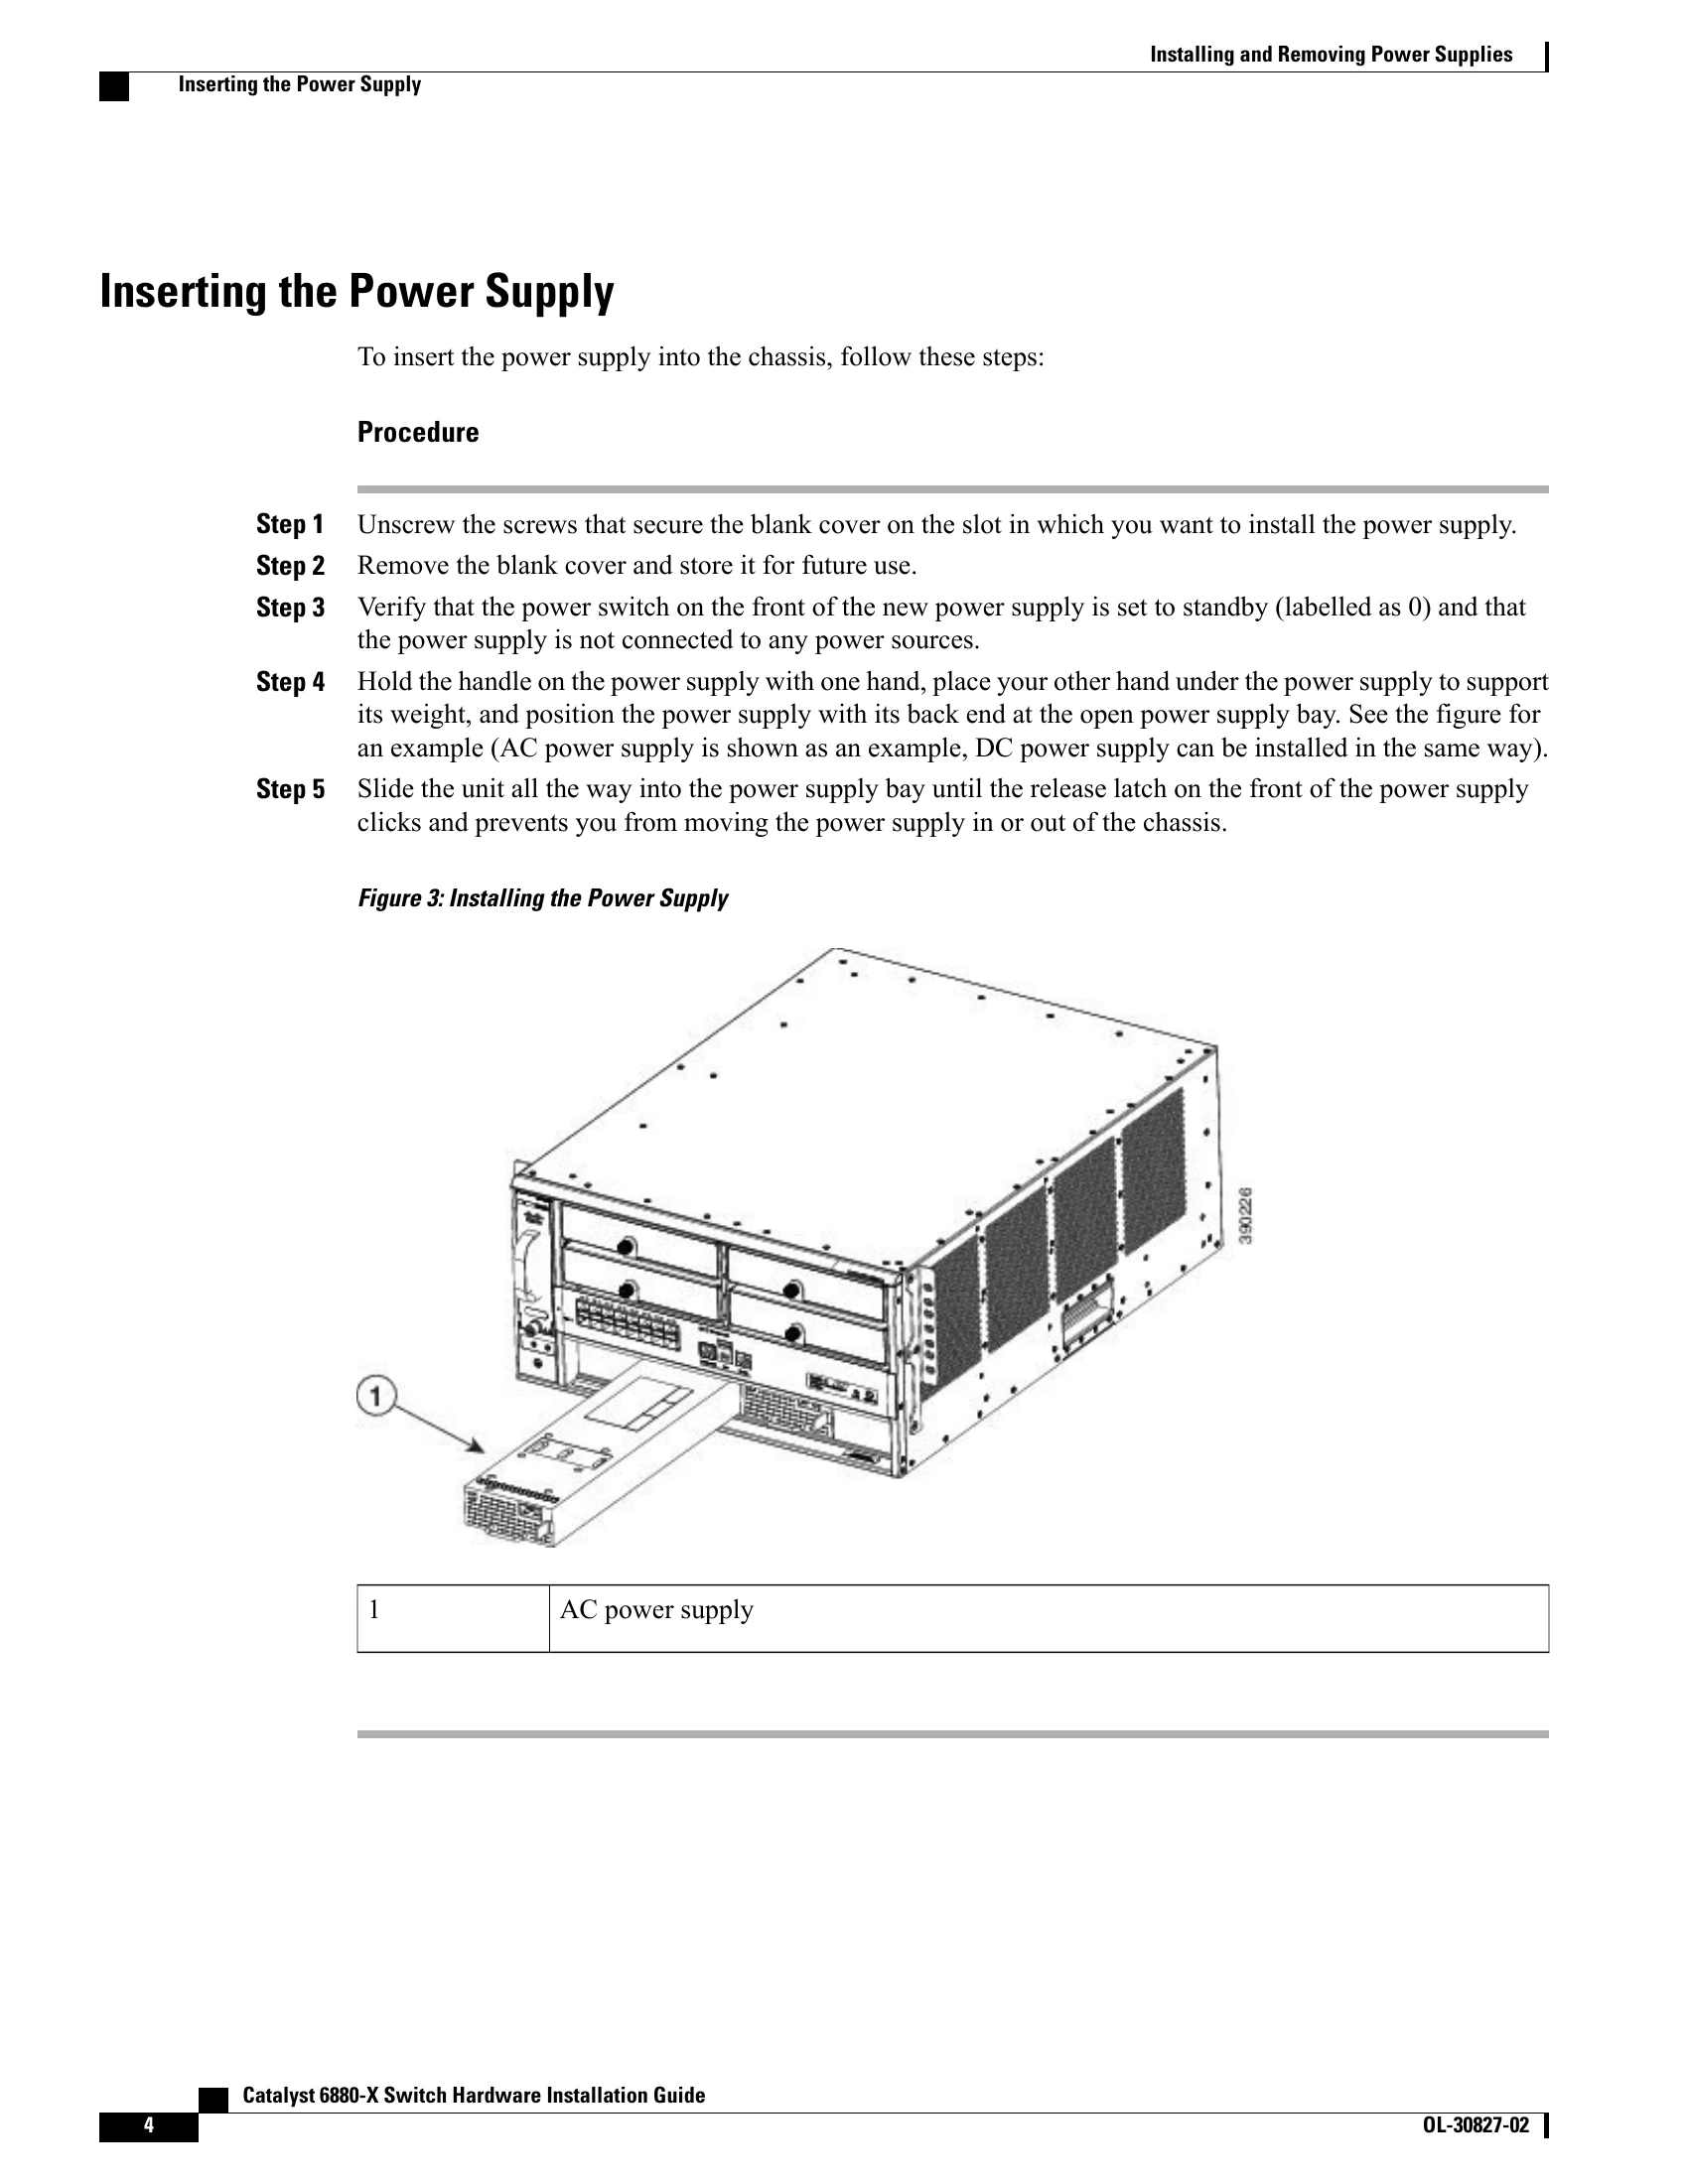
Before installation, ensure the switch chassis is secured in a rack. You will need basic tools and potentially a nut driver and crimping tool. For DC supplies, specific grounding wires and cables are required. The installation process involves removing a blank cover, verifying the power supply switch is off, and sliding the unit into the chassis until it clicks.
AC-input supplies ground automatically. DC-input supplies require direct grounding. One power cord is used per supply. In redundancy mode, each supply connects to a separate source; in combined mode, they connect to the same source. Ensure the power source is OFF before connecting. For DC connections, specific cable sizes (6-AWG) and terminal connections (positive/negative) are crucial.
To remove a power supply, first turn off its power switch and verify output LEDs are off. For DC supplies, ensure the DC circuit power is off. Detach power cables carefully. Press the ejector latch and pull the power supply out. If operating without a replacement, install a blank cover to maintain airflow and safety.
The serial number is located on a label on the power supply itself. It can also be found using the `show version` EXEC command.