Powering On: The device powers on automatically when plugged in or by pressing and holding the On/Off button until the display activates.
Micro SD Card: Use the provided Micro SD card. To remove, press the card until it clicks and pops out. Insert a new card by pressing until it locks. The device is compatible with cards up to 64GB. Format the card in the camera before first use.
Continuous Loop Recording: The camera overwrites the oldest footage when the card is full. To protect a clip, press the Emergency Record Button. Files can also be locked from the playback menu.
Emergency Recording: Triggered by the Emergency Record Button or the G-Sensor. These create locked files that are not overwritten. Adjacent clips are also locked if the incident occurs within 30 seconds of a clip's beginning or end.
Navigating Menus: Use the arrow buttons to navigate and the Enter button to select or change options. Pressing the Back button at any time exits the menu without saving.
Volume Adjust: Briefly press the Power/Volume button to enter the volume menu with 5 settings plus mute.
LED Indicator: Communicates power and recording status. Blinking Red/Green indicates Unit ON/Recording; Solid Red indicates Unit ON/Not Recording; Solid Green indicates Unit OFF/Power Connected; No LED indicates Unit OFF/Power Disconnected.
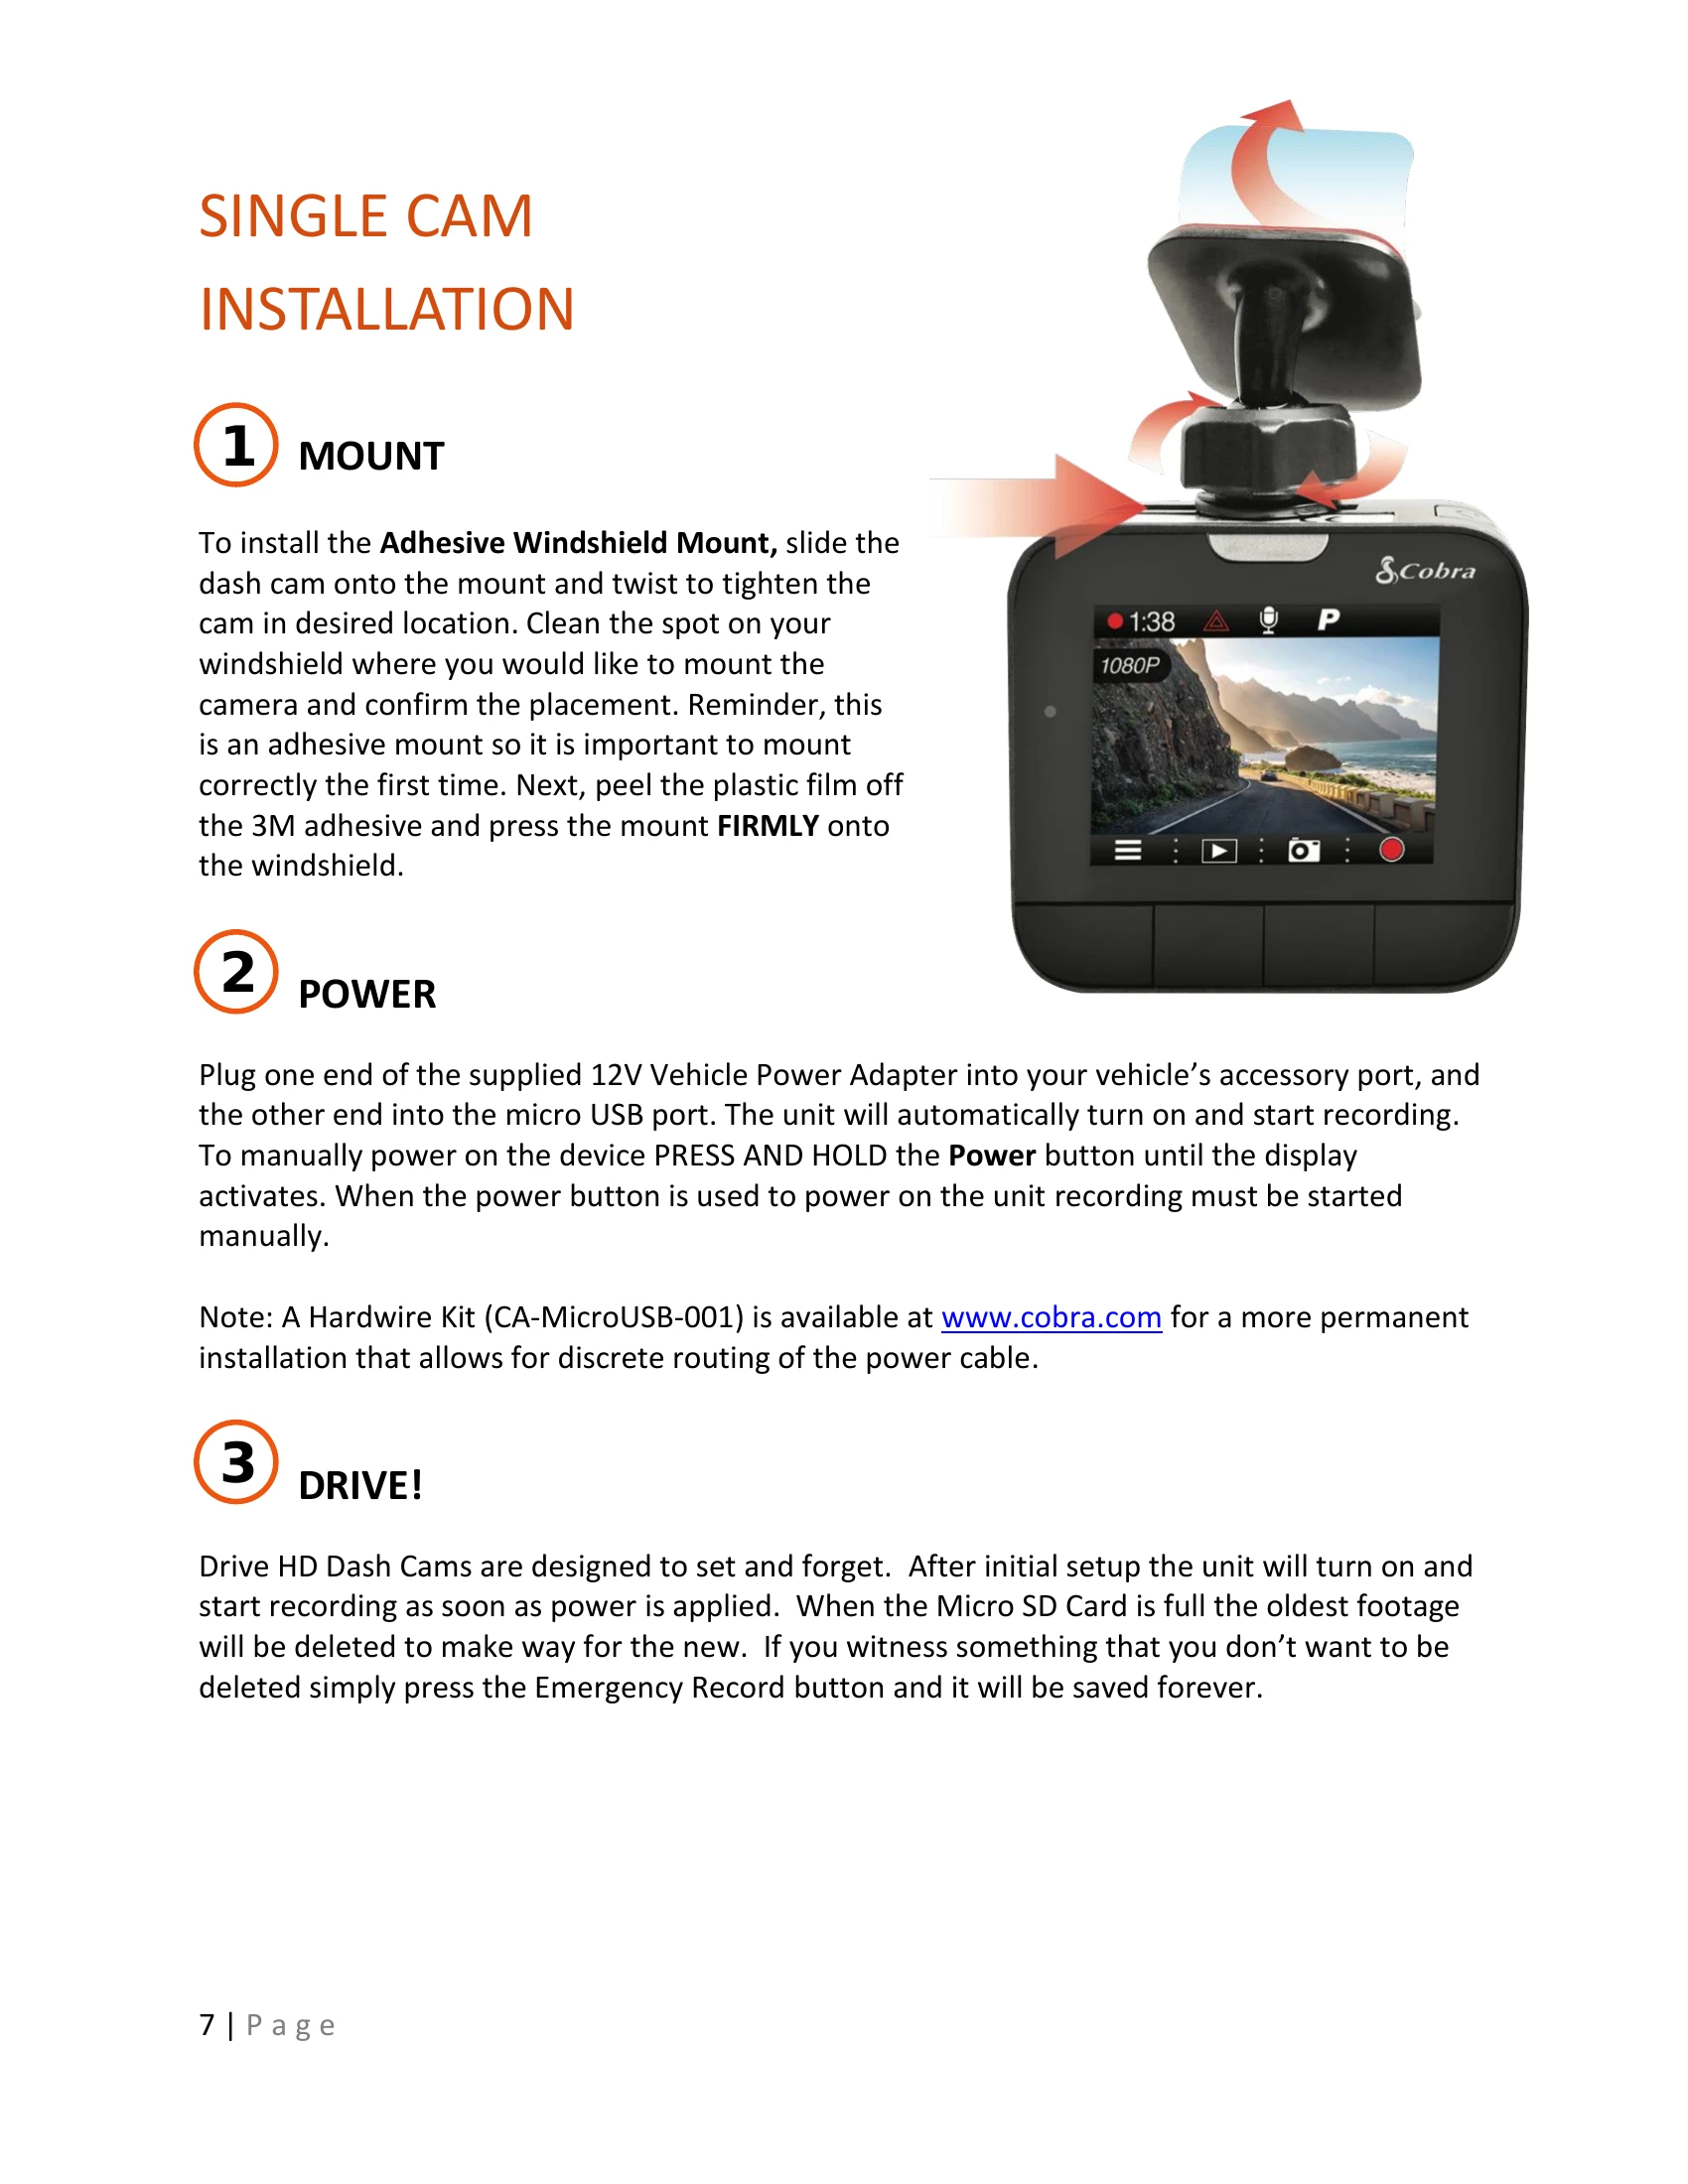
Video Screen: The home screen displays status icons: Recording Icon, Recording Time, Hazard Icon (Emergency Recording), Mic Status, Parking Mode status, Bluetooth status (if applicable), and GPS status (if applicable).
Button Functions: Functions vary based on whether the unit is recording or paused. While recording, buttons control screen on/off, camera views, microphone, snapshot, and pause/emergency recording. When paused, buttons access settings, playback, snapshots, and start recording.
Video Settings: Adjust Video Resolution (1296P Super HD, 1080P Full HD, 720P HD 60fps, 720P HD 30fps) and Loop Clip Time (3, 5, 10 minutes, or off). G-Sensor sensitivity can be set from 1-3 or turned off.
Parking Mode: Uses Motion Sensor and G-Sensor to record when parked. It monitors for motion or impact. Timeout settings are 5 or 10 minutes. Requires constant power.
General Settings: Adjust Volume, Date/Time, Screen Saver duration, Beep Sound on/off, Format SD Card, and Restore Defaults.
iRadar Settings (Bluetooth Models): Enable/disable Bluetooth, select iRadar alerts, and change speed units.
Language Settings: Select from 9 supported languages.
Playback Menu: Review saved videos and photos. Videos can be locked, unlocked, or deleted. Photos are not affected by loop recording.
GPS Operation: Embeds Location, Speed, Heading, and G-Sensor info into videos via GPS Mount or iRadar App. Updates clock and time stamps.
Cobra iRadar App Connection: Connects via Bluetooth for embedding data and displaying alerts. Download the app from the App Store or Google Play.
Connecting to Computer/TV: Use USB for computer connection (Connect to Computer or Power Only modes) or HDMI for TV connection. Micro SD card can also be removed and plugged into a computer.
Download Drive HD Player: Software to view dash cam footage with GPS and G-Sensor data, available at www.cobra.com.
Firmware Update: Instructions for updating firmware via a computer using the USB cable. Download the update file from www.cobra.com.
Camera Specifications: Details specifications for various models including resolution, video format, lens type, media support, etc.
Troubleshooting: Basic steps include checking power cord connection, cigarette lighter socket cleanliness, and adapter seating. Visit www.cobra.com/support/faqs for more details.
Trademarks and Regulatory Information: Legal disclaimers, warnings, and compliance information for features like FCWS and LDWS. Disposal instructions are also provided.