Brand: D-Link
Category: Network Storage
Document Type: Quick Start Guide
Language: EN
Brand: D-Link
Category: Network Storage
Document Type: Quick Start Guide
Language: EN
Uploaded: Sept. 12, 2025, 4:21 a.m.
Manual Publish Date: 2010-01-01
The DSN-3000 Series Quick Start Guide provides the information needed to get your DSN-3000 out of the box and operational with a direct connection to a host computer. Follow the simple instructions in this guide, and in no time at all you will be part of the iSCSI revolution.
Inspect the container for damage. Remove items and compare to the packing list. Contents may include DSN-3000 Series Storage System (DSN-3200-10 or DSN-3400-10), power cords, serial cable adapter, this quick-start guide, rack-mount kit, Product CD, and additional documentation.
You will need a computer as the iSCSI initiator, static IP addresses and network cables (Category 6, 5E, or fiber optical), XFP modules for 10GbE, an independent AC power supply, disk drives, and optionally a separate computer for management console and an uninterruptible power supply/Ethernet switch.
Mount the DSN-3000 Series in a standard 19-inch rack using the provided kit. Ensure sufficient airflow and plan for heaviest items at the bottom. Attach mounting hardware to the unit, then slide it into place.
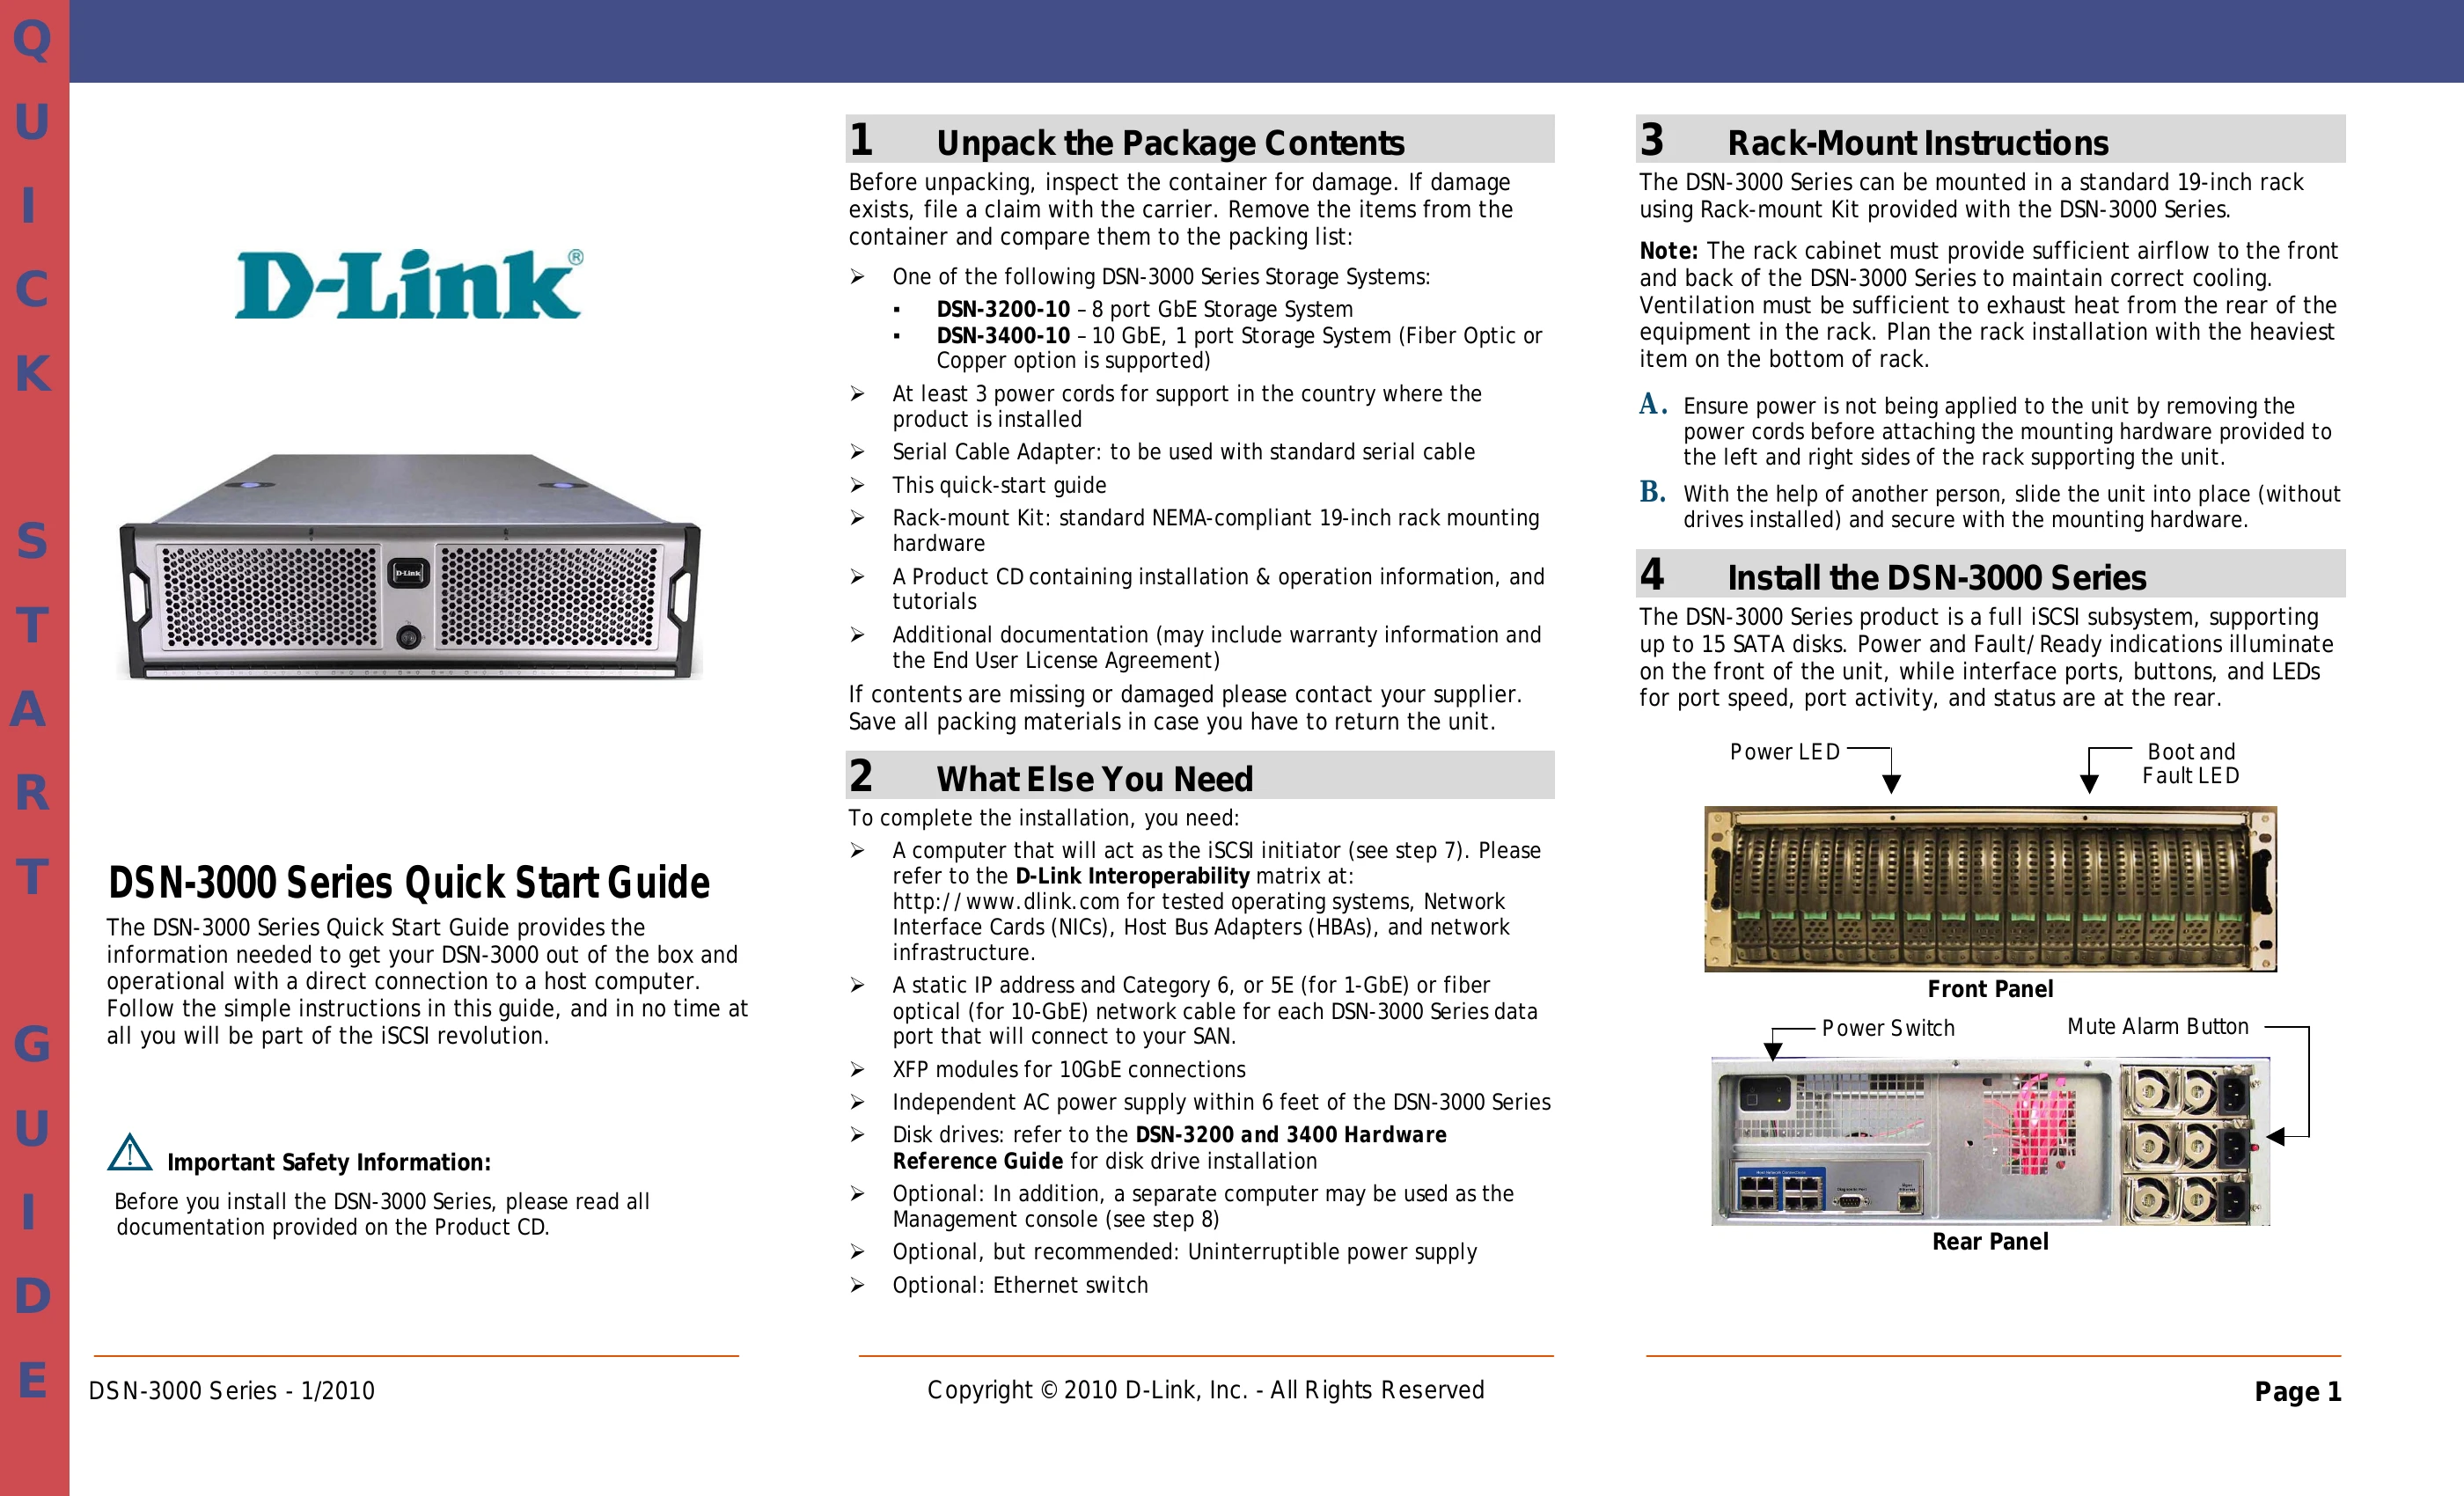
The DSN-3000 Series is a full iSCSI subsystem supporting up to 15 SATA disks. LEDs for Power, Fault/Ready, port speed, activity, and status are on the front and rear panels.
Attach Ethernet cables from the 1GbE data ports on the back panel to your server or SAN switch. Connect the management console to the 10/100 data port. The diagnostic port (DB9) is for command-line interface and diagnostics.
Insert the XFP module into the XFP cage for 10GbE connections. The management console and diagnostic port are the same as for the DSN-3200.
Use Windows 2003 Server or later. Ensure all updates, Service Packs, and drivers are installed. Install the latest Microsoft iSCSI initiator software.
Set a fixed IP address for the NIC (e.g., 192.168.1.2) to connect to the DSN-3000 management port (default 192.168.1.1). Download and install Java Runtime Environment 6 (JRE 6).
Plug in power cords and power up the DSN-3X00. Wait for the system to boot (up to 5 minutes). Access the management IP address (default 192.168.1.1) via your web browser. Accept the End User License Agreement and follow the Start-Up Wizard prompts to configure settings like administrator password, management port IP, and data port IPs.
After the first-time startup and reboot, access the DSN-3000 Series via its IP address. Log in using the administrative credentials. Navigate to System Administration to configure settings and refer to the D-Link Storage Management Center Software User's Guide for further configuration.