Manual for Wet & Dry Extraction Vacuum Cleaners

Manual for Wet & Dry Extraction Vacuum Cleaners

Brand: ELECTROLUX

Category: Vacuum Cleaner

Document Type: Manual

Language: EN

Uploaded: Nov. 21, 2025, 7:58 p.m.

Warranty Information

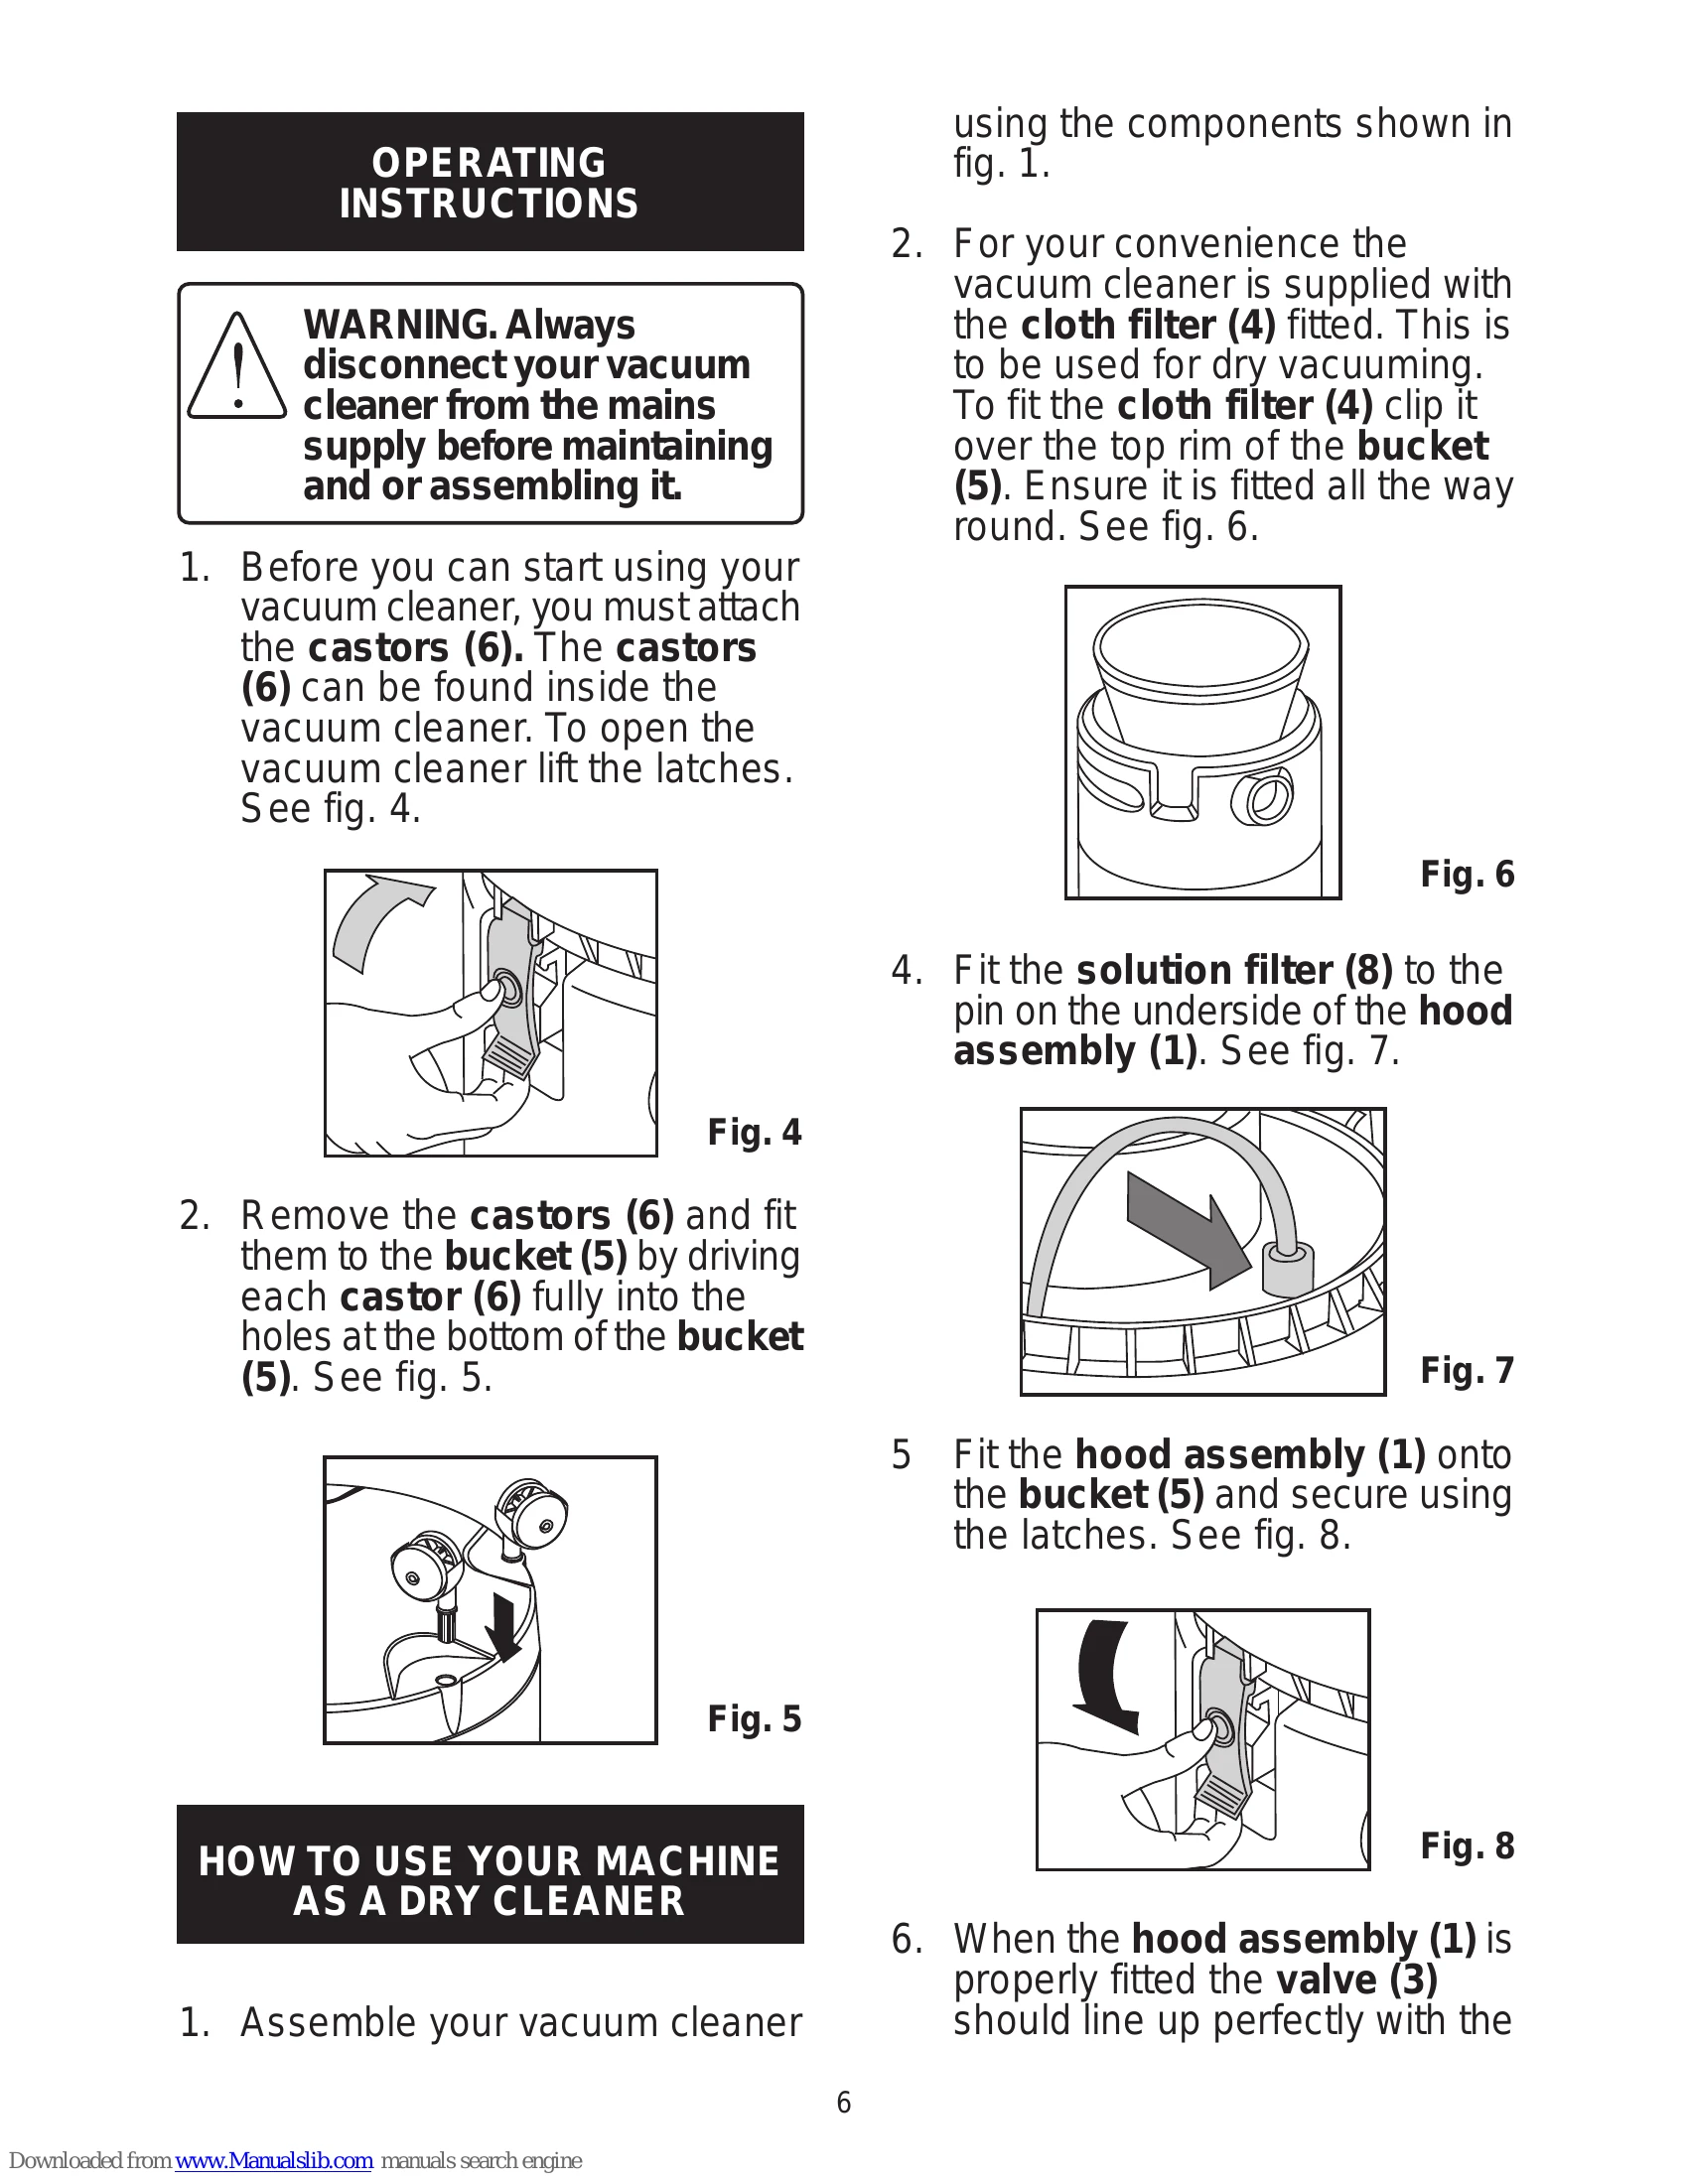
This warranty covers defects in material or workmanship for one year for domestic use only.

DRY USE

  1. Assemble the vacuum cleaner, ensuring castors are attached.
  2. Fit the cloth filter over the rim of the bucket.
  3. Attach the solution filter to the hood assembly.
  4. Secure the hood assembly to the bucket.
  5. Connect the hose to the hose intake.
  6. Attach extension tubes and desired nozzle.
  7. Plug into the wall socket and switch on.
  8. Control suction with the regulator on the curved handle.

WET USE

  1. Assemble the vacuum cleaner.
  2. Fit the foam filter over the float cage.
  3. Attach the solution filter to the hood assembly.
  4. Secure the hood assembly to the bucket.
  5. Connect the hose to the hose intake.
  6. Attach extension tubes and the wet tool.
  7. Plug into the wall socket and switch on.
  8. Keep suction regulator closed for wet suction.
  9. After use, run the vacuum cleaner dry for 30 seconds to empty water.

SHAMPOOING

  1. Vacuum or sweep the surface.
  2. Assemble the machine, fitting the foam filter.
  3. Fill the solution tank with shampoo and water.
  4. Fit the solution tank into the bucket.
  5. Secure the hood assembly, ensuring the solution filter aligns with the tank.
  6. Connect the hose to the hose intake.
  7. Attach extension tubes and the appropriate shampoo nozzle adaptor.
  8. Plug in and switch on the vacuum cleaner and pump switch.
  9. Press the trigger to release shampoo solution.
  10. For upholstery, slide the shampoo nozzle adaptor directly onto the curved handle.

Troubleshooting and error codes

Problem Check Following
No power Plug connection. Electrical wall socket is switched on.
Loss of suction Hose and accessories not blocked. Filters (4 & 16) clean. Bucket (5) not overfull and protective filter not blocked. Hood assembly (1) seated properly.
No shampoo release Pump switch (7) is on. Solution filter (8) correctly inserted into solution tank (22).
Privacy Policy