Manual for EH-R4000

Manual for EH-R4000

Brand: EPSON

Category: Projector

Document Type: Manual

Language: EN

Uploaded: Nov. 21, 2025, 6:29 p.m.

Warranty Information

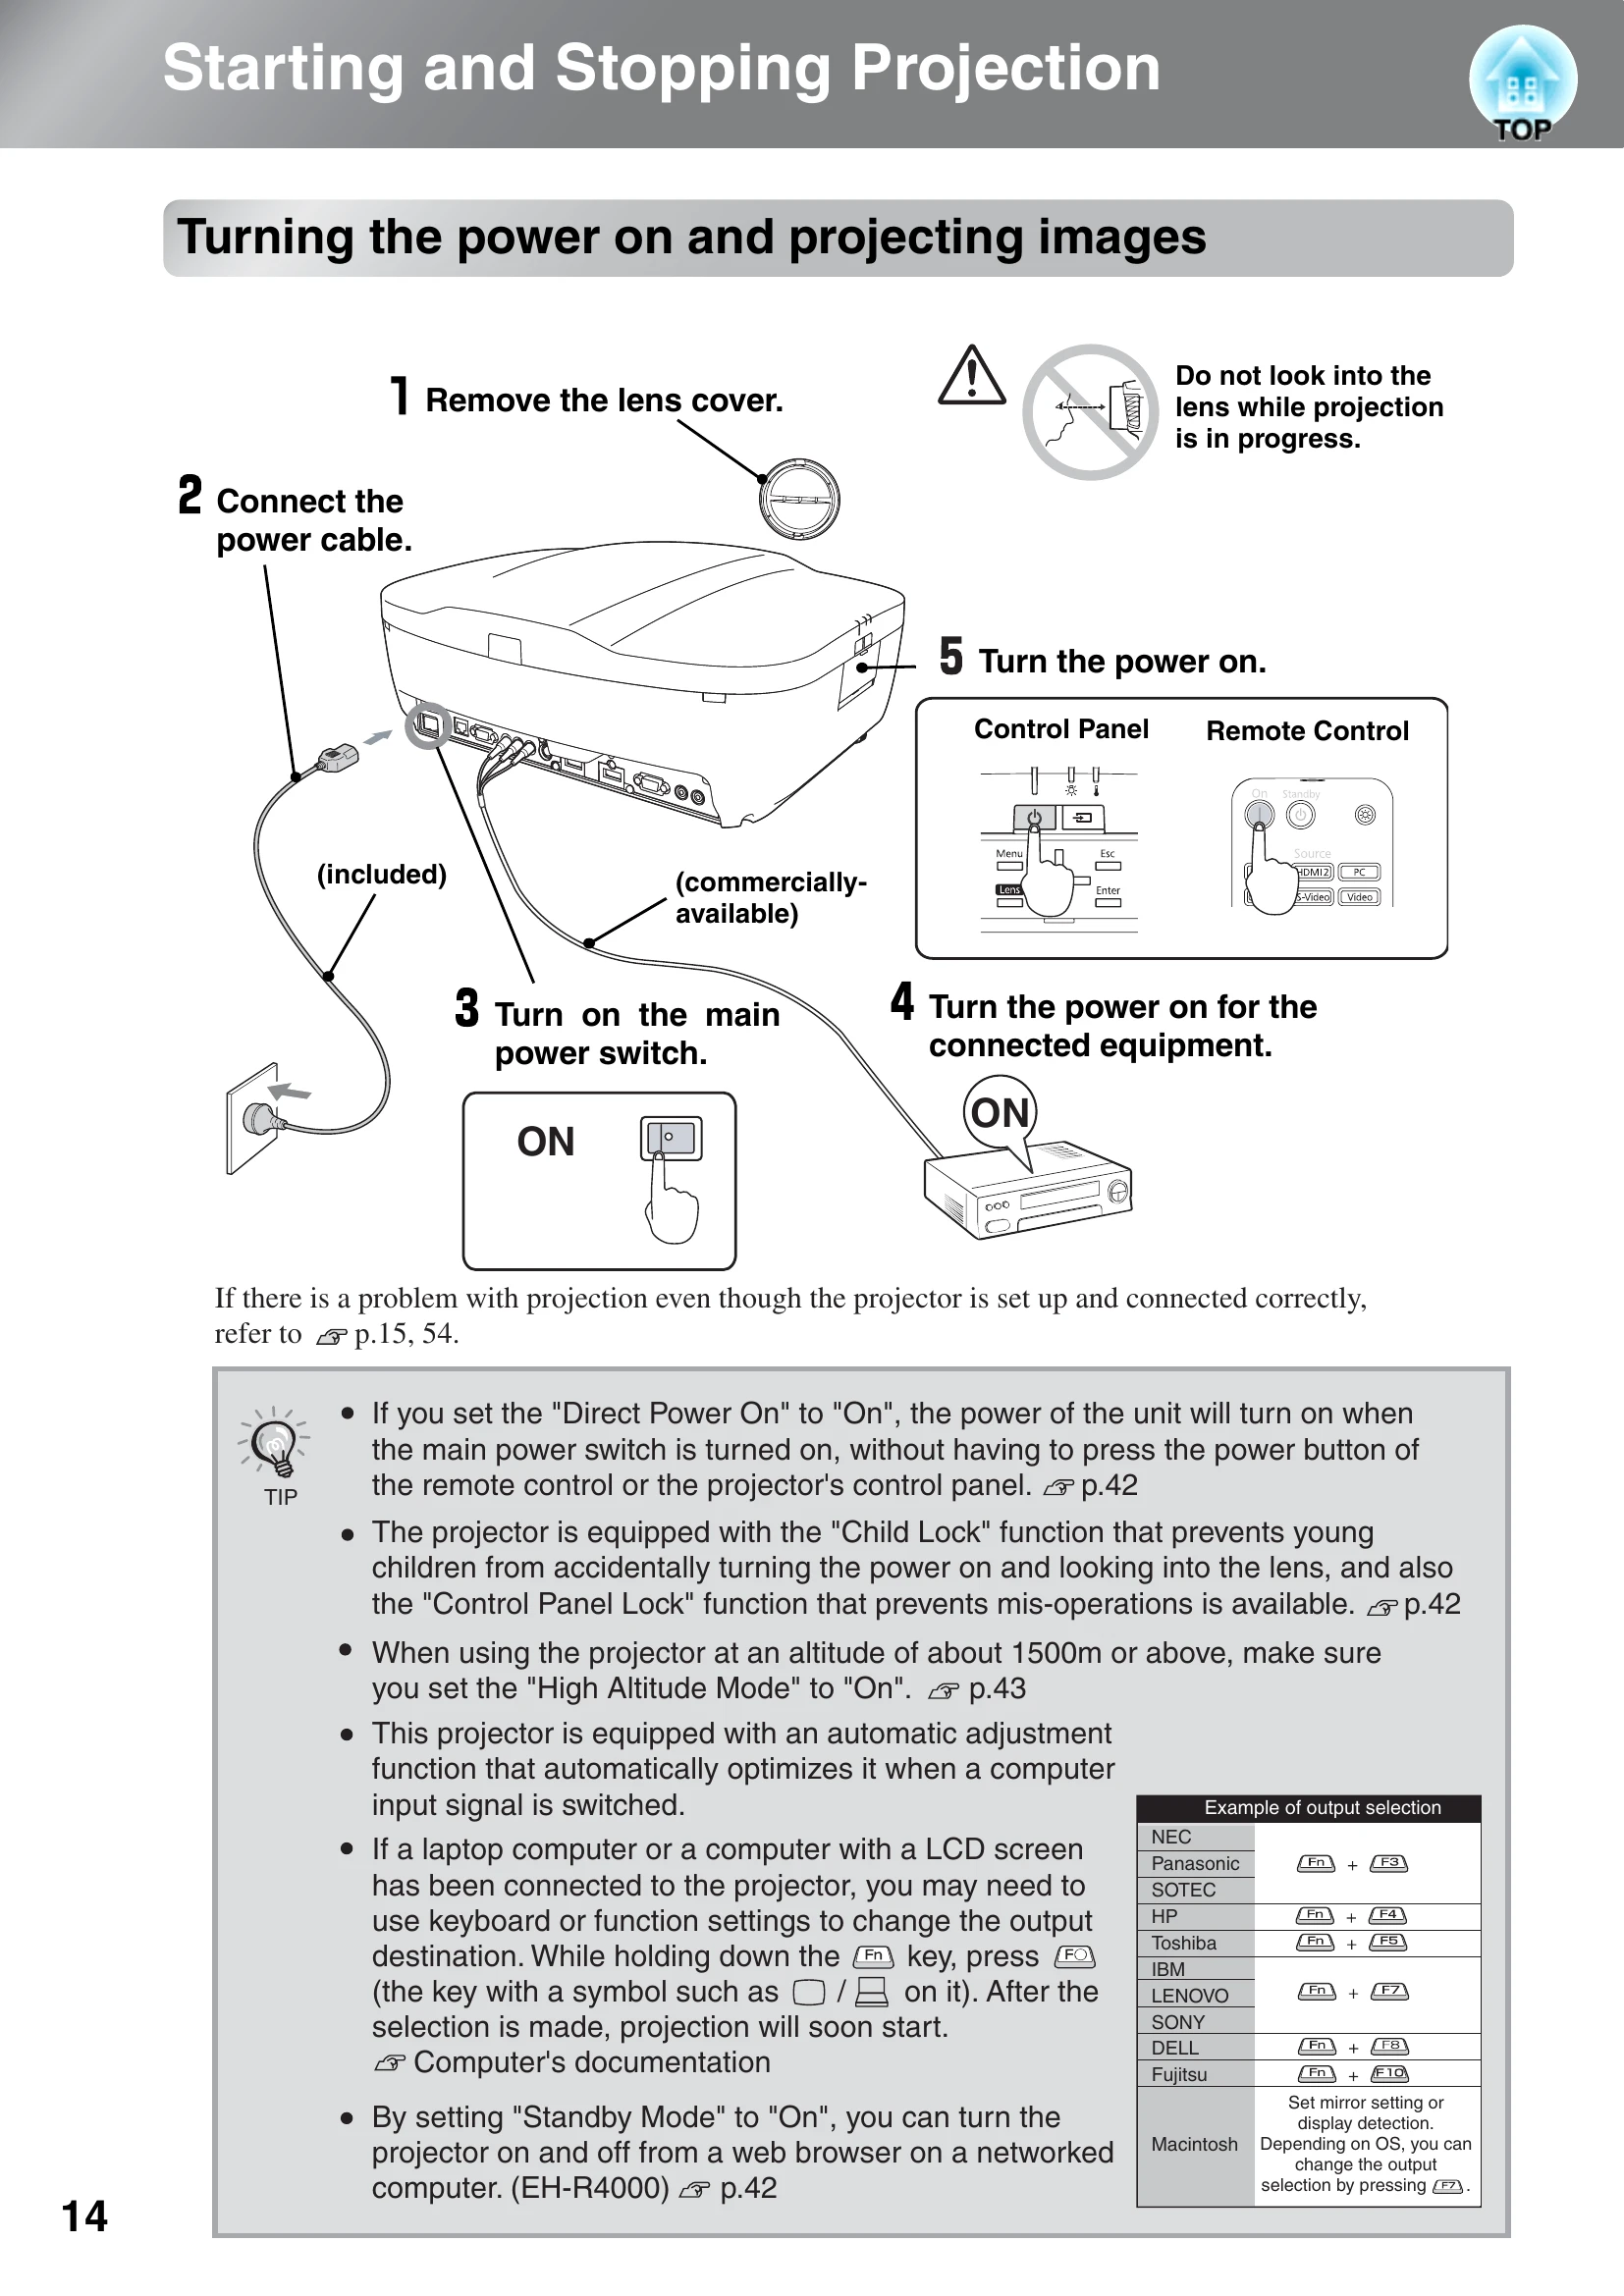
No specific warranty period is mentioned in the provided pages.

Turning the power on and projecting images:
  1. Remove the lens cover.
  2. Connect the power cable.
  3. Turn on the main power switch.
  4. Turn on the power for the connected equipment.
  5. Turn the power on (using the remote control or control panel).
Turning the power off:
  1. Turn the power off for connected signal sources.
  2. Press the Standby button on the remote or control panel.
  3. Once the cool-down period ends, turn off the main power switch.
  4. Attach the lens cover.
Adjusting Projection Screen:
  • Focus adjustment: Press Focus, then use navigation buttons.
  • Projection size adjustment (Zoom): Press Zoom, then use navigation buttons.
  • Projection image position adjustment (Lens shift): Press Lens Shift, then use navigation buttons.
  • Adjusting tilt: Use the front feet.
  • Displaying a test pattern: Press the Pattern button.

Troubleshooting and error codes

Problem Indication Solution
When the ⚠ (warning) indicator is lit or flashing Red lamp flashes Lamp replacement required (Page 69)
Green lamp flashes Air filter replacement required (Page 69)
Both lamps flash Contact EPSON Support
When the indicators provide no help No image projected Check "When the expected images are not projected" (Page 15)
Operation indicator does not light Check "Turning the power on and projecting images" (Page 14)
Privacy Policy