Brand: FED
Category: Camera
Document Type:
Language: EN
Brand: FED
Category: Camera
Document Type:
Language: EN
Uploaded: Aug. 9, 2025, 11:35 p.m.
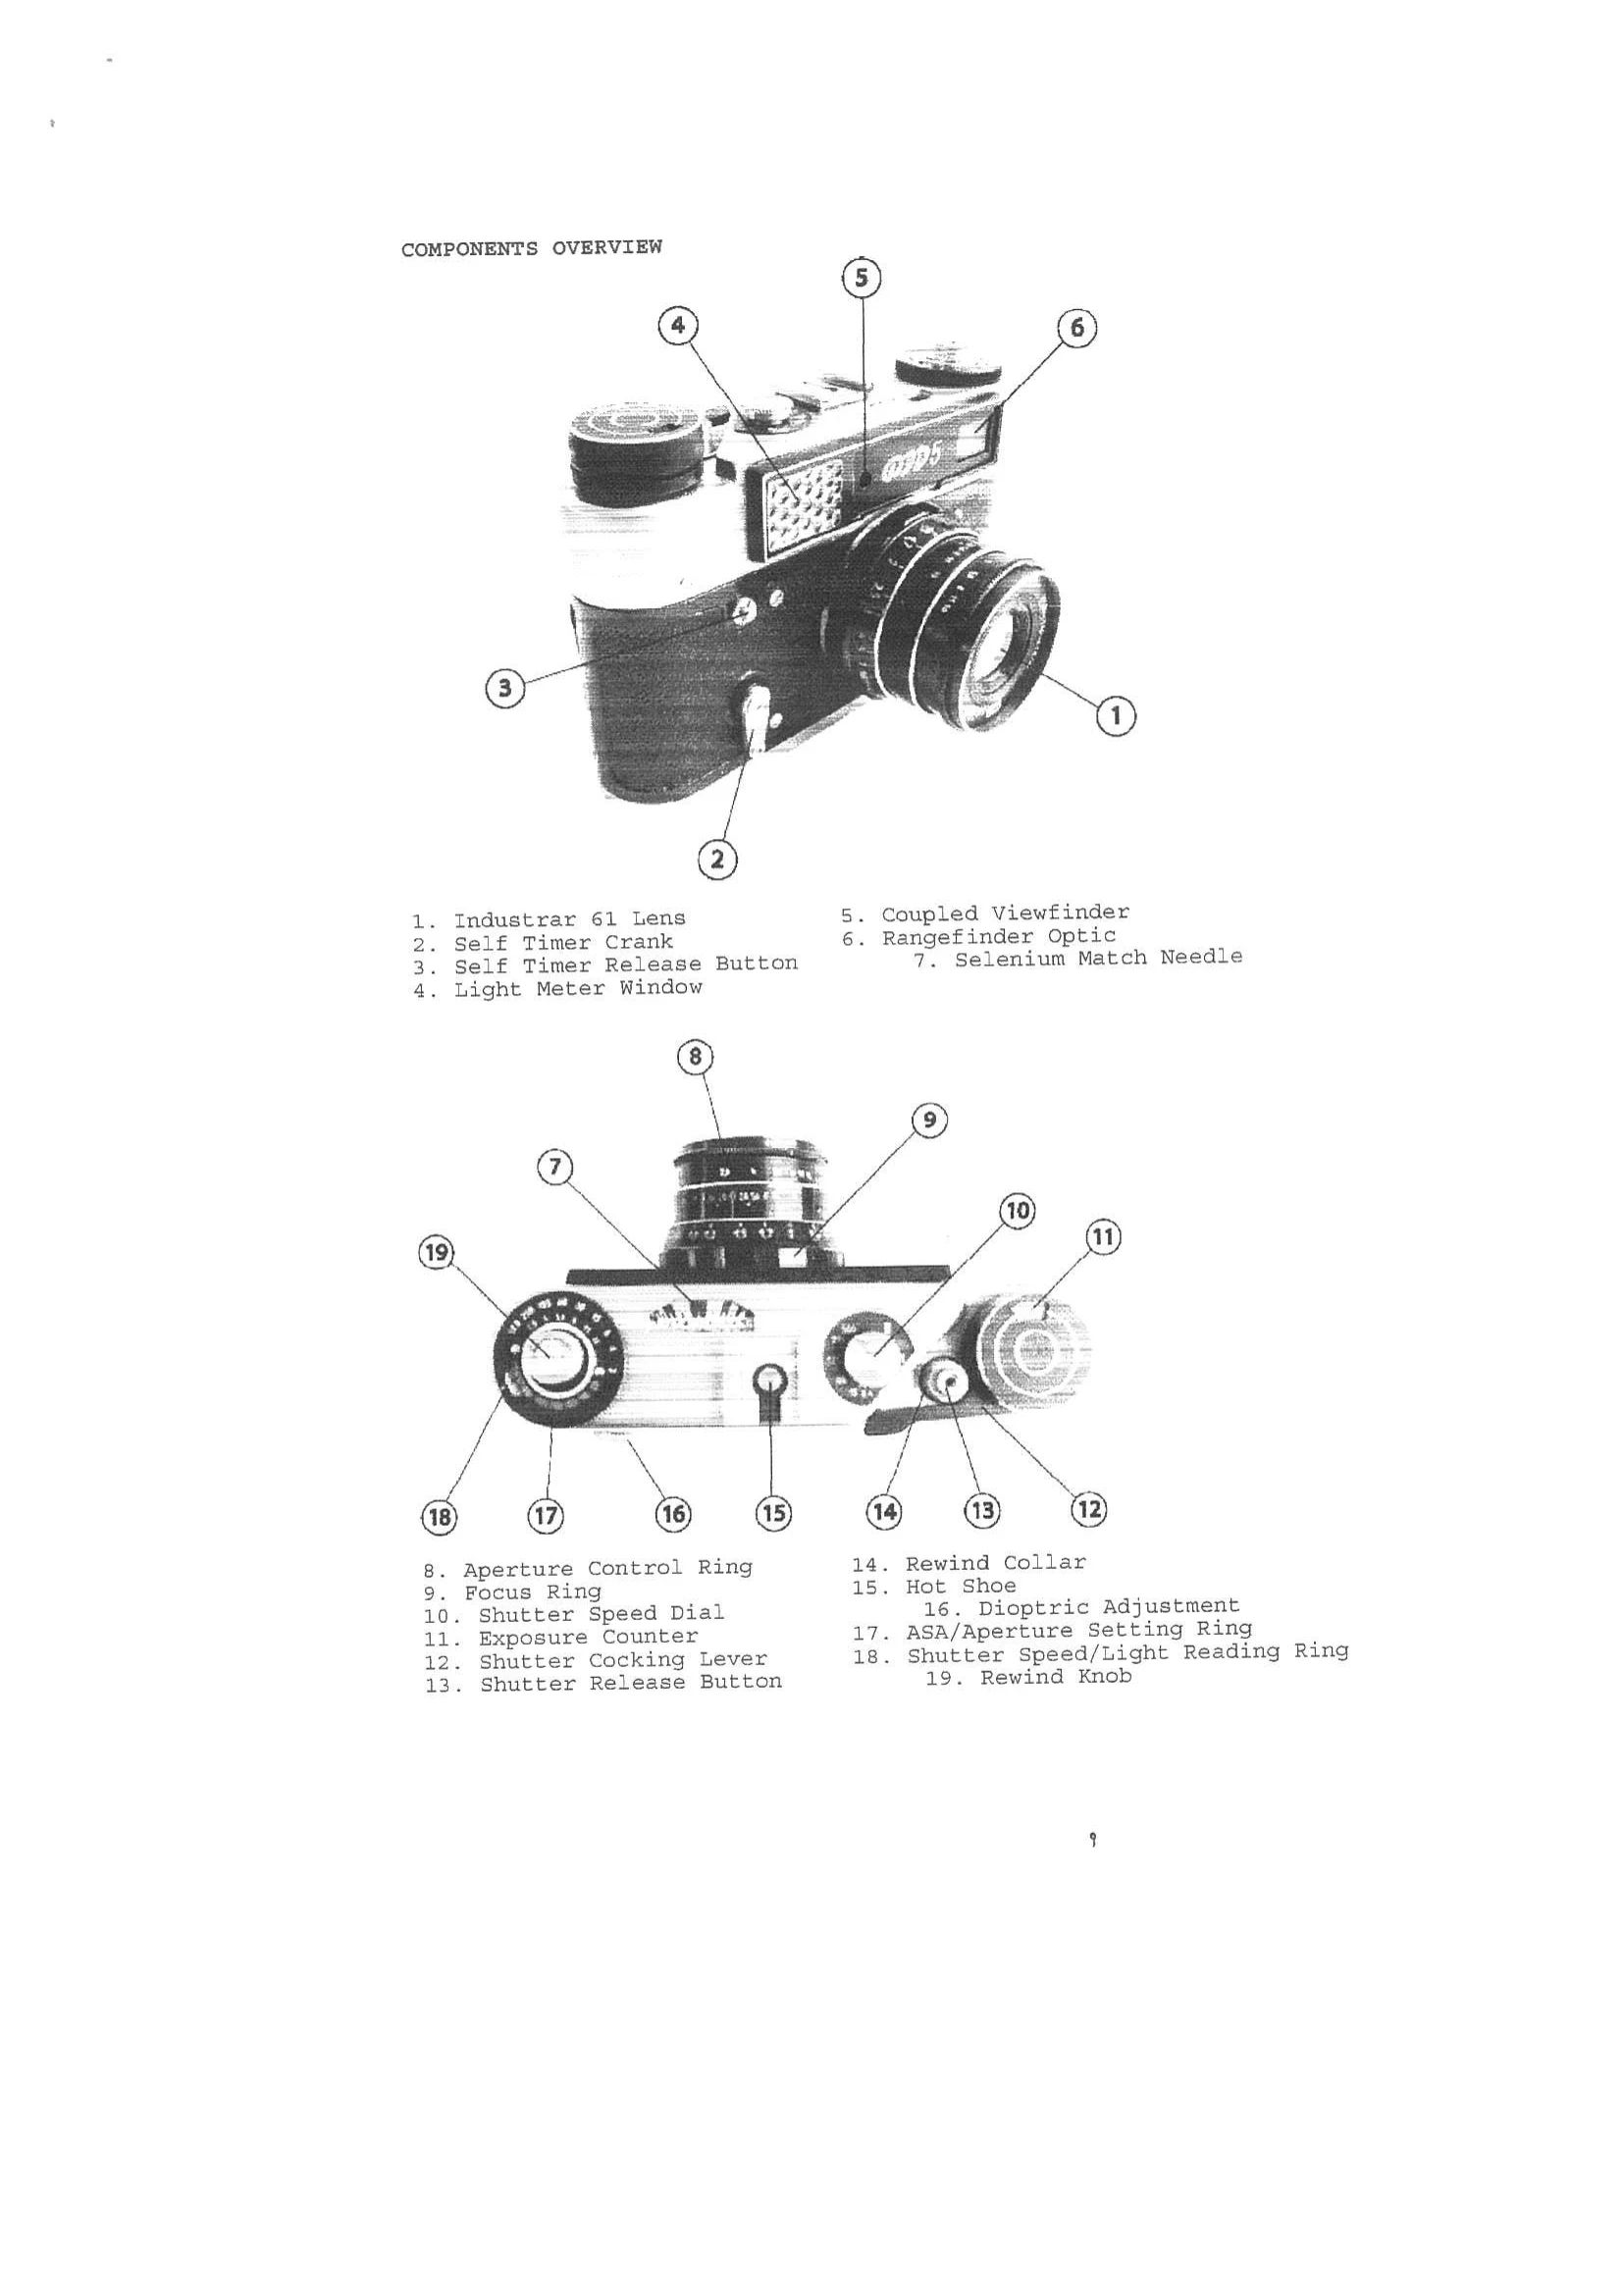
1. Loading the Film: Remove the one-piece back by rotating latches outward. Place the 35mm cartridge on the left spindle and thread the leader over the sprockets and under the take-up spool.
2. Film Advance / Shutter Cocking: Push the shutter cocking lever (12) on the top right to the limit of its travel to advance film and cock the shutter. Ease the lever back gently. The exposure counter advances with each frame.
3. Setting Shutter Speed: ALWAYS cock the shutter before changing speeds. Pull up the shutter speed dial (10) and rotate the red arrow to the desired speed (B, 30, 1, 2, 4, 8, 15, 60, 125, 250, 500). Note the resistance and sound when setting slow speeds (below 1/15s), indicating the slow speed mechanism is engaged.
4. Setting Aperture: Turn the outmost ring of the lens (8) to select the aperture (f/2.8 to f/16) based on light conditions and desired depth of field.
5. Setting Exposure: Set the ASA film speed (17) by aligning the green number with the black line on the inner silver ring. Point the camera at the subject. Rotate the outermost ring (18) until the window number matches the selenium match needle (7).
6. Using the Viewfinder: The rangefinder spot within the viewfinder will show a split image. Rotate the focus ring (9) until the split image merges, indicating correct focus.
7. Taking a Picture: With focus set, aperture and shutter speed selected, press the shutter release button (13).
8. Rewinding the Film: FIRST RELEASE THE SHUTTER. Push down the rewind knob (19) at the top left and turn counter clockwise until it pops up. Press down the rewind collar (13) surrounding the shutter release and rewind the film clockwise until no resistance is felt. Pop open the back.
9. Using a Flash: Use electronic flash at a shutter speed of 1/30 second. Place flash in hot-shoe (15).
10. Changing Lenses: The camera uses Leica Thread Mount (LTM) 39mm X 1mm. Turn lens counter clockwise to remove, clockwise to install. Ensure threads are aligned.