Before starting the work:
1. To prevent damage from static electricity, use a conductive rubber mat, ground your soldering iron, and ground yourself.
2. The camera uses a charged flash circuit. Discharge the flash system after removing the top cover using a 3 kilo-ohm/10W discharging resister.
3. When disassembling up to the lens assembly, fully open the shutter. Set the camera to manual exposure mode, set shutter speed to "Bulb", aperture to F4, manual focus to ∞, and pull out the battery.
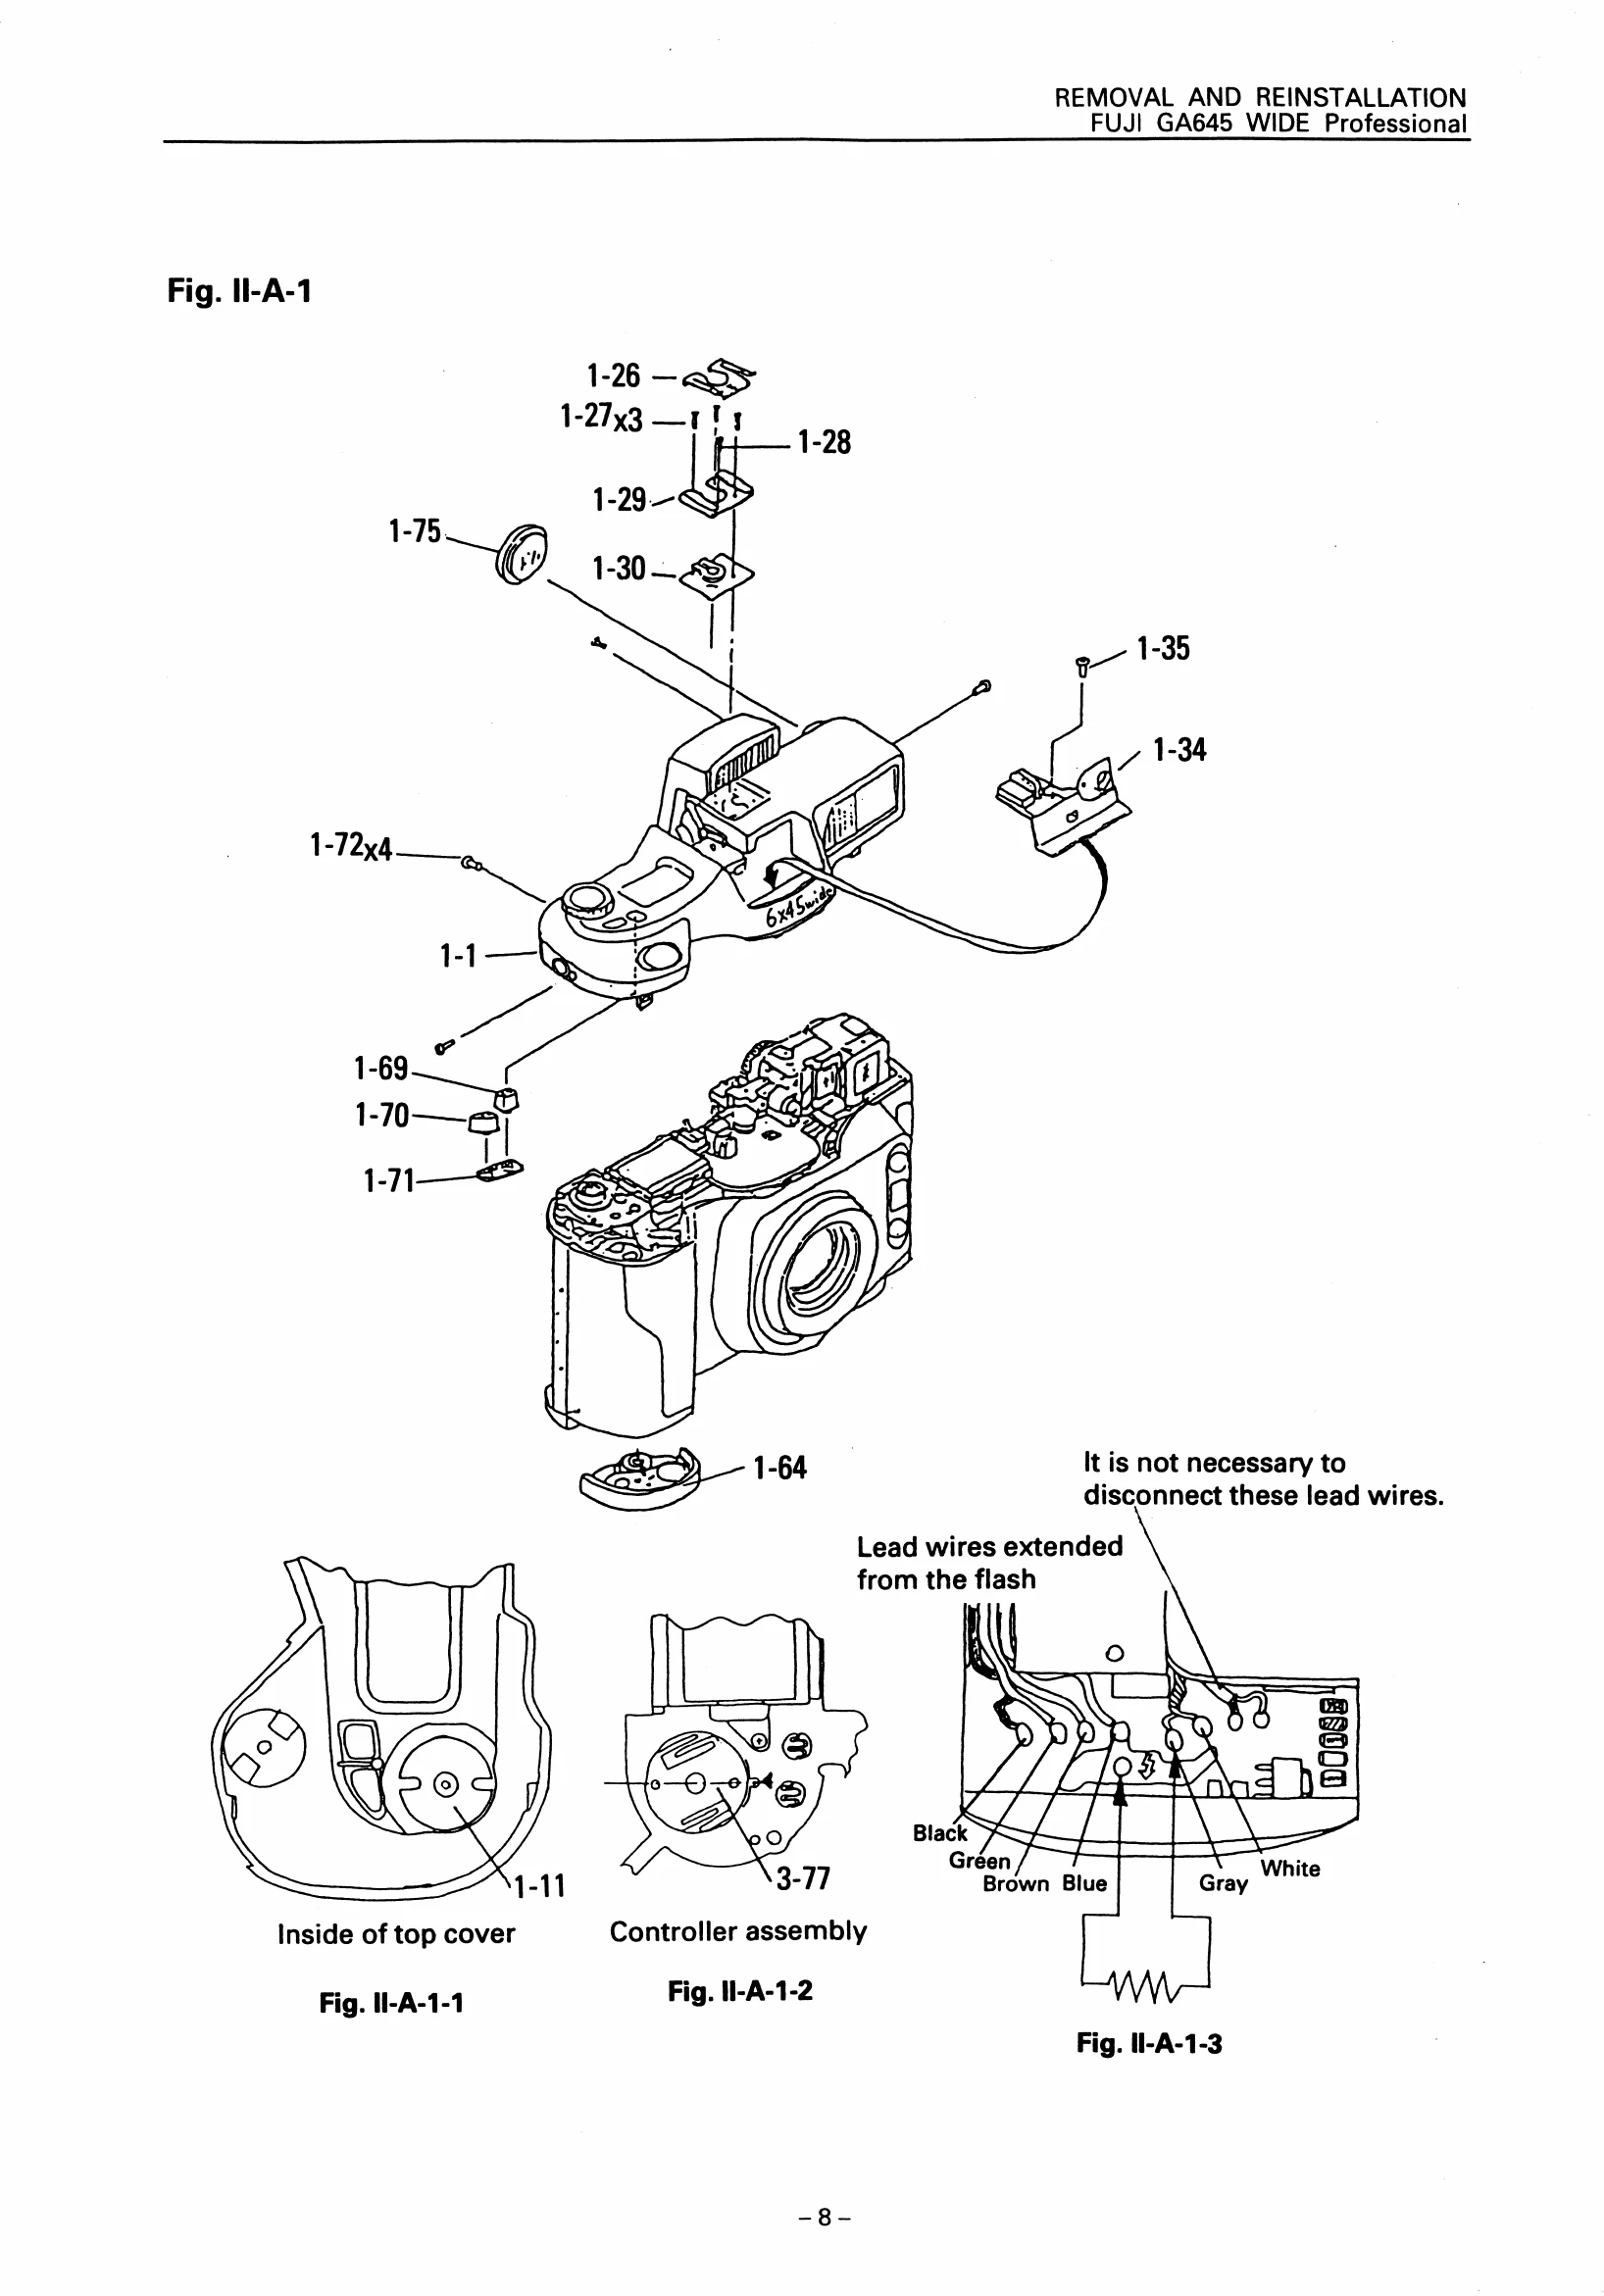
Top Cover Removal:
1. Remove battery compartment cover and battery.
2. Remove flash head assembly, screw, and flash cover. Discharge main capacitor.
3. Disconnect lead wires of flash head assembly and synchro-contact.
4. Remove shoe cover, screws, accessory shoe, and shoe seat assembly.
5. Remove four screws.
6. Float and remove the top cover assembly. Be careful not to lose FR button, MF button, and rubber switch.
Top Cover Reinstallation:
1. Align contact assembly with shaft.
2. Align up-down dial and install top cover, then tighten screws. Ensure flash PCB assembly is clear of the cover.
3. Install shoe seat assembly and accessory shoe, passing synchro lead wires correctly.
4. Solder lead wires as shown.
5. Tighten screws and install shoe cover.
6. Ensure link is on the hinge shaft, install flash cover, and secure with screw.