Brand: GARMIN
Category: Other
Document Type: Quick Start Guide
Language: EN
Brand: GARMIN
Category: Other
Document Type: Quick Start Guide
Language: EN
Uploaded: Aug. 10, 2025, 12:45 a.m.
Manual Publish Date: 2014-05-01
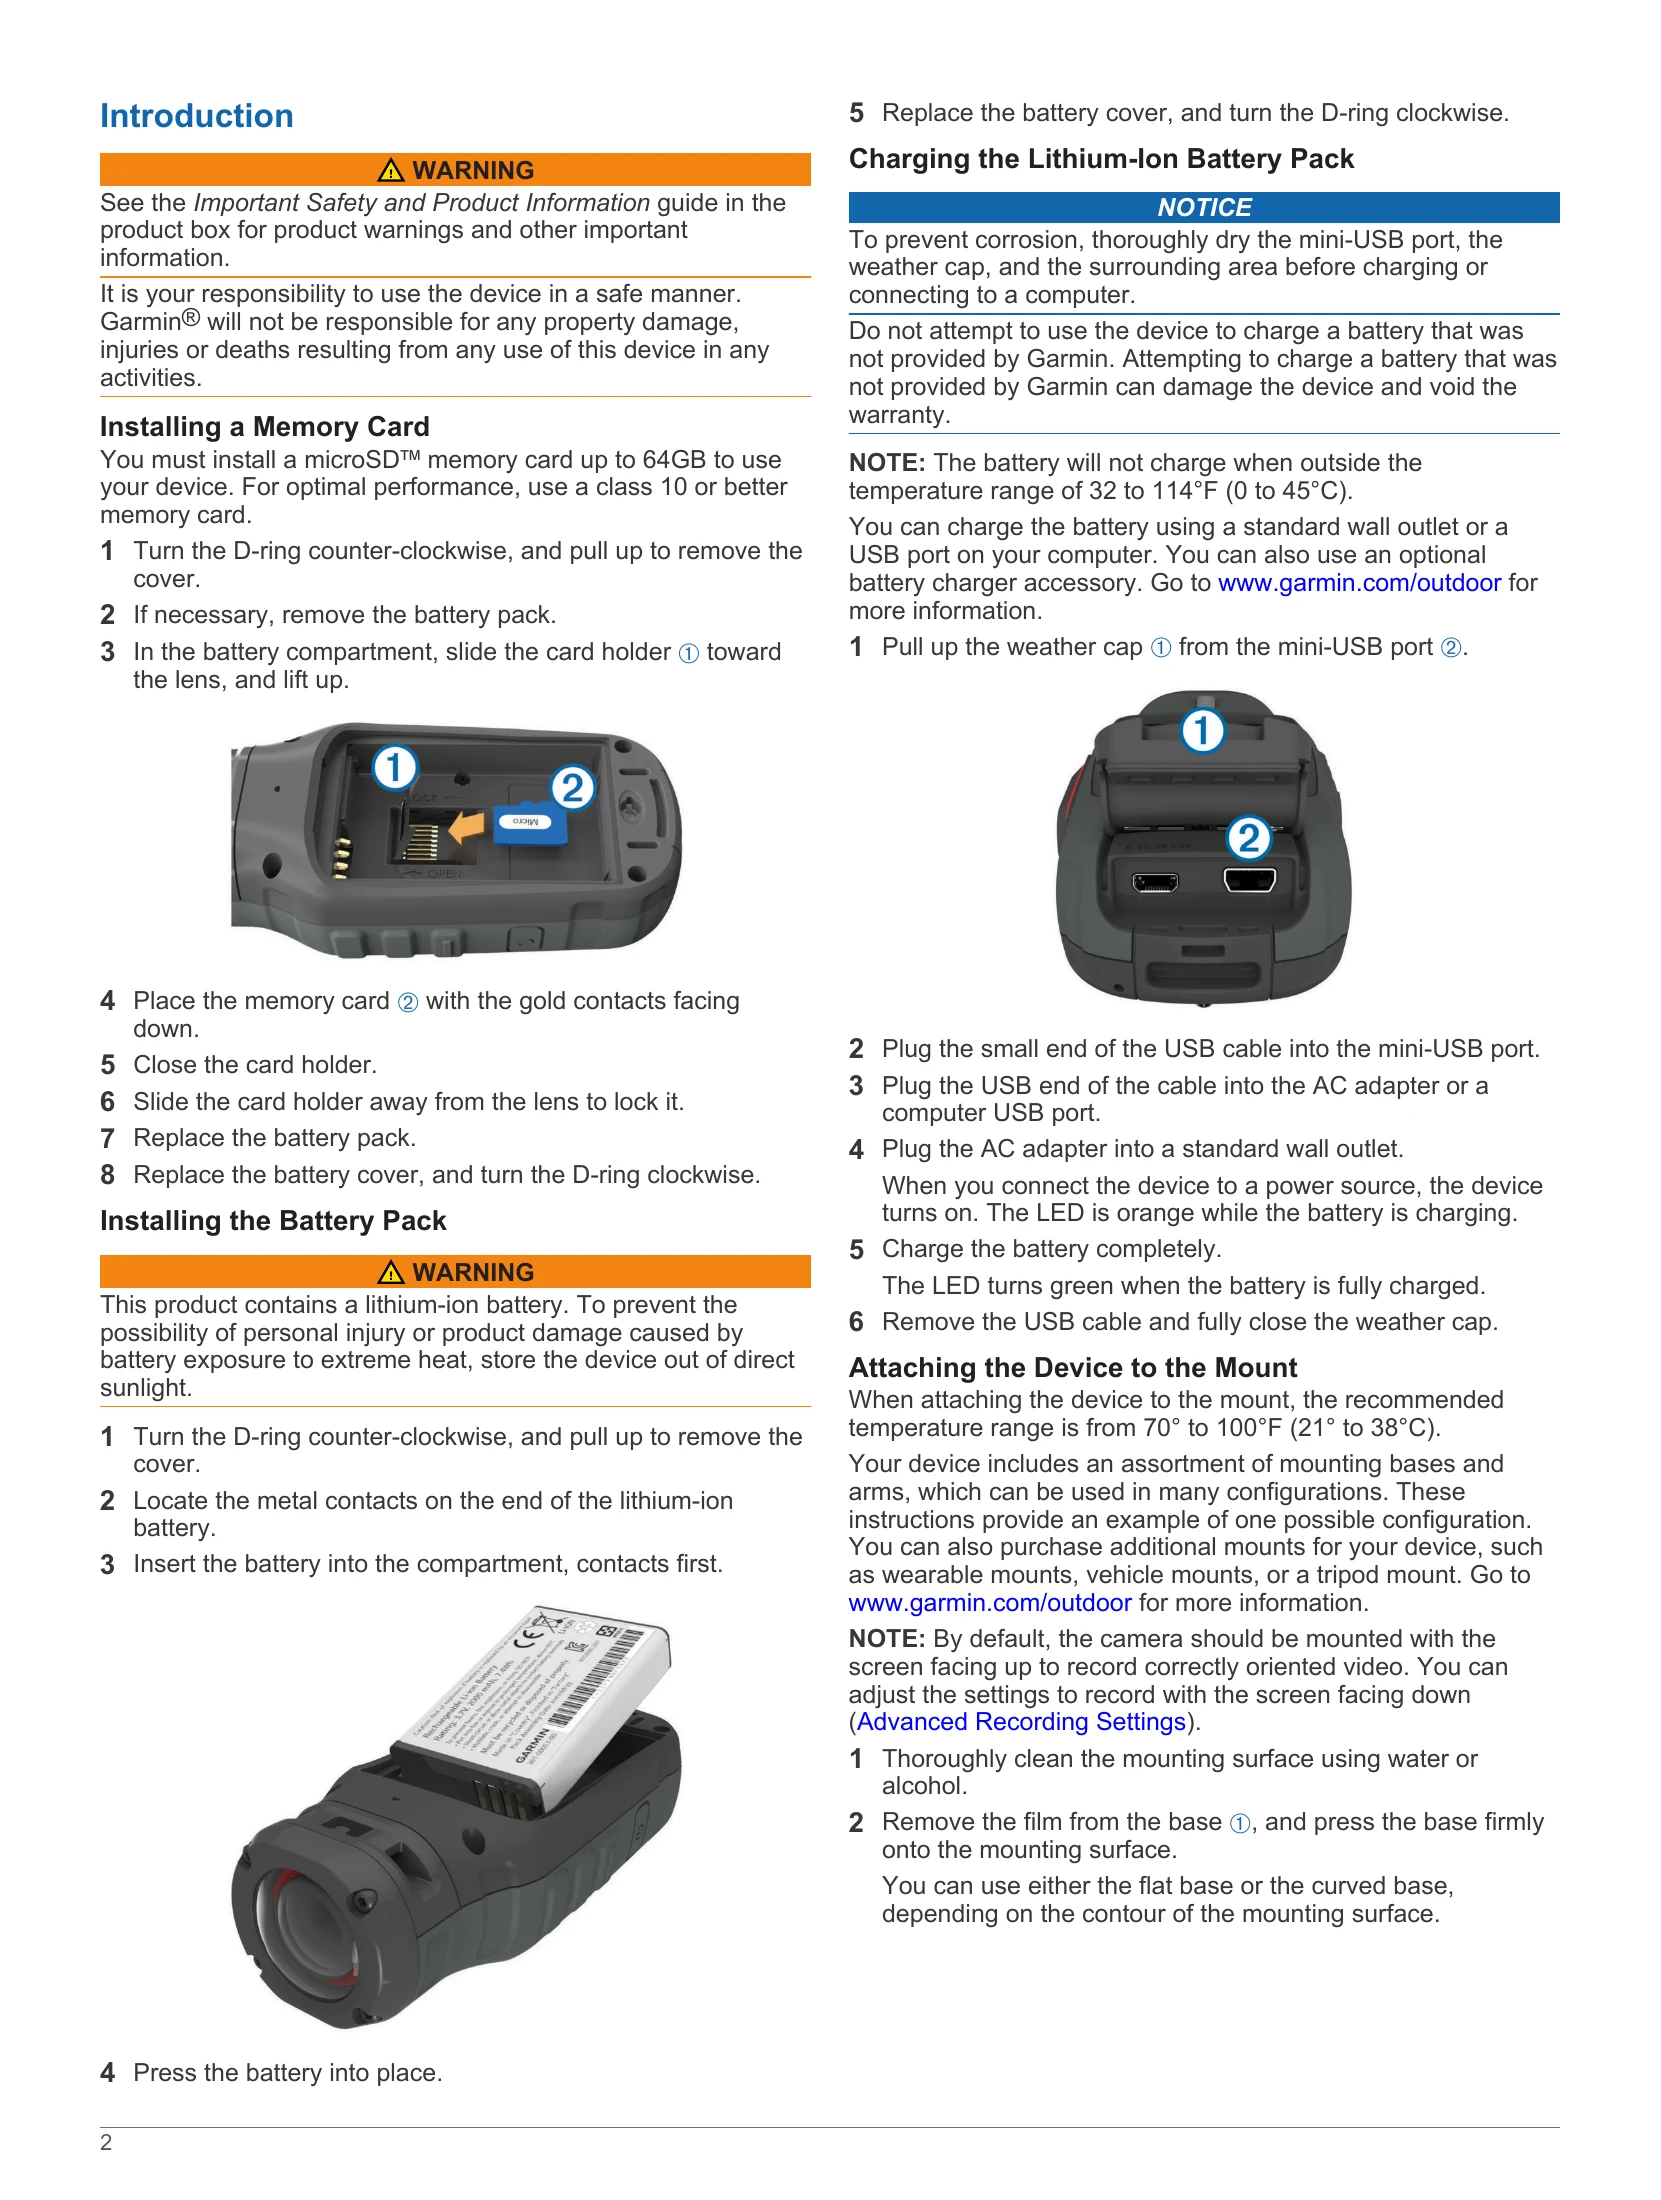
1. Turn the D-ring counter-clockwise and pull up to remove the cover. If necessary, remove the battery pack.
2. In the battery compartment, slide the card holder toward the lens and lift up.
3. Place the memory card with the gold contacts facing down.
4. Close the card holder, slide it away from the lens to lock.
5. Replace the battery pack and cover, turning the D-ring clockwise.
1. Pull up the weather cap from the mini-USB port.
2. Plug the small end of the USB cable into the mini-USB port.
3. Plug the USB end into an AC adapter or a computer USB port.
4. Plug the AC adapter into a wall outlet. The device turns on; an orange LED indicates charging.
5. Charge until the LED turns green. Remove the USB cable and close the weather cap.
1. Clean the mounting surface with water or alcohol.
2. Remove the film from the base and press it firmly onto the surface.
3. Allow the base to bond for at least 24 hours.
4. Place the coupler into the base, and screw the threaded ring onto the base.
5. Snap the mounting arm into the coupler, insert and tighten a thumbscrew.
6. Snap the camera mount into the arm, insert and tighten a thumbscrew.
7. Place the tab on the mount into the slot on the camera.
8. Squeeze the side buttons, press the camera down, and release the buttons.
Select the power button or slide REC toward the lens.
1. Slide REC away from the lens if necessary.
2. Hold the power button until the screen turns off.
Press MODE to cycle through Viewfinder, Playback, Dashboard (VIRB Elite only), and Setup.