Brand: GE
Category: Digital Camera
Document Type:
Language: EN
Brand: GE
Category: Digital Camera
Document Type:
Language: EN
Uploaded: Aug. 9, 2025, 11:57 p.m.
Manual Publish Date: 2012-01-01
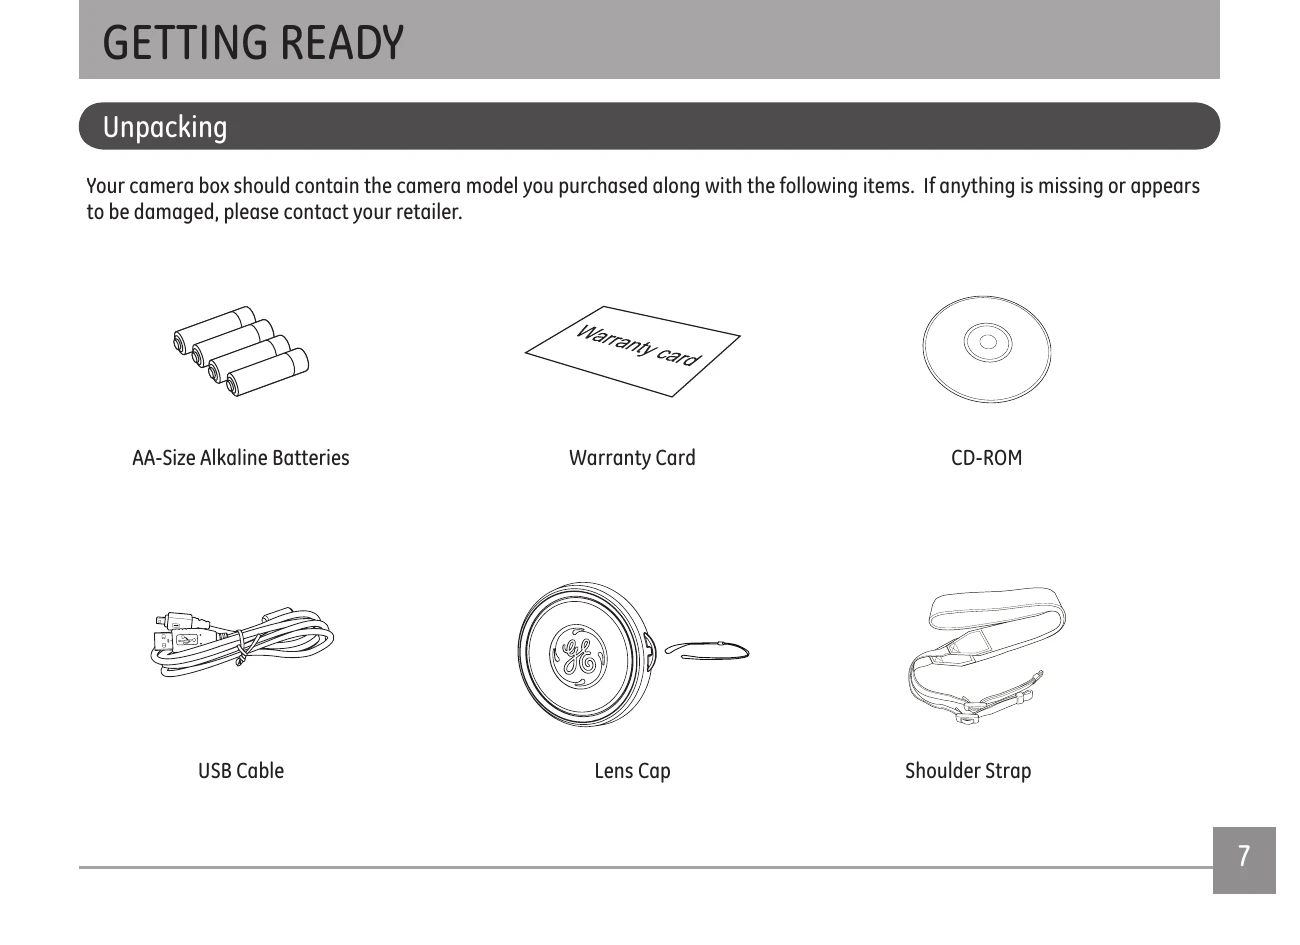
Your camera box should contain the camera model you purchased along with the following items. If anything is missing or appears to be damaged, please contact your retailer.


1. Open the battery compartment

2. Insert the enclosed AA batteries into the battery slot according to the correct polarity as shown below

3. Insert an SD/SDHC card (not included) into the SD memory card slot as shown

4. Close the battery compartment

Push ON/OFF to turn camera on/off

After the camera is powered on, set the camera to Auto mode by turning the Mode Dial at the top of the camera (see page 16).
When turning on the camera for the first time, the Display Language and Date/Time Setup menu will appear. Use the following procedures to set the camera Language, Date/Time to your preferences:


This GE camera provides a convenient mode dial that allows you to manually switch between different modes with ease. All the available modes are listed below:
| Mode Name | Icon | Description |
|---|---|---|
| Auto Mode |  |
Take still pictures in automatic mode |
| ASCN Mode |  |
The camera automatically selects the best scene type for still pictures |
| Program AE | P | Setting allows you to choose the EV value and the camera will select both the shutter speed and aperture automatically |
| Shutter priority | S | Setting allows you to choose a specific shutter speed while the camera will adjust the aperture automatically to ensure correct exposure |
| Aperture priority | A | Allows you to choose a specific aperture and the camera will automatically adjust the shutter speed to match it |
| Manual Mode | M | Many of the camera settings can be configured manually in this mode |
| Portrait | Portrait pictures under normal conditions | |
| Panorama Mode | Capture a sequence of shots and automatically stitch them together into a panoramic photo | |
| Movie Mode | Record videos | |
| Scene Mode | SCN | Choose from 20 different pre-set scene types and effects for your photos |
When you turn the camera on, various icons are shown on the LCD screen to indicate the current camera settings and status. To learn more about the displayed icons, see “LCD Screen display" on page 30.
Extremely high-precision technology has been used to manufacture the LCD screen so that most of the pixels are operational. On occasion, there may be some minute points (black, white, red, blue or green) that constantly appear on the LCD screen. These points are normal in the manufacturing process and the recording is not affected in any way.
Avoid exposing the LCD screen to water; remove any moisture on the LCD screen with a soft, dry cleaning cloth.
If the LCD monitor is damaged, take particular care with the liquid crystal in the monitor. If any of the following situations arise, take the recommended immediate action indicated below:
The Electronic View Finder displays the same information as the LCD screen. To switch between the LCD screen and the Electronic Viewfinder, press the EVF/LCD switch button. When selecting the EVF indicator, the LCD screen will automatically shut off.

Auto mode is the easiest mode to take photos. While operating in this mode, the camera automatically optimizes camera settings to adjust your photos for best results.
To start shooting, do the following:
Your camera is equipped with two types of zoom functions: optical zoom and digital zoom. Press the Zoom Wheel of the camera to zoom in or out of the subject while taking pictures.

When the optical zoom reaches its maximum value, release the Zoom Wheel and then press it again for the digital zoom to begin. The zoom indicator is hidden after the Zoom Wheel is released. The screen shows ( Q ) for the current zoom status.
After setting the USB mode to Printer, the PictBridge menu will appear.

Select a menu item with the Up/Down button and press the Right button or OK button to enter the item.
Refer to the following sections for more detailed information on each setting.
If you have set the date and time on your camera, the date and time will be recorded and saved with each photo you take.

2. Use the Left/Right navigation buttons to scroll through the photos.
Use this setting to print the photos without dates on them.

2. Use the Left/Right navigation buttons to scroll through the images.
3. Use the Up/Down navigation buttons to select the number of prints for the current displayed image.
4. Press the OK button and the following screen will appear.

5. Select Yes to print or exit, then press the OK button again.
You can use this setting to print an index of all the photos currently in your camera's memory.

2. Select Yes to print or exit, then press the OK button again.
To use DPOF printing, you must make the selection of photos for printing using the DPOF settings beforehand. See “DPOF” section on page 56.

2. Select Yes to print or exit, then press the OK button again.
To exit the PictBridge menu, select Exit. The "Remove USB cable" message will be displayed.

Disconnect the USB cable from the camera and printer.
Design and specifications are subject to change without notice.
| Active Image Sensor Pixels | 16.07 Megapixels | |
| Total Image Sensor Pixels | 16.56 Megapixels [1/2.33"CCD] | |
| Lens | Focal Length | 4.9mm (Wide) — 73.5mm (Tele) |
| [35mm film equivalent) | [27mm (Wide) — 405mm (Tele)] | |
| F number | F3.0 (Wide) - F5.2 (Tele) | |
| Lens Construction | 11 groups 14 elements | |
| Optical Zoom | 15x | |
| Focusing Range | Normal: (Wide) 23.6in. ~ ∞ / 60cm ~ ∞; (Tele) 47.2in. ~ ∞ / 120cm ~ ∞ Macro: 1.9in. ~ ∞ / 5cm ~ ∞ (Wide Only) | |
| Viewfinder | Electronic Viewfinder | |
| Anti-Handshake | Optical Image Stabilization | |
| Digital Zoom | 6x Digital Zoom (Combined Zoom: 90x) |
| Number of Recording Pixels | Still Image | 16MP: 4608×3456, (16:9)12MP: 4608×2592, 8MP: 3264×2448, 5MP: 2592×1944, 3MP: 2048×1536, (16:9)2MP: 1920×1080, 0.3MP: 640×480 |
| Movie | VGA, QVGA | |
| Image Compression | Best, Fine, Normal | |
| DCF, DPOF (Ver1.1) Support | Yes | |
| File Format | Still Image | Exif 2.2 (JPEG) |
| Movie | Movie Format: MOV (Motion JPEG), Audio: G.711 [Monaural] | |
| Shooting Modes | Auto, ASCN, P, S, A, Manual, Panorama, Movie, Portrait, Scene (Landscape, Sport, Beach, Sunset, Fireworks, Night Landscape, Night Portrait, Party, Children, Indoor, Snow, ID, Museum, Photo frame, Panning Shot, Text, Leaf, Glass, Fish eye, Sketch) | |
| Detection Features | Face, Smile, Blink | |
| Red-Eye Removal | Yes | |
| HDR | Yes | |
| Panorama Capture | Still Image | Yes (Horizontal) |
| View Angle | 0° ~ 170° | |
| LCD Display | 2.7inch (230k Pixels) |
| ISO Sensitivity | Auto, ISO80/100/200/400/800/1600(4M)/3200(4M) | |
| AF Method | Single AF, Multi-AF (TTL 13-point), Object Tracking, Face-Detection, AF Assist Light (On/Off) | |
| Exposure Metering Method | Artificial Intelligence AE (AiAE), Center-Weighted Average, Spot (Fixed to Center of Frame), Face AE | |
| Exposure Control Method | Program AE (AE-Lock Available), Aperture prior AE, Shutter Prior AE | |
| Exposure Compensation | ±2EV in 1/3 Step Increments | |
| Shutter Speed | 1/2000 ~ 4 Seconds (Manual: 30 Seconds) | |
| Continuous Shooting | Yes | |
| Playback Modes | Single Photo, Index (9/16 Thumbnails), Slide Show, Movie, Date Zoom (Approx. 2x ~ 8x), Histogram Display | |
| White Balance Control | Auto, Daylight, Cloudy, Fluorescent, Fluorescent CWF, Incandescent, Manual | |
| Flash | Flash Method | Pop-up |
| Flash Modes | Forced off, Forced flash, Red-Eye + Slow Synchro, Slow Synchro, Red-eye reduction, Auto | |
| Shooting Range | (Wide) Approx. 11.8in. ~ 177.1in. / 0.3m ~ 4.5m (ISO400) (Tele) Approx. 19.6in. ~ 157.4in. / 0.5m ~ 4.0m (ISO800) |
| Recording Media | Internal Memory: Approx. 13MB SD/SDHC Card (Up to 16GB Support) (Nonsupport MMC Card] | |
| Other Features | PictBridge, ExifPrint Support, Multi-Language Support (26 Languages) | |
| Jacks | AV-OUT/USB 2.0 (Mini 8 pin USB) | |
| Power | AA Alkaline Battery(×4) AA NiMH Battery(×4) (Not Included) | |
| Shooting Capability (Battery Performance) | Approx. 300 Shots of AA Alkaline Battery (Based on CIPA Standards) | |
| Approx. 500 Shots of AA NiMH Battery (Based on CIPA Standards) | ||
| Operation Environment | Temperature: 32 ~ 104°F / 0 ~ 40°C, Humidity: 0 ~ 90% | |
| Dimensions (W×H×D) | Approx. 4.0×2.9×2.6in. / 103.0×74.0×68.0mm (Based on CIPA Standards) | |
| Weight | Approx. 12oz. /350g (Body Only) | |
| Supplied Accessories (May Differ Depending On Country or Area) | AA Alkaline Battery(×4), USB Cable Shoulder Strap, CD-ROM, User Manual, Lens Cover Quick Start Guide, Warranty Card |
| Messages | Explanation |
|---|---|
| Card Error | • The SD memory card is not formatted. |
| Card Full | • The SD memory card is full and cannot store any new images. |
| Picture Error | • The picture was not captured correctly. • The picture is damaged. |
| No Picture | • There are no images on the SD memory card or in the internal memory. |
| Lens Error | • The lens is probably stuck and the camera will power off automatically. |
| System Error | • Unexpected error encountered. |
| Write Protect | • The write protection switch in the SD memory card is set to the “LOCKED” position. |
| Out of the Range | • When pictures were taken in Panorama mode, the direction of movement was incorrect or the angle was outside the range of the internal settings. |
| Messages | Explanation |
|---|---|
| Card is not formatted, format? | • Confirm whether the SD memory card should be formatted. |
| This image cannot be deleted | • The picture or video you are trying to delete is protected. |
| Warning!! Camera recording, please wait | • No other actions are allowed during video/audio recording. |
| Warning!! Battery exhausted | • The batteries are depleted. |
| This file cannot be played back | • The picture format is not recognized by the camera. |
| No connection | • The camera is not connected to the printer correctly. |
| Print error | • There is a problem with camera or printer. |
| Cannot print | • Check to see that the printer is not out of paper or out of ink. • Check to see if the printer has a paper jam. |
| Problem | Possible causes | Solution |
|---|---|---|
| Camera does not turn on | • The batteries have been depleted. • The batteries are not inserted correctly. | • Replace the dead batteries with new ones. |
| Camera turns off suddenly during operation | • The batteries have been depleted. | • Replace the dead batteries with new ones. |
| The picture is blurred | • The lens is dirty. • appears when taking pictures. | • Use a soft cloth to clean the lens on your camera. • Use the Image Stabilization mode. |
| Images and video files cannot be saved | • The SD memory card is full. | • Replace the SD memory card with a new one. • Delete unwanted images. • Unlock the memory card. |
| No picture can be taken when pressing the Shutter button | • The SD memory card is full. • No available space to store the files. • The mode dial is in Playback mode. | • Replace the SD memory card with a new one or format the current SD memory card. • Delete unwanted images. • The SD memory card is locked. |
| Problem | Possible causes | Solution |
|---|---|---|
| Images cannot print from the connected printer | • The camera is not connected to the printer correctly. • The printer is not PictBridge compatible. • The printer is out of paper or out of ink. • The printer paper is jammed. | • Check the connection between the camera and printer. • Use a PictBridge compatible printer. • Reload more paper in the printer. • Replace the ink cartridge in the printer. • Remove the jammed paper. |
| Write to memory card is slow | • Using a memory card below Class 4 may result in slower recording times. | • Use an SDHC card and shoot after formatting the card. |
| Cannot write to the memory card | • The SD memory card has been locked. • The camera may experience trouble recording HD movies to SD cards with a rating lower than class 4. | • Remove the SD memory card and unlock it. • Use an SDHC card and shoot after formatting the card. |
| Too many movies to process | • The number of pictures or binders in the SD memory card exceed the specifications, so the playback of data folder can not be displayed. | • Delete unwanted files. • Transfer the files on the SD memory card to other area. |
| Problem | Possible causes | Solution |
|---|---|---|
| Camera does not turn on | • The batteries have been depleted. • The batteries are not inserted correctly. |
• Replace the dead batteries with new ones. |
| Camera turns off suddenly during operation | • The batteries have been depleted. | • Replace the dead batteries with new ones. |
| The picture is blurred | • The lens is dirty. • appears when taking pictures. |
• Use a soft cloth to clean the lens on your camera. • Use the Image Stabilization mode. |
| Images and video files cannot be saved | • The SD memory card is full. | • Replace the SD memory card with a new one. • Delete unwanted images. • Unlock the memory card. |
| No picture can be taken when pressing the Shutter button | • The SD memory card is full. • No available space to store the files. • The mode dial is in Playback mode. |
• Replace the SD memory card with a new one or format the current SD memory card. • Delete unwanted images. • The SD memory card is locked. |
| Images cannot print from the connected printer | • The camera is not connected to the printer correctly. • The printer is not PictBridge compatible. • The printer is out of paper or out of ink. • The printer paper is jammed. |
• Check the connection between the camera and printer. • Use a PictBridge compatible printer. • Reload more paper in the printer. • Replace the ink cartridge in the printer. • Remove the jammed paper. |
| Write to memory card is slow | • Using a memory card below Class 4 may result in slower recording times. | • Use an SDHC card and shoot after formatting the card. |
| Cannot write to the memory card | • The SD memory card has been locked. • The camera may experience trouble recording HD movies to SD cards with a rating lower than class 4. |
• Remove the SD memory card and unlock it. • Use an SDHC card and shoot after formatting the card. |
| Too many movies to process | • The number of pictures or binders in the SD memory card exceed the specifications, so the playback of data folder can not be displayed. | • Delete unwanted files. • Transfer the files on the SD memory card to other area. |