Brand: GE
Category: Other
Document Type: Manual
Language: EN
Brand: GE
Category: Other
Document Type: Manual
Language: EN
Uploaded: Nov. 21, 2025, 6:11 p.m.
This manual does not contain specific warranty period information.
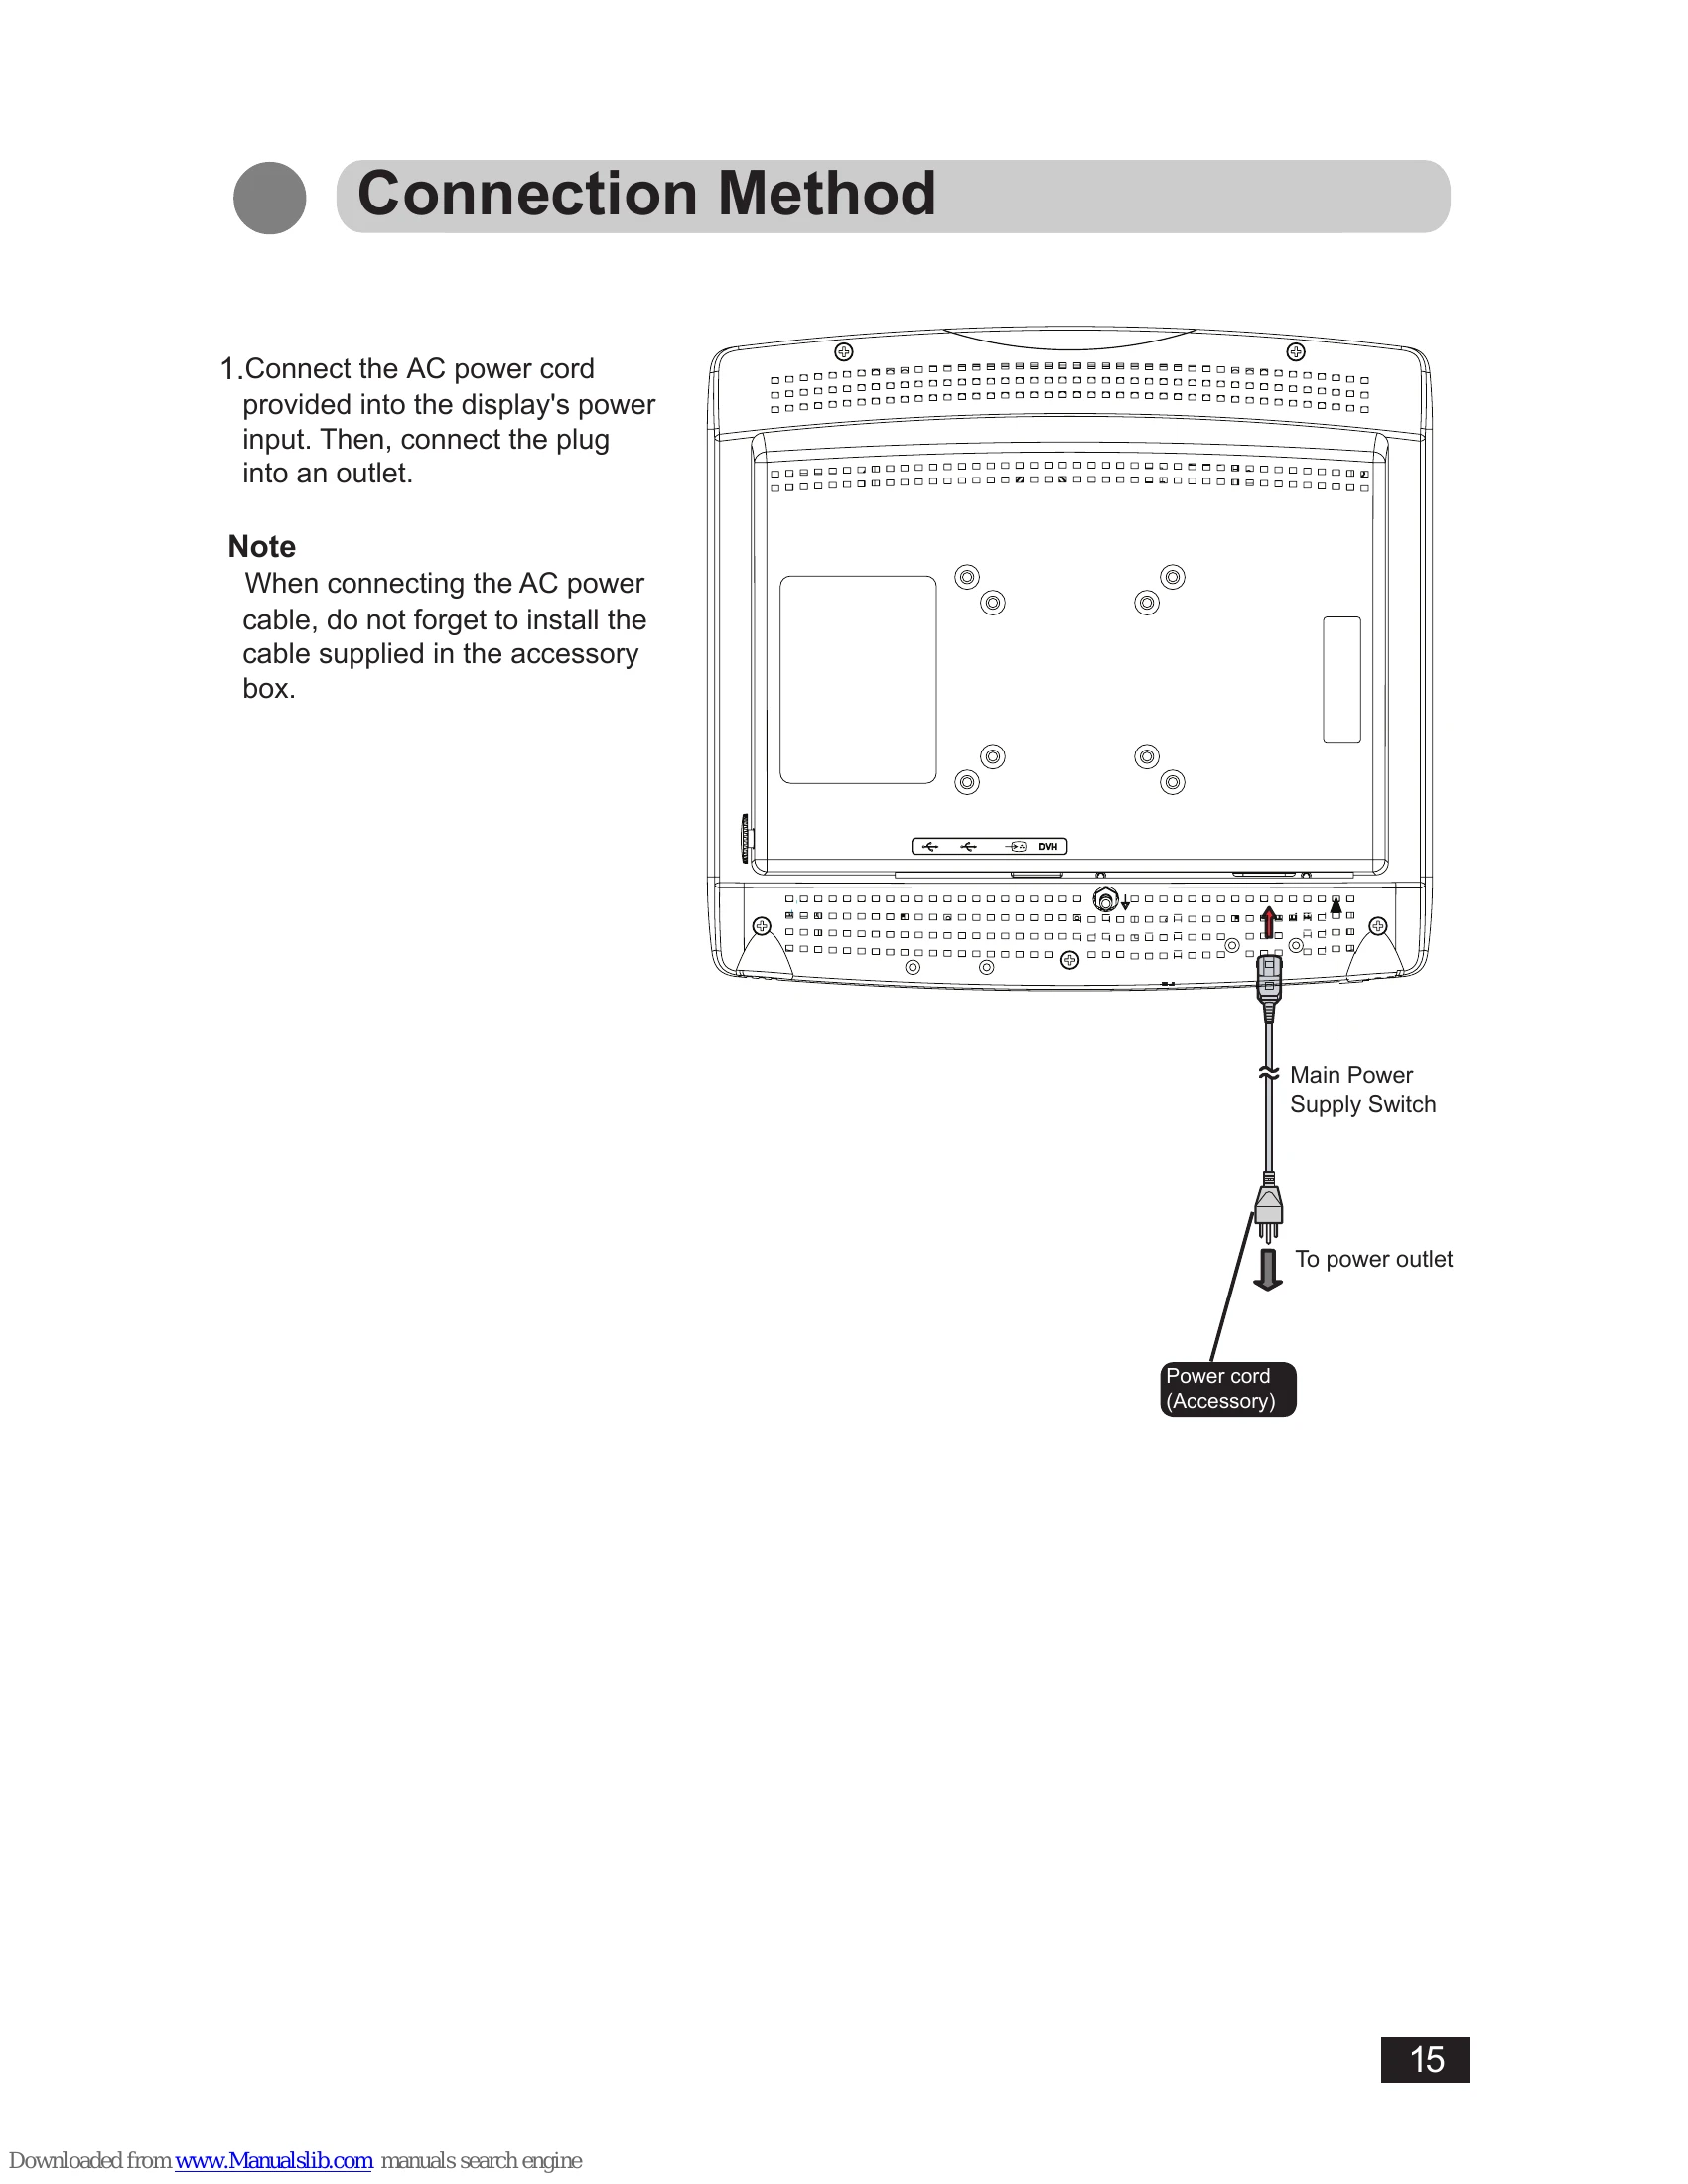
1. Connect the AC power cord to the display's power input and then to an outlet. Ensure the cable supplied in the accessory box is installed.
2. Connect the signal cable (DVI-I to DVI-D) between the display and the system's digital output. Tighten the cable screws. The default input is DVI-D; DVI-A can be selected if needed. If "NO SYNC" appears, check the video input.
3. Connect a USB Type A port from the system to the display's USB Type B port using the provided USB cable. Downstream USB ports are for accessories like keyboards or mice.
4. The display is equipped with a potential equalization connector.
5. For wall/ceiling mounting, use only UL-approved kits with M4*12mm screws. Ensure secure installation. VESA mounting is supported for 75mm x 75mm and 100mm x 100mm.
| OSD Error Messages | |
| NO SYNC | No video signal or incorrect input source saved. |
| No Support | Vertical refresh rate is too low or too high. |
| Out of Range | Horizontal refresh rate is too low or too high. |