Manual for 45231

Manual for 45231

Brand: GE

Category: Other

Document Type: Manual

Language: EN

Uploaded: Nov. 21, 2025, 6:40 p.m.

Manual Publish Date: null

Warranty Information

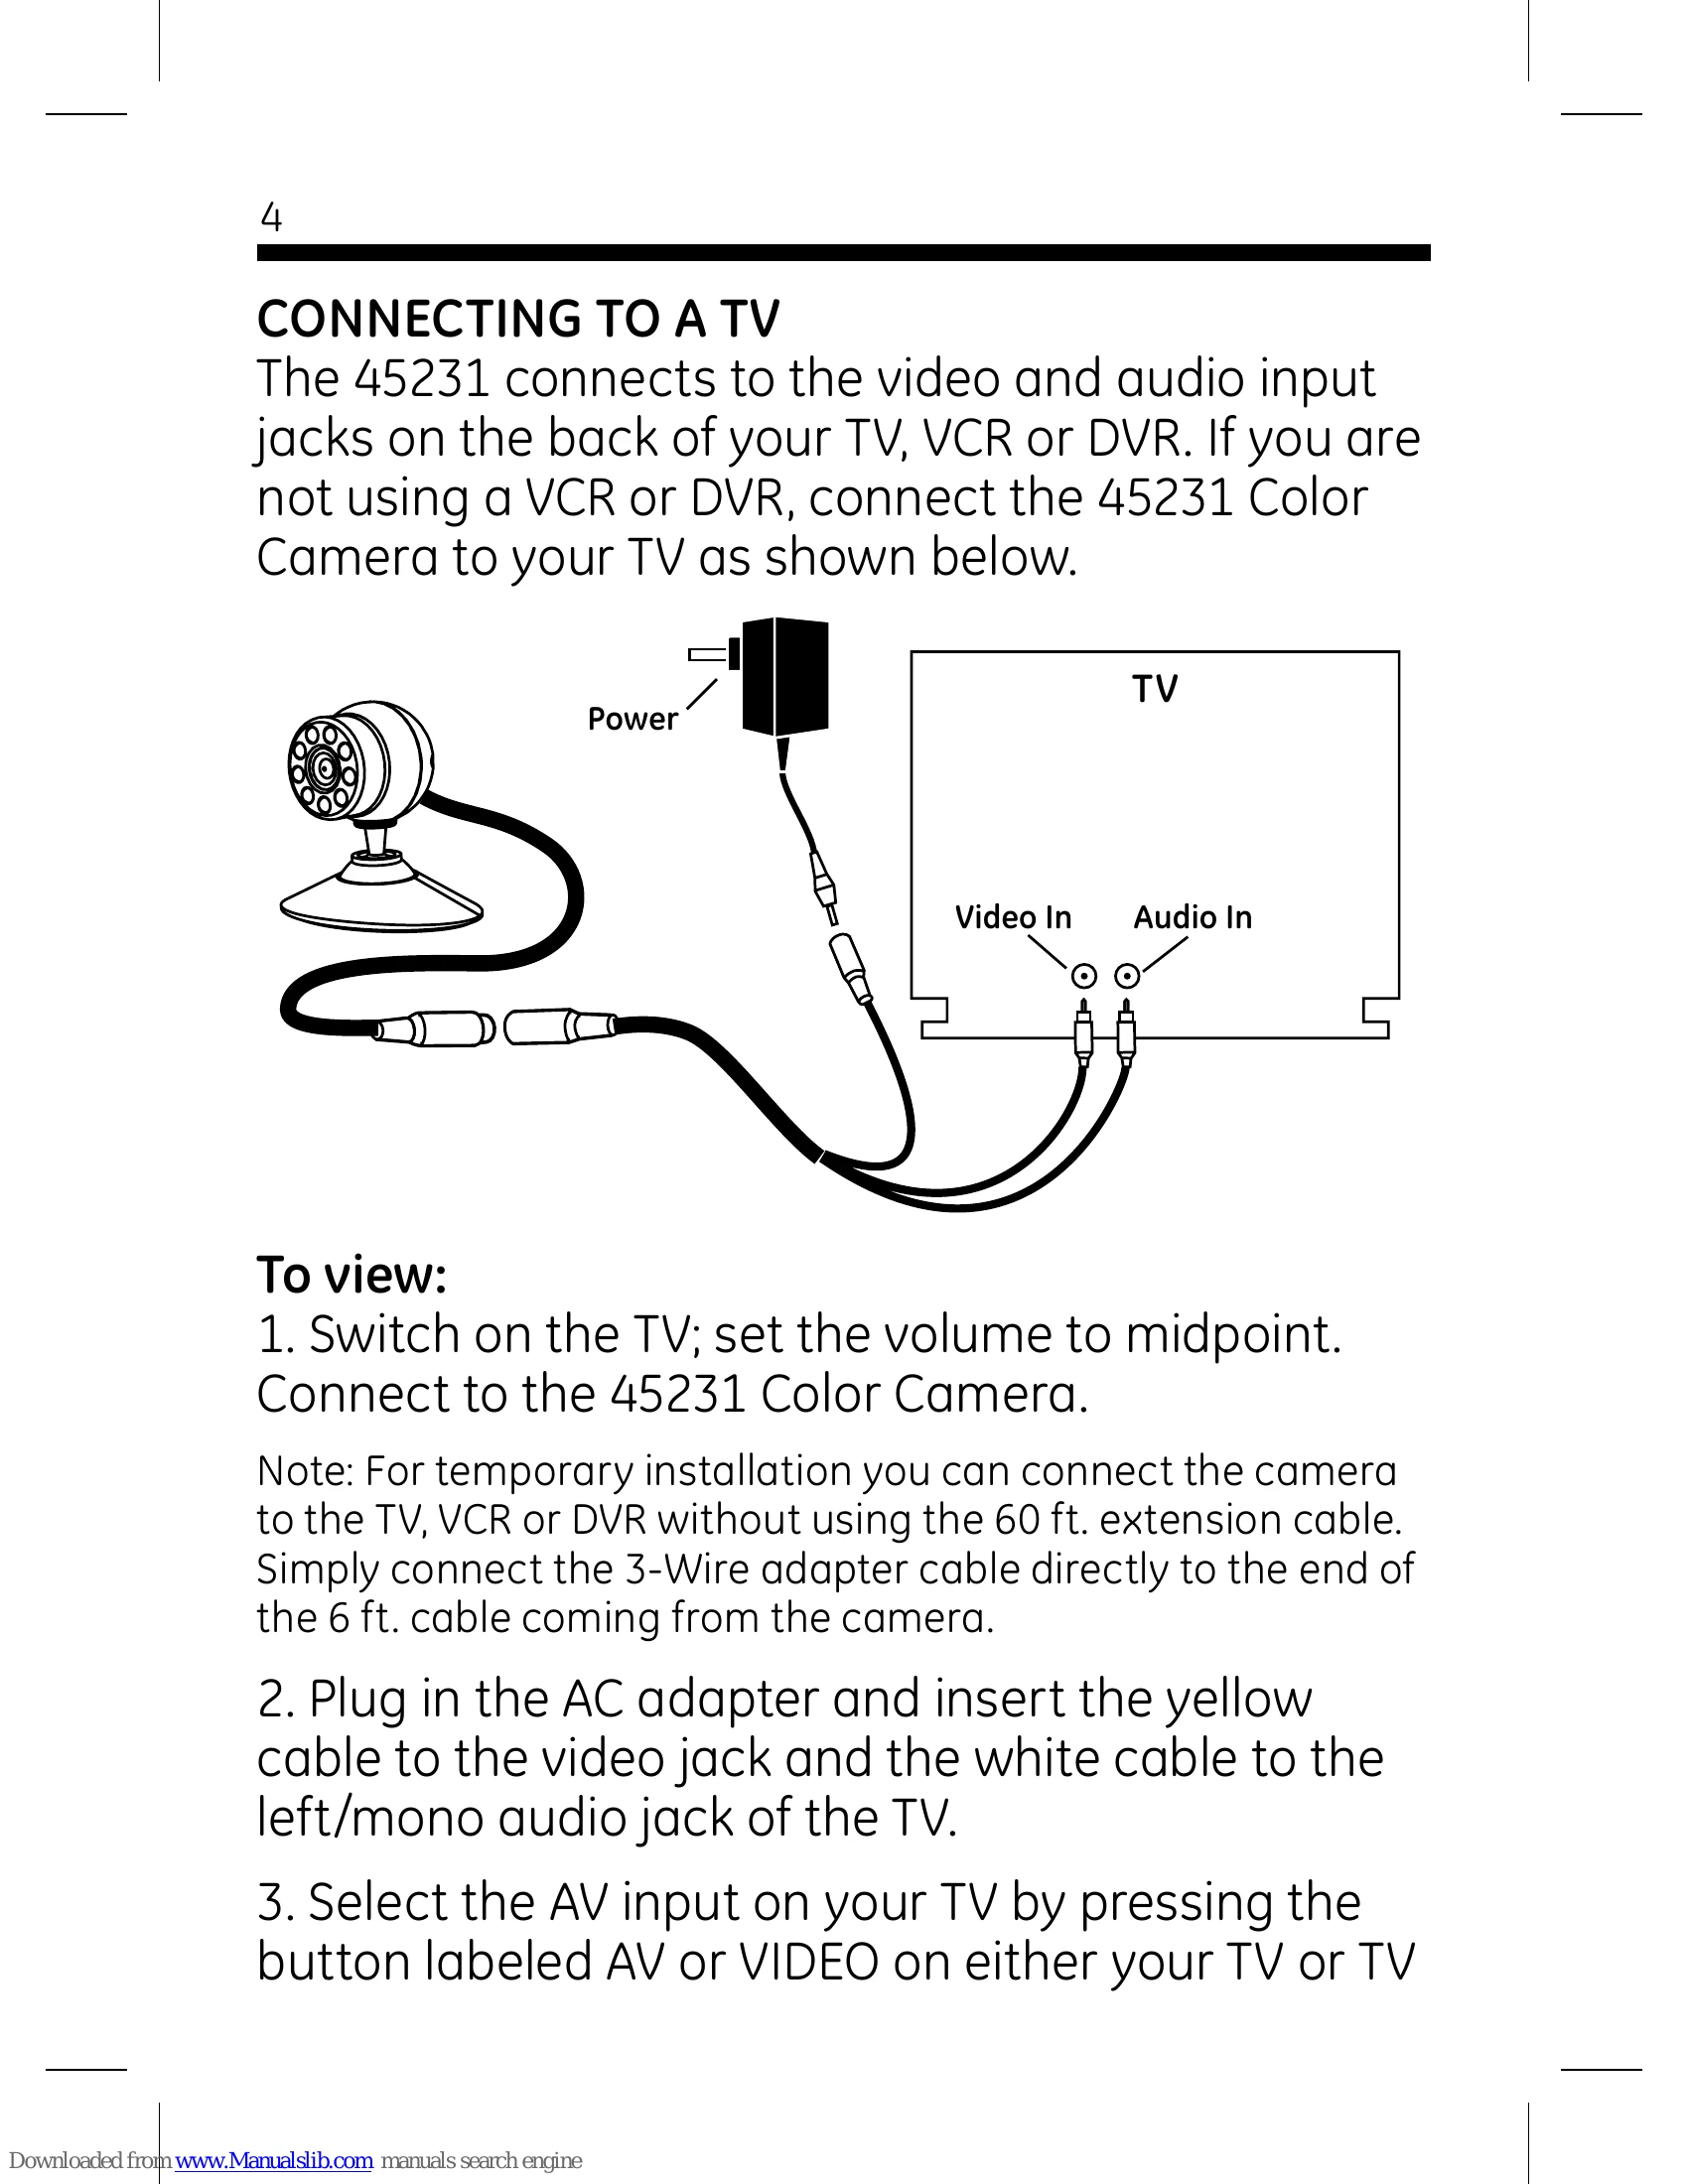
Warrants the product to be free from manufacturing defects for one year from the original date of consumer purchase.

\n

Connecting to a TV

\n
    \n
  1. Switch on the TV; set the volume to midpoint. Connect to the 45231 Color Camera.
  2. \n
  3. Plug in the AC adapter and insert the yellow cable to the video jack and the white cable to the left/mono audio jack of the TV.
  4. \n
  5. Select the AV input on your TV by pressing the button labeled AV or VIDEO on either your TV or TV remote control. You should now be able to see and hear the output from the camera.
  6. \n
\n

Connecting to a VCR or DVR

\n
    \n
  1. Switch on the TV and VCR or DVR; Connect the 45231 Color Camera to the VCR or DVR by connecting the 3-Wire adapter cable directly to the end of the 6 ft. cable coming from the camera. Plug in the AC adapter and insert the yellow cable to the video jack and the white cable to the left/mono audio jack.
  2. \n
  3. Select the VCR channel on your TV (3 or 4).
  4. \n
  5. Select the AV input on your VCR or DVR by pressing the button labeled AV or VIDEO on the VCR/DVR or on the VCR/DVR's remote control. You should now be able to see and hear the output from the camera.
  6. \n
\n

Installation

\n

Desktop Mount:

\n
    \n
  1. Place camera in desired location on a flat surface.
  2. \n
  3. Run the 60' cable from the camera's location to the location of the TV, VCR or DVR. Use the cable clips provided to keep the cable in place.
  4. \n
  5. Connect the camera cable to the TV, VCR or DVR by connecting the 3-Wire adapter cable to the end of the 60 ft. cable coming from the camera. Plug in the AC adapter. Insert the yellow plug to the video jack and the white plug to the left/mono audio jack on the TV, VCR or DVR.
  6. \n
  7. Switch on the power to the TV, VCR or DVR. Select appropriate AV input on TV, VCR or DVR.
  8. \n
  9. Adjustments can now be made to the camera viewing angle by rotating the camera head or desktop mount.
  10. \n
\n

Wall Mount:

\n
    \n
  1. Disconnect the camera's cable.
  2. \n
  3. Unscrew the camera from the desktop base and screw on to the wall mount bracket.
  4. \n
  5. Drill three 1/8\" holes in mounting location and insert wall anchors provided. Position wall bracket over the anchors and install screws, or screw directly into a stud.
  6. \n
  7. Run the 60' cable from the camera's location to the location of the TV, VCR or DVR. Use the cable clips provided to keep the cable in place.
  8. \n
  9. Connect the camera cable to the TV, VCR or DVR by connecting the 3-Wire adapter cable to the end of the 60 ft. cable coming from the camera. Plug in the AC adapter. Insert the yellow plug to the video jack and the white plug to the left/mono audio jack on the TV, VCR or DVR.
  10. \n
  11. Adjustments can now be made to the camera viewing angle by loosening the adjustment knob and tilting and rotating the camera head.
  12. \n
\n
"}
Privacy Policy