Installation Guide for JKS10, JKP30, JKP35, JKP55, JKP70, JKP75, PK916, PK956, ZEK938, ZEK958, JTP30, JTP35, JTP55, JTP70, JTP75, PT916, PT920, PT956, PT960, ZET938, ZET958

Installation Guide for JKS10, JKP30, JKP35, JKP55, JKP70, JKP75, PK916, PK956, ZEK938, ZEK958, JTP30, JTP35, JTP55, JTP70, JTP75, PT916, PT920, PT956, PT960, ZET938, ZET958

Brand: GE

Category: Oven

Document Type: Installation Guide

Language: EN

Uploaded: Nov. 21, 2025, 7:06 p.m.

Warranty Information

Refer to the Owner's Manual for specific warranty details. Improper installation is not covered under warranty.
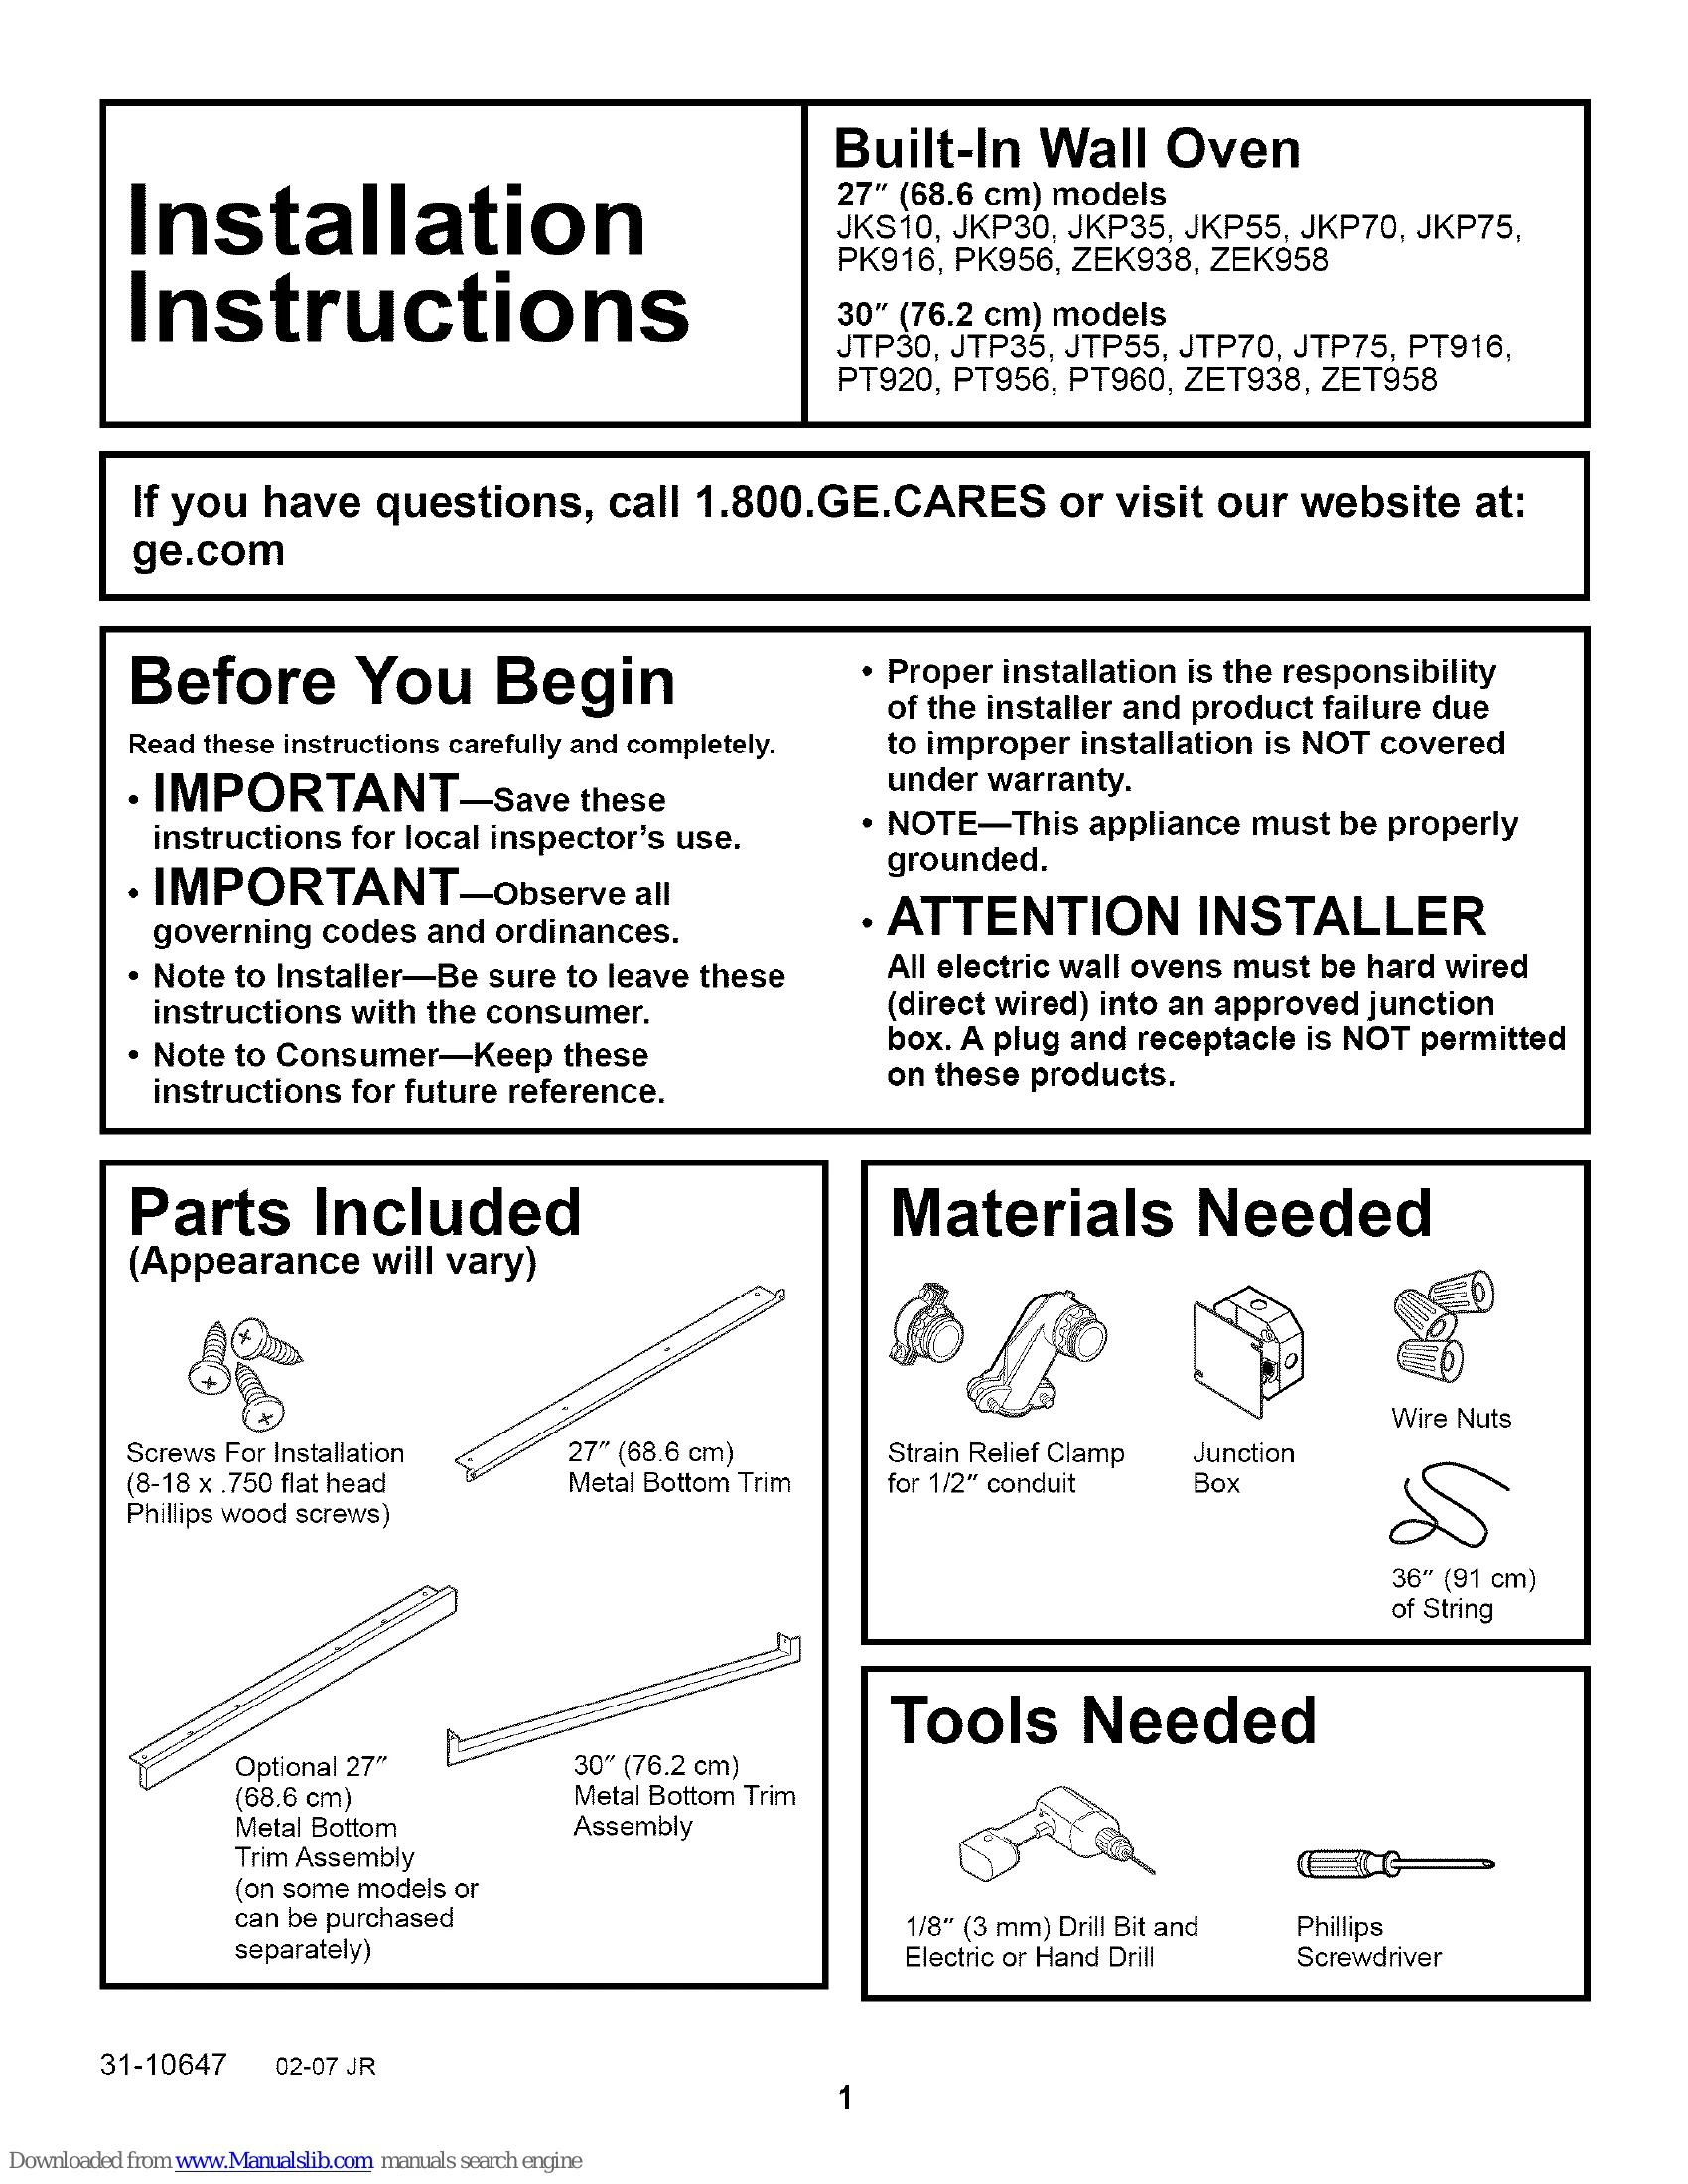
Before You Begin:

  • Read all instructions carefully.
  • Save instructions for inspector's use and future reference.
  • Ensure proper installation by a qualified technician.
  • Verify appliance is properly grounded.
  • ATTENTION INSTALLER: All electric wall ovens must be hard-wired into an approved junction box. Plugs and receptacles are NOT permitted.

Electrical Requirements:

  • Appliance must be supplied with proper voltage and frequency, connected to a properly grounded branch circuit protected by a circuit breaker or fuse.
  • Refer to the rating plate on the oven frame for specific electrical requirements.
  • A chart is provided to determine the minimum recommended dedicated circuit protection based on KW rating.
  • Local electrical codes must be followed.
  • Use a three-wire, single-phase A.C. 208Y/120 Volt or 240/120 Volt, 60 hertz electrical system.
  • If connecting to aluminum wiring, use approved connectors.

Cabinetry Preparation:

  • Specific cutout dimensions are provided for 27" and 30" single and double built-in ovens, including dimensions for under-counter installations and installations over a warming drawer or Advantium.
  • Ensure cabinet can support the weight of the oven.
  • If the cabinet lacks a solid bottom, braces or runners must be installed.

Installation Steps:

  • Remove packaging materials and check for any shipping screws.
  • Door removal is optional but can aid installation. Handle the heavy door with care.
  • Slide the oven into the opening, ensuring conduit is properly routed.
  • Drill pilot holes and secure the oven to the cabinet with screws.
  • Install the bottom trim.
  • Replace the oven door, ensuring hinges are properly seated and locked.

Electrical Connections:

  • Turn off power at the circuit breaker or fuse.
  • Connect flexible conduit to the junction box using an appropriate strain relief clamp.
  • Follow instructions for either a four-conductor or three-conductor branch circuit connection, depending on new construction requirements or local codes.
  • Use proper connectors for aluminum wiring if applicable.

Final Checks:

  • Pre-test checklist includes removing protective film, checking wiring, verifying trim and mounting screw installation.
  • Operation checklist includes checking for items inside the oven, conduit connection, power, and circuit breaker status.
Privacy Policy