Brand: GE
Category: Refrigerator
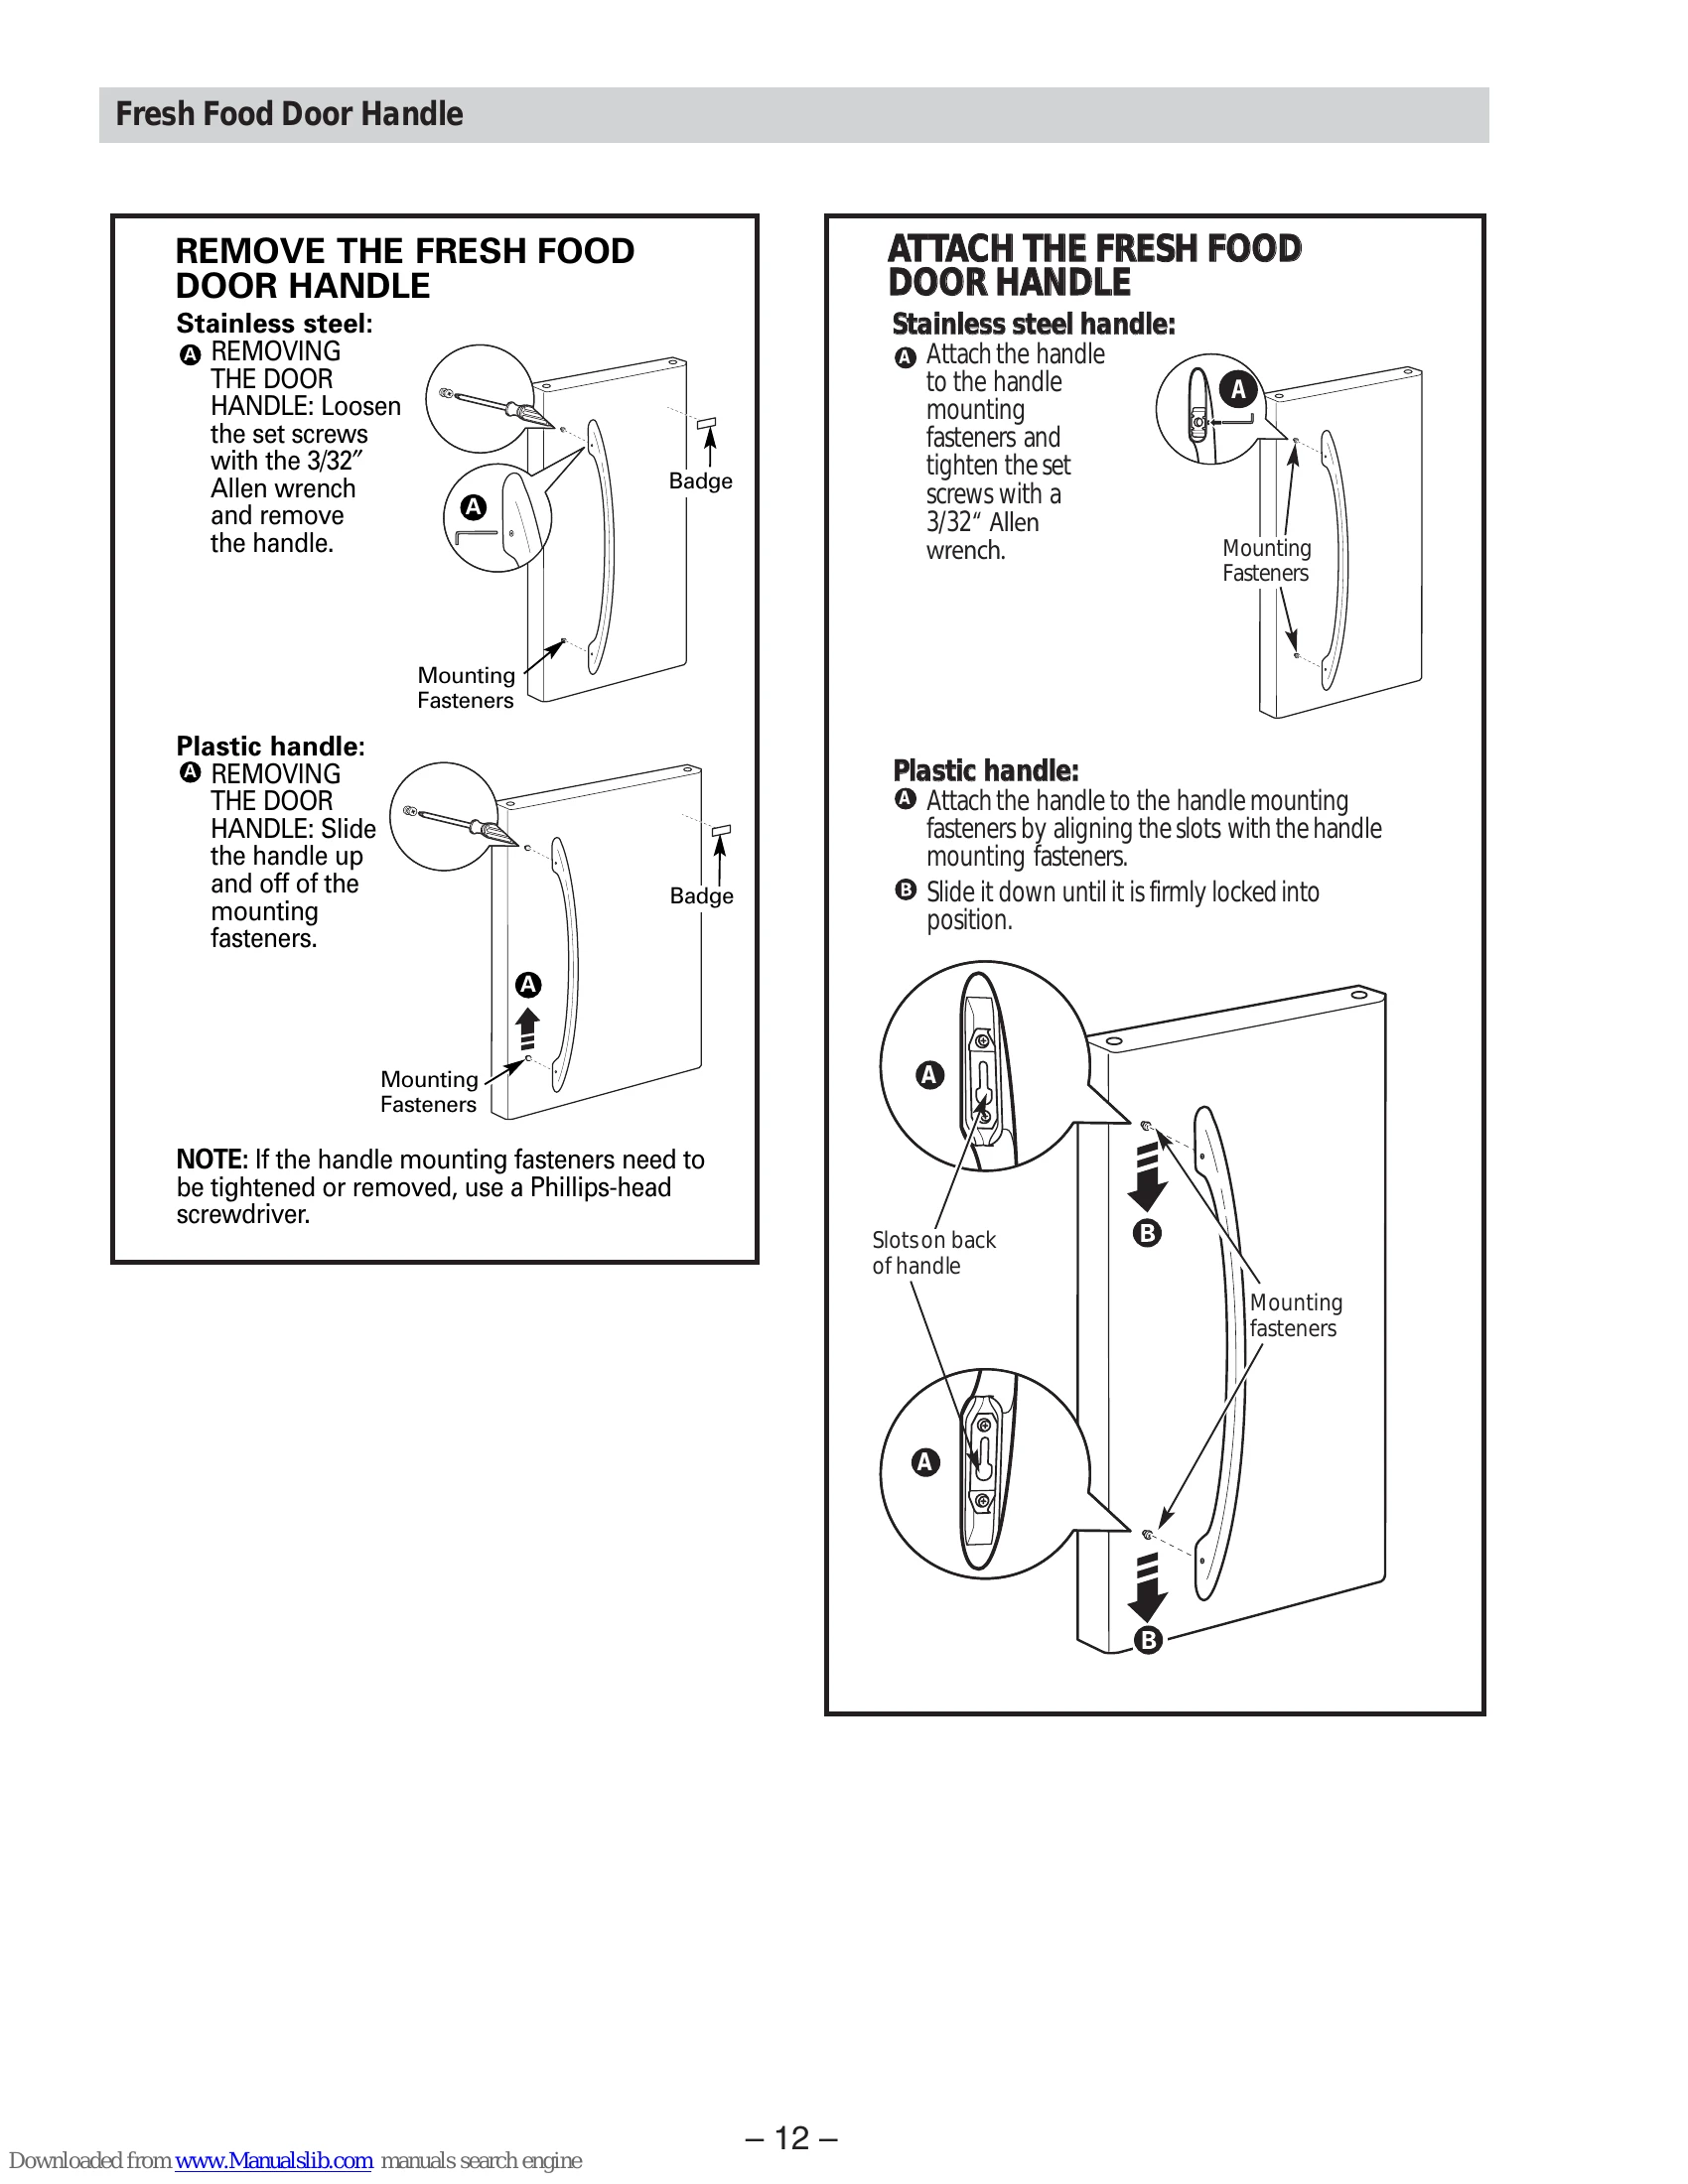
Document Type: Parts/Service
Language: EN
Brand: GE
Category: Refrigerator
Document Type: Parts/Service
Language: EN
Uploaded: Nov. 21, 2025, 8:20 p.m.
Manual Publish Date: 2008-03-01
GE offers a one-year warranty on parts and labor for the refrigerator and a five-year warranty on the sealed refrigerating system for GE Profile models.
The temperature controls are preset in the factory at 38°F for the refrigerator compartment and -2°F for the freezer compartment. Allow 24 hours for the temperature to stabilize to the preset recommended settings.
The temperature controls can display both the SET temperature as well as the actual temperature in the refrigerator and freezer. The actual temperature may vary slightly from the SET temperature based on usage and operating environment.
To change the temperature, press and release the ADJUST FREEZER or ADJUST REFRIGERATOR pad. The display will show the actual temperature. To change the temperature, tap either the ADJUST FREEZER or ADJUST REFRIGERATOR pad until the desired temperature is displayed.
Once the desired temperature has been set, the temperature display will return to the actual refrigerator and freezer temperatures after 10 seconds. Several adjustments may be required. Each time you adjust controls, allow 24 hours for the refrigerator to reach the temperature you have set.
| LED | Item | Trouble Contents | Diagnostic Method |
|---|---|---|---|
| R-1-@ | Icemaker Sensor Error | Display error: separation of sensor housing part, contact error, disconnection, short circuit | When checking the voltage of MAIN PCB CN90 #3 to CN90 #4: should be between 4.5 to 1.0V. |
| R-1-6 | Refrigerator Sensor Error | Display error of detecting temperature of sensor: more than 149°F(+65°C) or less than -58°F (-50°C) | When checking the voltage of MAIN PCB CN30 #6 to CN75 #1: should be between 4.5 to 1.0V. |
| R-1-C | Refrigerator Defrost Sensor Error | When checking the voltage of MAIN PCB CN #7 to CN75 #1: should be between 4.5V to 1.0V. | |
| R-1-d | Refrigerator Fan Error | Display error during operation of fan motor: feed back signal line contact error, separation of motor wire, motor error | Voltage of MAIN PCB CN75 orange to gray should be between 7v to 12V. |
| R-1-e | Icemaker Error | Display error: ice making kit is harvested more than 3 times and level error. Note: Apply to the applicable icemaker model. | After replacing icemaker, check the operation by turning the appliance ON again. |
| R-1-g | Refrigerator Defrost Error | Display error: separation of fresh food compartment defrost heater housing part, contact error, disconnection, short circuit or temperature fuse error | After separating MAIN PCB CN70, CN71, from PCB, check the resistance value between CN70 white to CN71 orange. It should be 102 ohms ±7%. (Resistance value is varied by the input power.) Check 0 ohm: heater short, ∞ ohm: wire/bimetal open. |
| F-1-a | Ambient Sensor Error | Display error: sensor housing separation, contact error, disconnection, short circuit | Check the voltage of MAIN PCB CN32 #1 to #4. It should be between 4.5V to 1.0V. |
| F-1- | Freezer Sensor Error | Display error by detecting temperature of sensor: more than 149°F (+65°C) or less than -58°F (-50°C) | Check the voltage of MAIN PCB CN30 #3 to CN75 #1. It should be between 4.5V to 1.0V. |
| F-1-C | Defrost Sensor Error | Check the voltage of MAIN PCB CN30 #4 to CN75 #1. It should be between 4.5V to 1.0V. | |
| F-1- | Freezer Fan Error | Display error during operation of fan motor: feed back signal line contact error, motor wire separation, motor error | Voltage of MAIN PCB CN75 yellow to gray should be between 7V to 12V. |
| F-1-e | Condenser Fan Error | Display error during operation of fan motor: feed back signal line contact error, motor wire separation, motor error | Voltage of MAIN PCB CN75 sky blue to gray should be between 7V to 12V. |