Brand: HITACHI
Category: Digital Camera
Document Type:
Language: EN
Brand: HITACHI
Category: Digital Camera
Document Type:
Language: EN
Uploaded: Aug. 9, 2025, 11:48 p.m.
Return faulty item to Argos with proof of purchase for repair/replacement.
1. Attach the camera strap.
2. Open the battery cover.
3. Load the batteries with correct orientation as shown.
4. Close the battery cover and make sure it is locked securely.
5. Insert an SD/SDHC memory card (Optional).
Load the batteries and insert an SD/SDHC memory card before starting.
Press the POWER button until the digital still camera turns on.
To turn the power off, press the POWER button again.
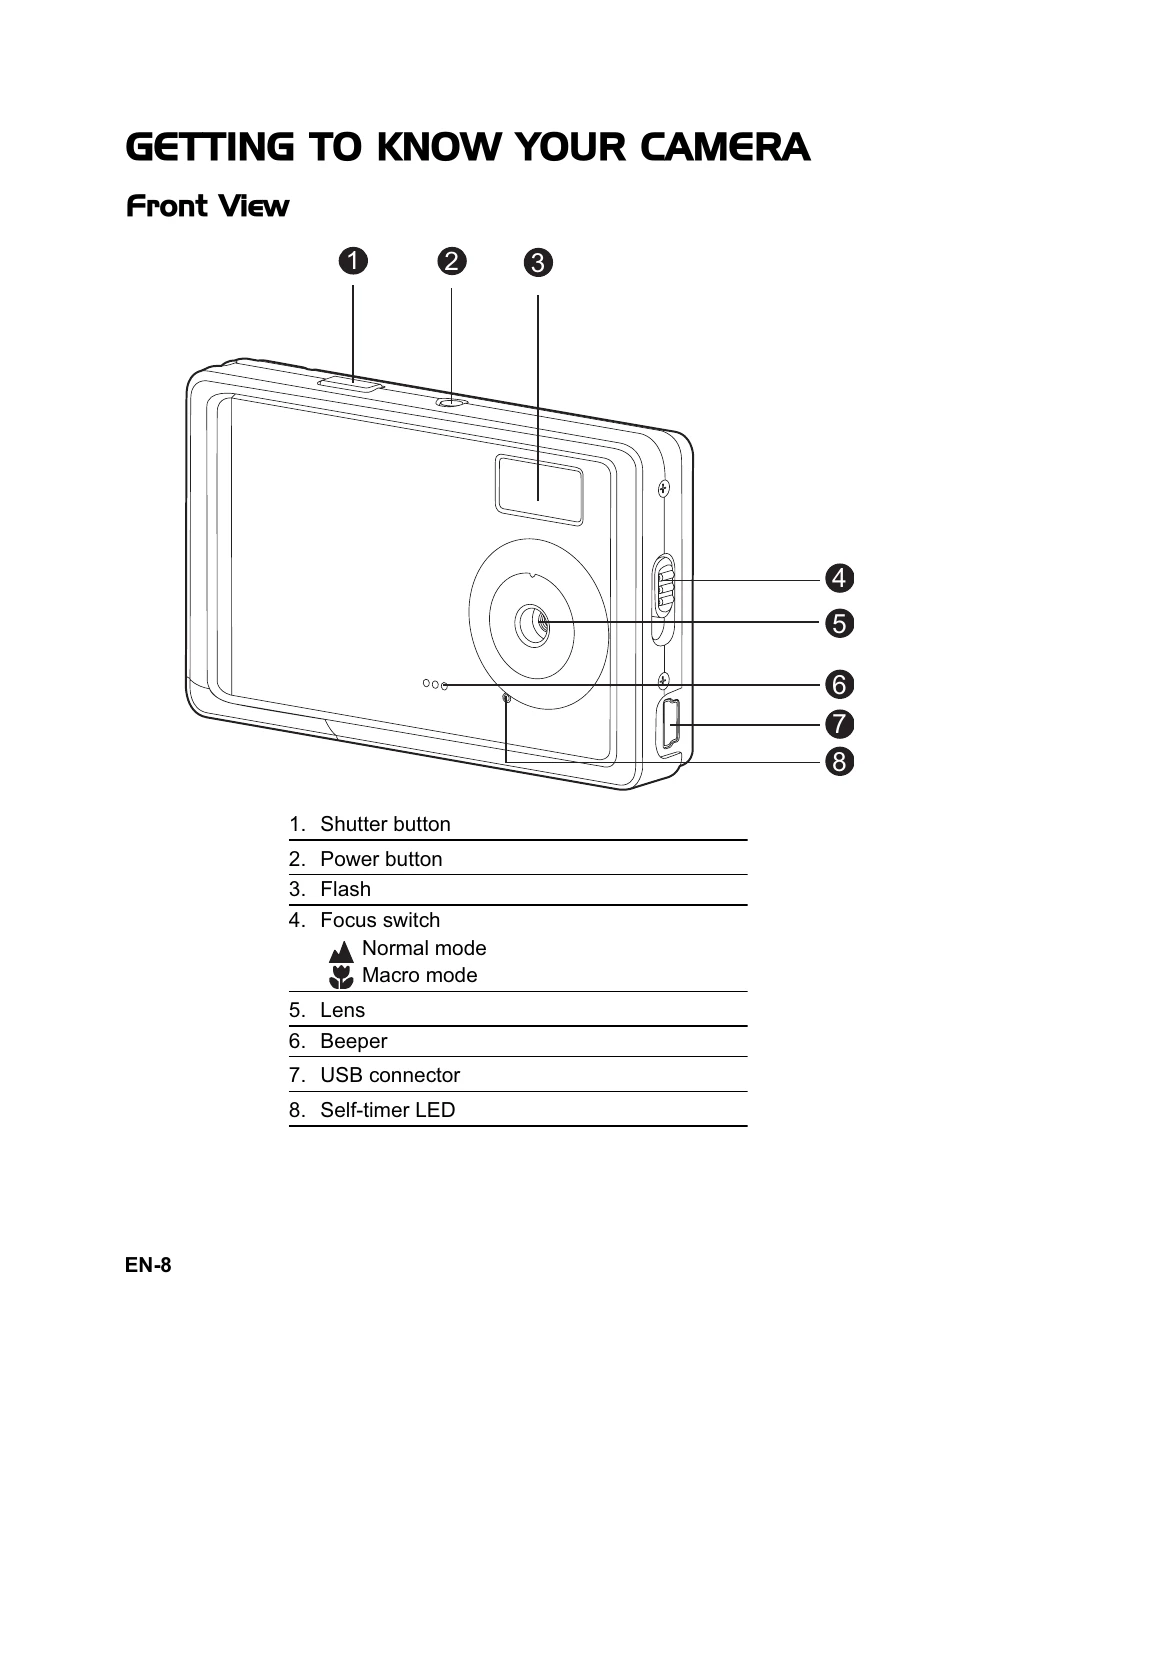
Your camera is equipped with a 2.48" full color LTPS-TFT LCD monitor to help you compose images, playback recorded images/video clips or adjust menu settings.
1. Press the Power button to turn the power on.
2. Compose the image on the monitor screen so that the main subject is within the focus frame.
3. Press the shutter button to capture the image.
You can select the scene mode according to the shooting scene. There are 6 available modes in this scene mode.
[A] Auto: Select this mode to adjust point-and-shoot action.
[X] Sport: Select this mode when you want to photograph fast-moving subjects.
[] Night: Select this mode when you want to capture dark scenes such as night views.
[] Portrait: Select this mode when you want to capture an image that makes the person stand out against a defocused (blurred) background.
[] Landscape: Select this mode to capture an image with infinity focus, hard sharpness and high saturation.
[] Backlight: Select this mode when you want to capture images as the light comes from behind the object.
1. Press the MENU button.
| Symptom | Cause | Solutions / Corrective Actions |
|---|---|---|
| The power does not come on. | The batteries are not loaded. | Load the batteries correctly. |
| The batteries or camera feels warm. | The batteries are exhausted. | Replace with a new set of batteries. |
| The start-up screen blinks after powering up. | Long period of continuous use of the camera or the flash. | Replace with a new set of rechargable batteries. |
| Even if I press the shutter button, the camera does not shoot. | The shutter button is not pressed all the way down. | Press the shutter button all the way down. |
| The internal memory or memory card does not have any free capacity. | Insert a new memory card, or delete unwanted files. | |
| The flash is charging. | Wait until the status LED turns green. | |
| The camera cannot focus. | The memory card is write-protected. | Remove the write-protection. |
| The lens is dirty. | Wipe clean with a soft, dry cloth or lens paper. | |
| Files cannot be deleted. | The distance to the subject is smaller than the effective range. | Get your subject within the effective focus range. |
| The file is protected. | Cancel protection. | |
| The memory card is write-protected. | Remove the write-protection. | |
| Cannot download images. | The free space on the hard disk in your computer may be insufficient. | Check whether the hard disk has a space for running Windows, and if the drive for loading image files has a capacity at least that of the memory card inserted in the camera. |