Installation Overview
This guide provides step-by-step instructions for installing the Hitachi Virtual Storage Platform E590 and E790 storage systems. The process includes unpacking, rack mounting, connecting power, cabling the management console, powering on the system, initial setup via a management console, configuring network settings, setting up notifications, connecting to hosts, registering with support, and installing the Hitachi Remote Ops monitoring system.
- Step 1: Unpack the storage system: Inspect for damage, open boxes, and verify contents against the packing list.
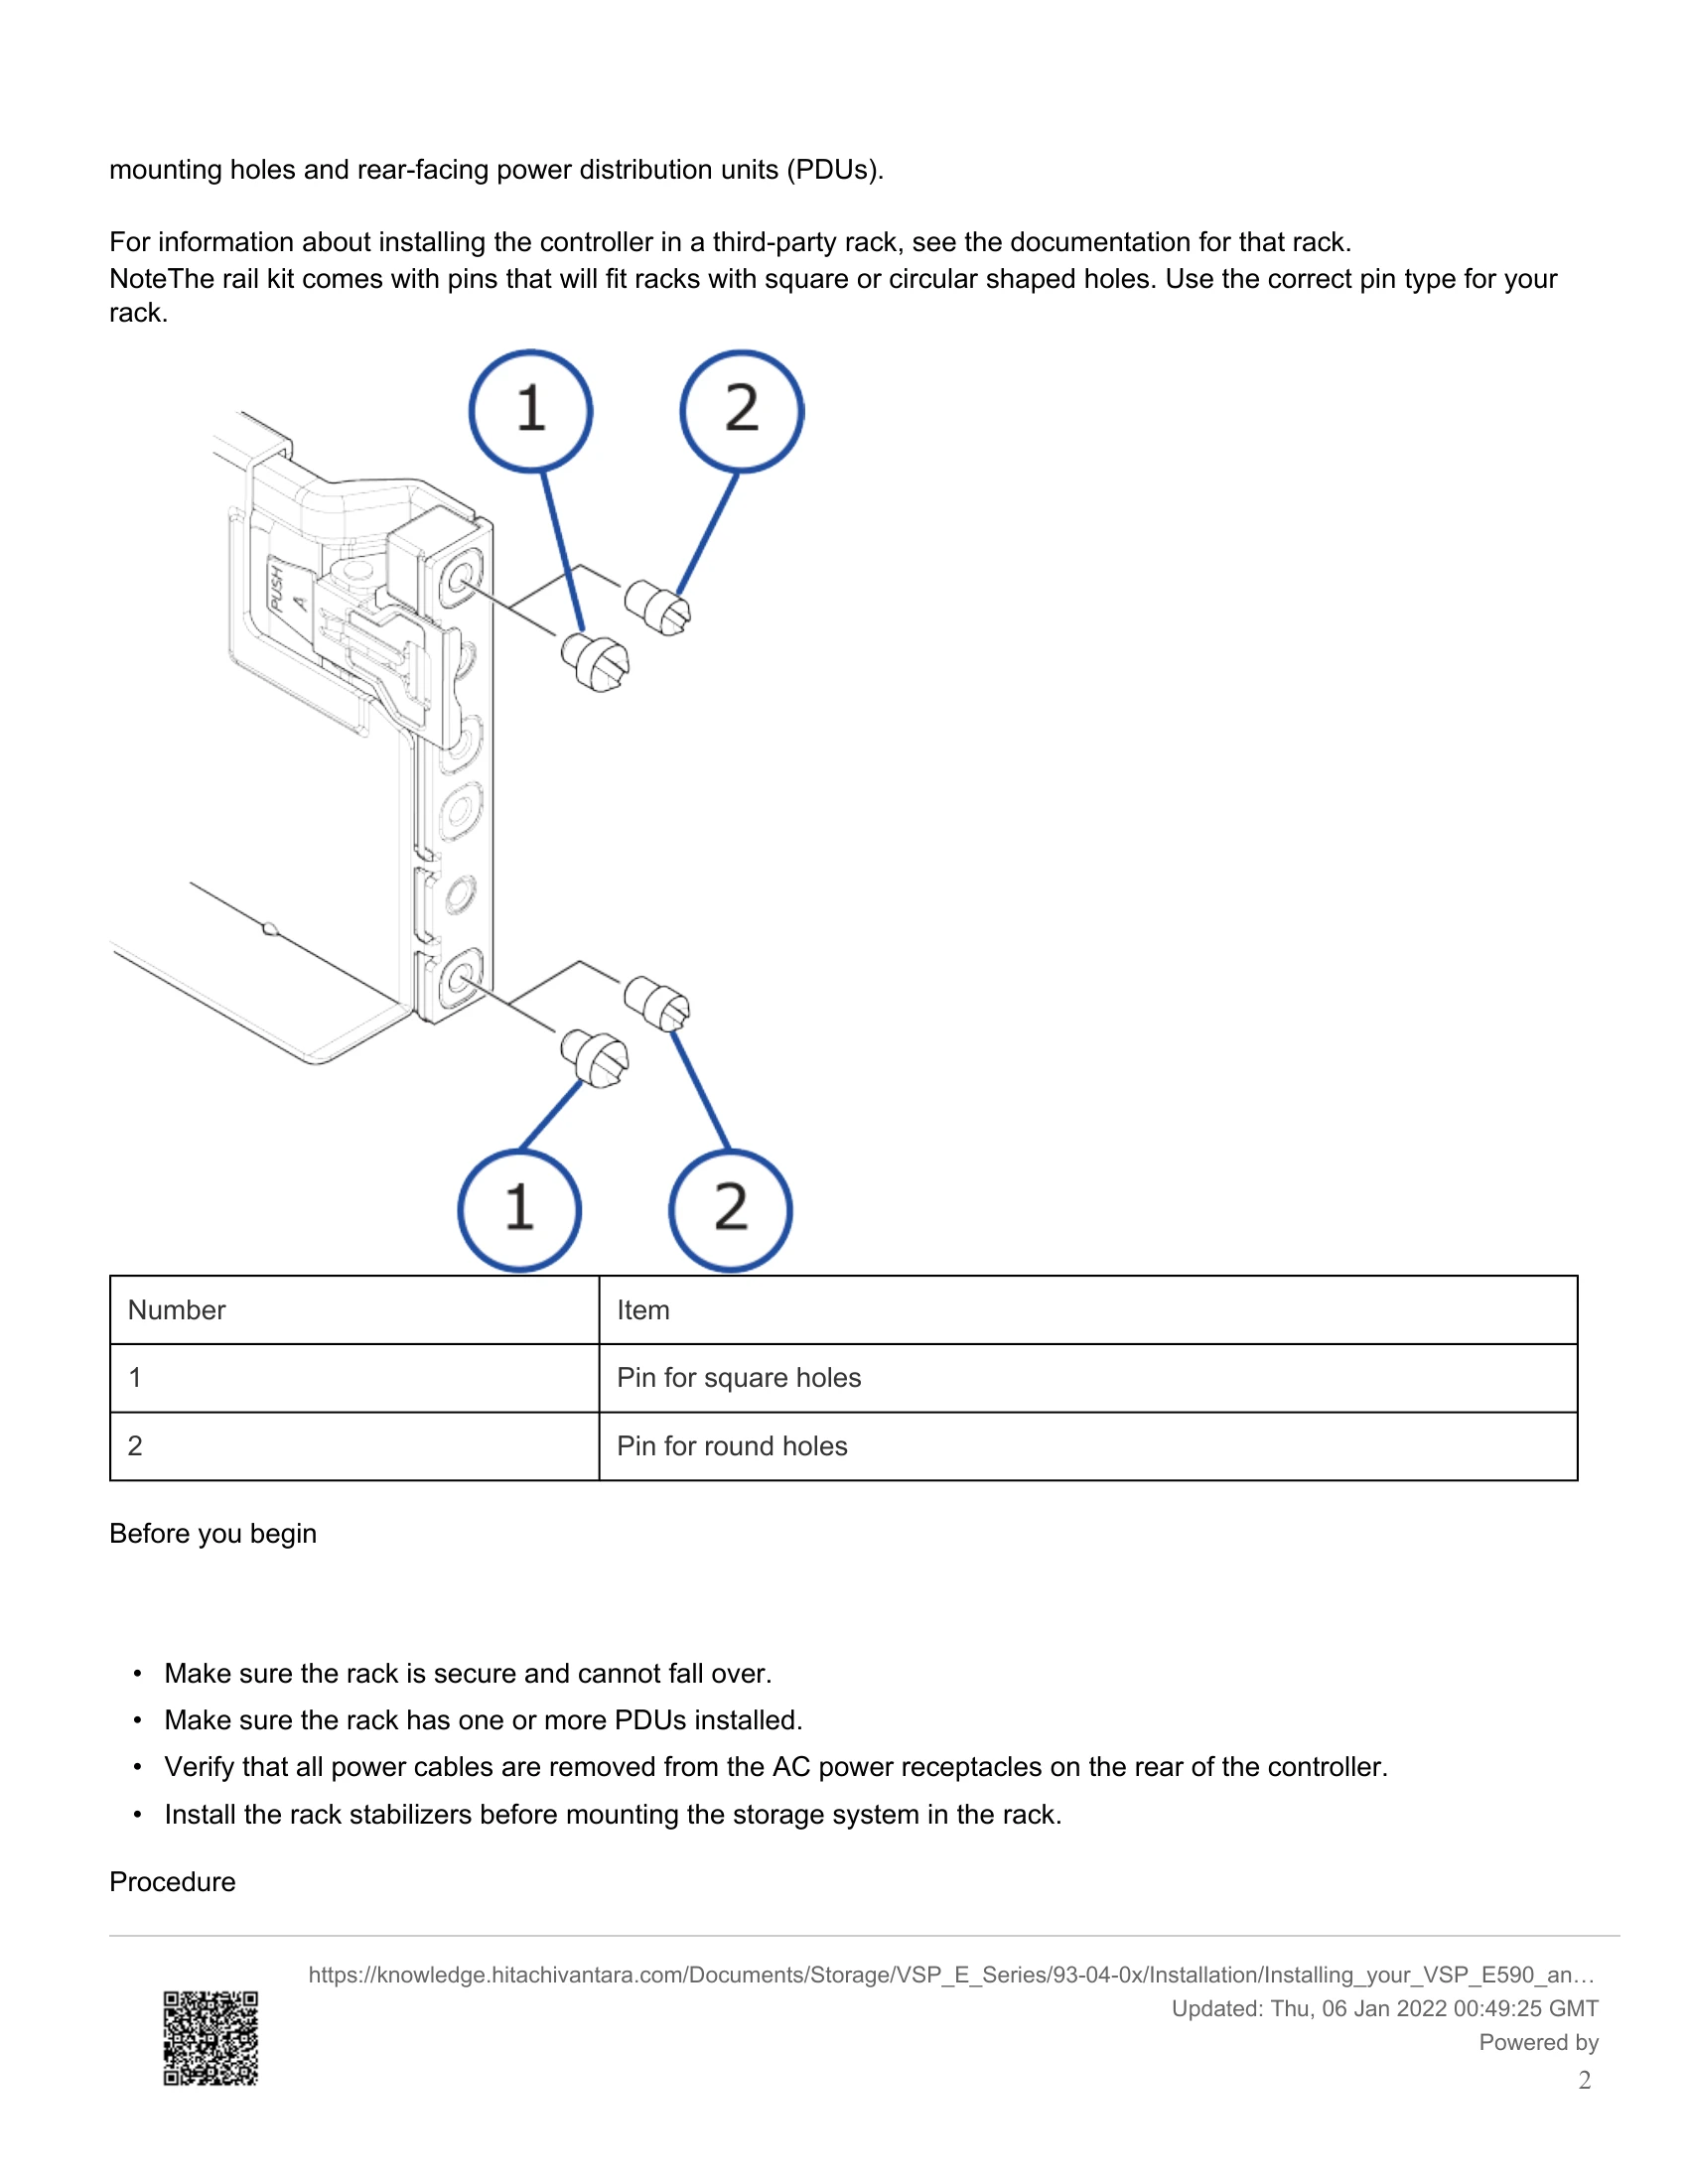
- Step 2: Install the storage system into the rack: Mount the controller into a compatible rack using the provided rail kit.
- Step 3: Connect the storage system to power: Ensure redundant power connections to independent PDUs and external power sources.
- Step 4: Cable the management console: Connect a management PC to the controller via an Ethernet cable.
- Step 5: Power on the storage system: Power on the PDUs and then the controller.
- Step 6: Perform the initial setup: Use the management console to configure system information, date/time, and network settings.
- Step 7: Make host connections: Connect Fibre Channel or iSCSI ports to hosts.
- Step 8: Register your storage system: Register the system on the Hitachi Vantara Support Website.
- Step 9: Install Hitachi Remote Ops monitoring system: Install the monitoring system for service notifications.