Brand: Honeywell
Category: Camera
Document Type: Manual
Language: EN
Brand: Honeywell
Category: Camera
Document Type: Manual
Language: EN
Uploaded: Nov. 21, 2025, 6:16 p.m.
None
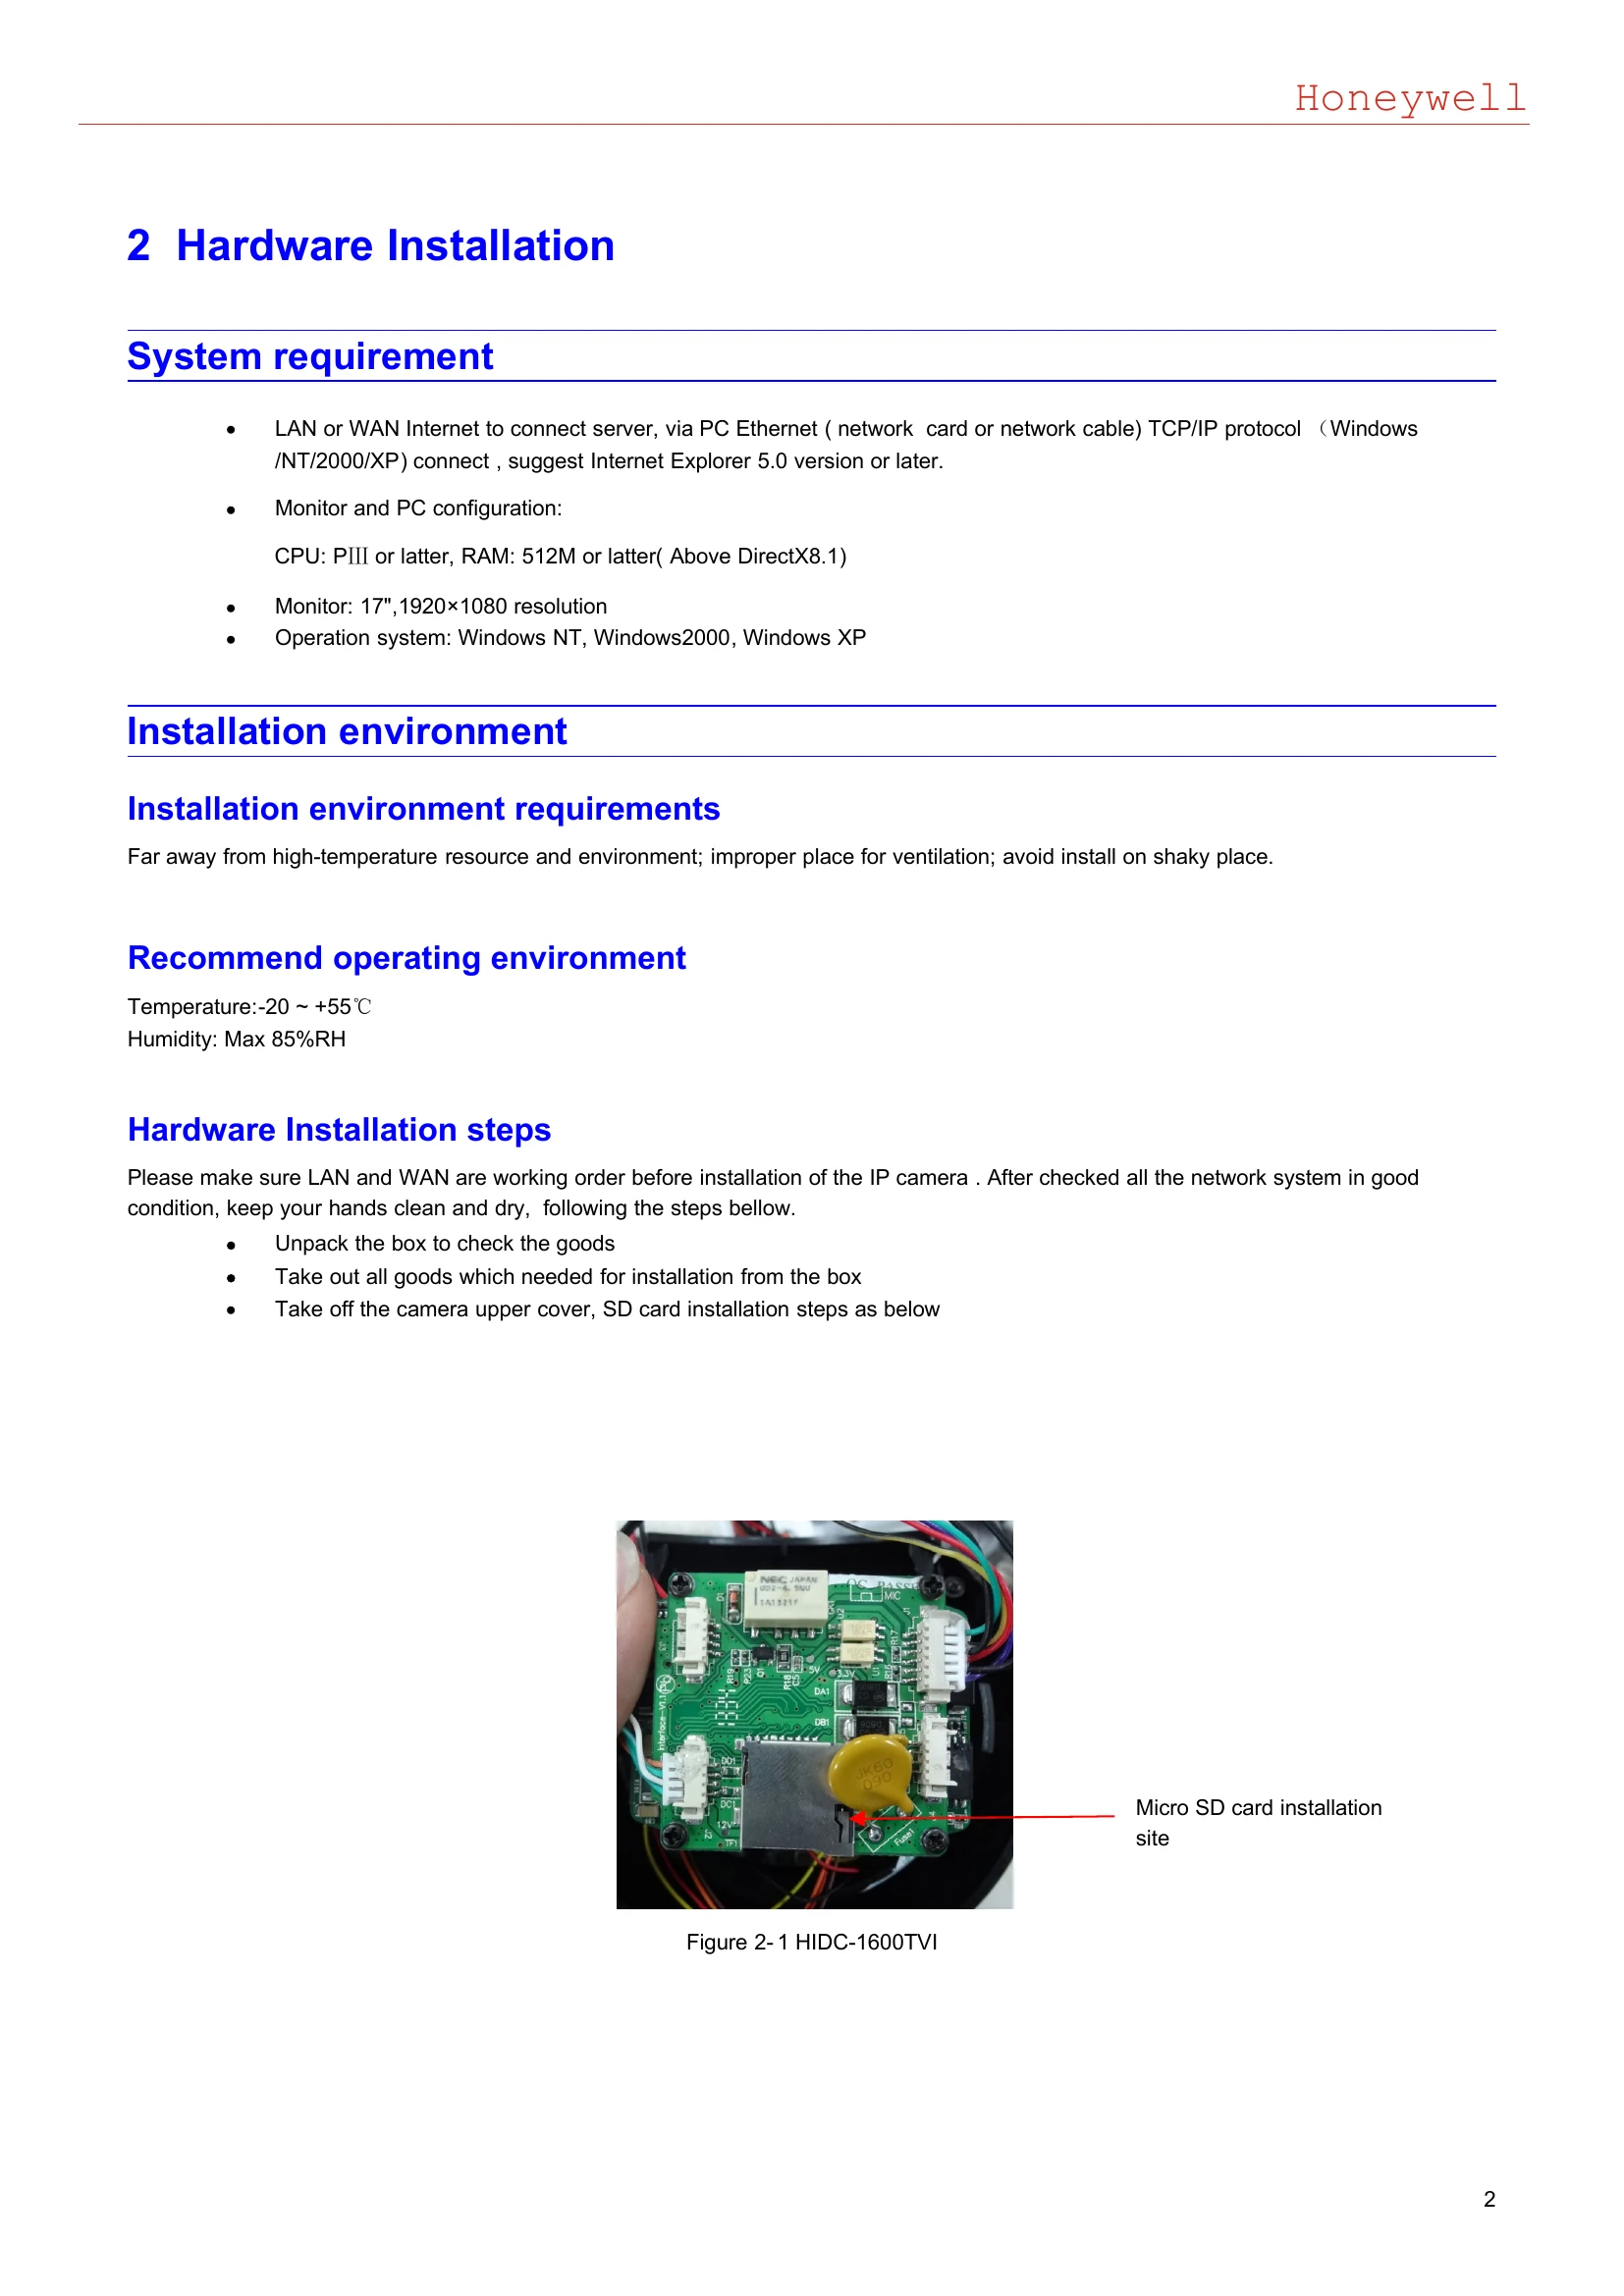
This manual details the setup, operation, and maintenance of the Honeywell HD Network IR Dome Camera (HIDC-1600TVI/HIDC-2600TVI).
| Problem | Possible Reason | Solution |
|---|---|---|
| No video image displayed in IE browser | ActiveX not installed | Install ActiveX when visiting IP camera for the first time via Internet Explore. |
| Fail to visit IP camera via IE after upgrade | Browser cache | Delete the caching of Browser. Open IE, click Tool, select "Internet Options", click "delete files" button in "Internet temporary files", select "delete all offline contents", click OK and re-log in IP camera. |
| The images do not flow | Frame rate is too low | Increase the video frame rate. |
| Too many users are viewing the images | Block some clients or reduce the video frame rate. | |
| Bandwidth is low | Reduce video frame rate or video compression bit rate. | |
| Fail to visit IP camera via IE browser | Network is disconnected | Connect your PC to network, checking whether it works properly or not. Check whether there is cable failure or network failure caused by PC virus, until PCs can be connected with the command of Ping. |
| IP Address has been occupied by other devices | Stop the connection between IP camera and Network, hook up IP camera to PC separately, reset IP address according to the proper operations recommended. | |
| IP addresses are in different subnets | Check IP address, subnet masking address of the DVS and the settings of Gateway. | |
| Physical address of network conflict with IP camera | Modify the physical address of IP camera. | |
| Web port has been modified | Contact Network Administrator to obtain related information. | |
| The color of images is abnormal (green or other colors) | Graphics Cards difference | Run the programme Config.exe (or run C:\windows\system32\Config.exe) to set the following parameters of display buffer: auto-detection, used display card memory or system memory, then reopen IE and connect IP camera. |
| There is no sound while monitoring | No audio input connection | Check audio connection of the host. |
| The audio option of IP camera is off | Check audio parameter settings to see if you have opened the audio. | |
| Search NVS software cannot find device | Firewall forbids multicast data packet | Disable the firewall. |
| Image processing doesn't work properly | System issue, DirectX function is disabled | Install DirectX image drive, then Start Run input "Dxdiag" order. Enable DirectDraw speedup, Direct3D speedup, AGP veins speedup in DirectX function. If they cannot be enabled, that means DirectX installation fails or hardware not supportive. |
| Hardware issue, graphics card doesn't support image acceleration and hardware zooming functions. | Replace graphics card. |