Brand: HP
Category: Computer
Document Type: Parts/Service
Language: EN
Brand: HP
Category: Computer
Document Type: Parts/Service
Language: EN
Uploaded: Nov. 21, 2025, 7:44 p.m.
| Step | Figure | Description |
|---|---|---|
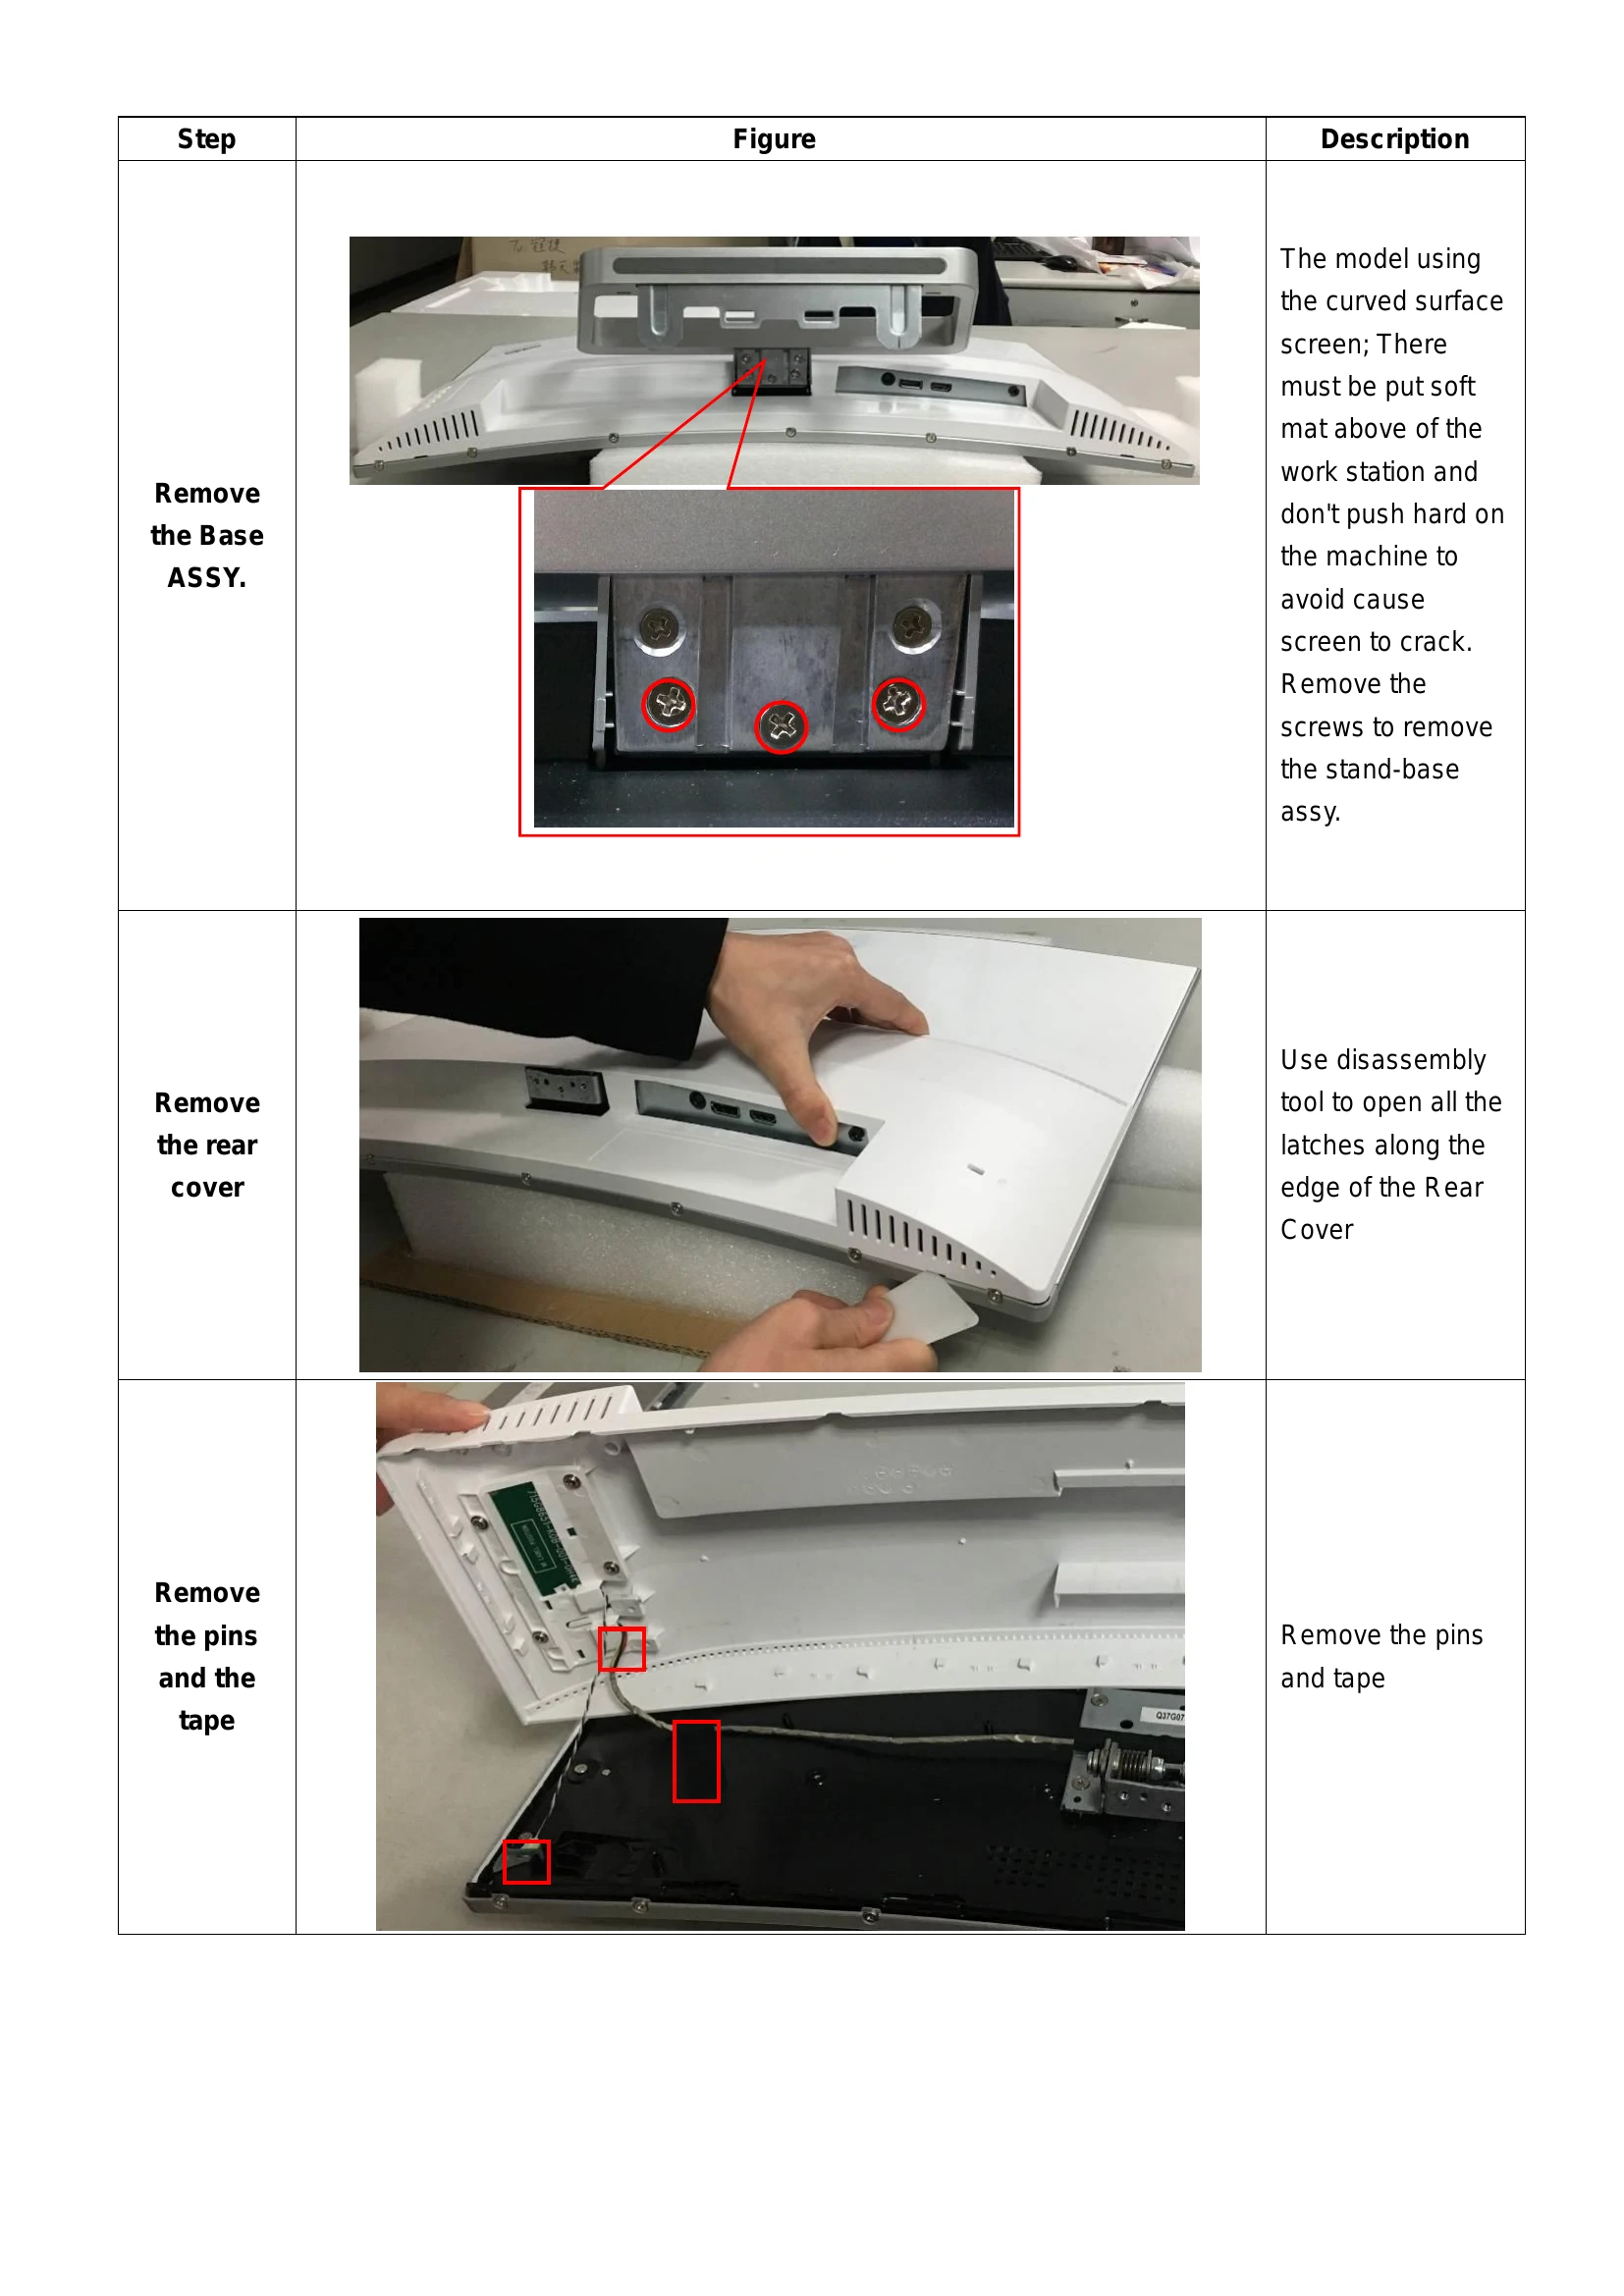
| Remove the Base ASSY. |  |
The model using the curved surface screen; There must be put soft mat above of the work station and don't push hard on the machine to avoid cause screen to crack. Remove the screws to remove the stand-base assy. |
| Remove the rear cover |  |
Use disassembly tool to open all the latches along the edge of the Rear Cover |
| Remove the pins and the tape |  |
Remove the pins and tape |
| Remove the pins and the screws |  |
Remove the pins and the screws |
| Remove the Pin and the screws |  |
Remove the pin and the screws |
| Remove the screws and the pin |  |
Remove the screws and the pin |
| Remove the screws |  |
Remove the screws |
| The panel |  |
The panel |
| Remove the board |  |
Remove the screws to remove the borad. |
| The rear cover |  |
Remove the screws to remove the key board/LED board from the rear cover |
| The key board/LED board |  |
The key board/LED board |
| The middle frame |  |
The middle frame |
| The rear cover |  |
The rear cover |