Quick Start Guide for t200

Quick Start Guide for t200

Brand: HP

Category: Digital Camera

Document Type: Quick Start Guide

Language: EN

Uploaded: Nov. 21, 2025, 6:20 p.m.
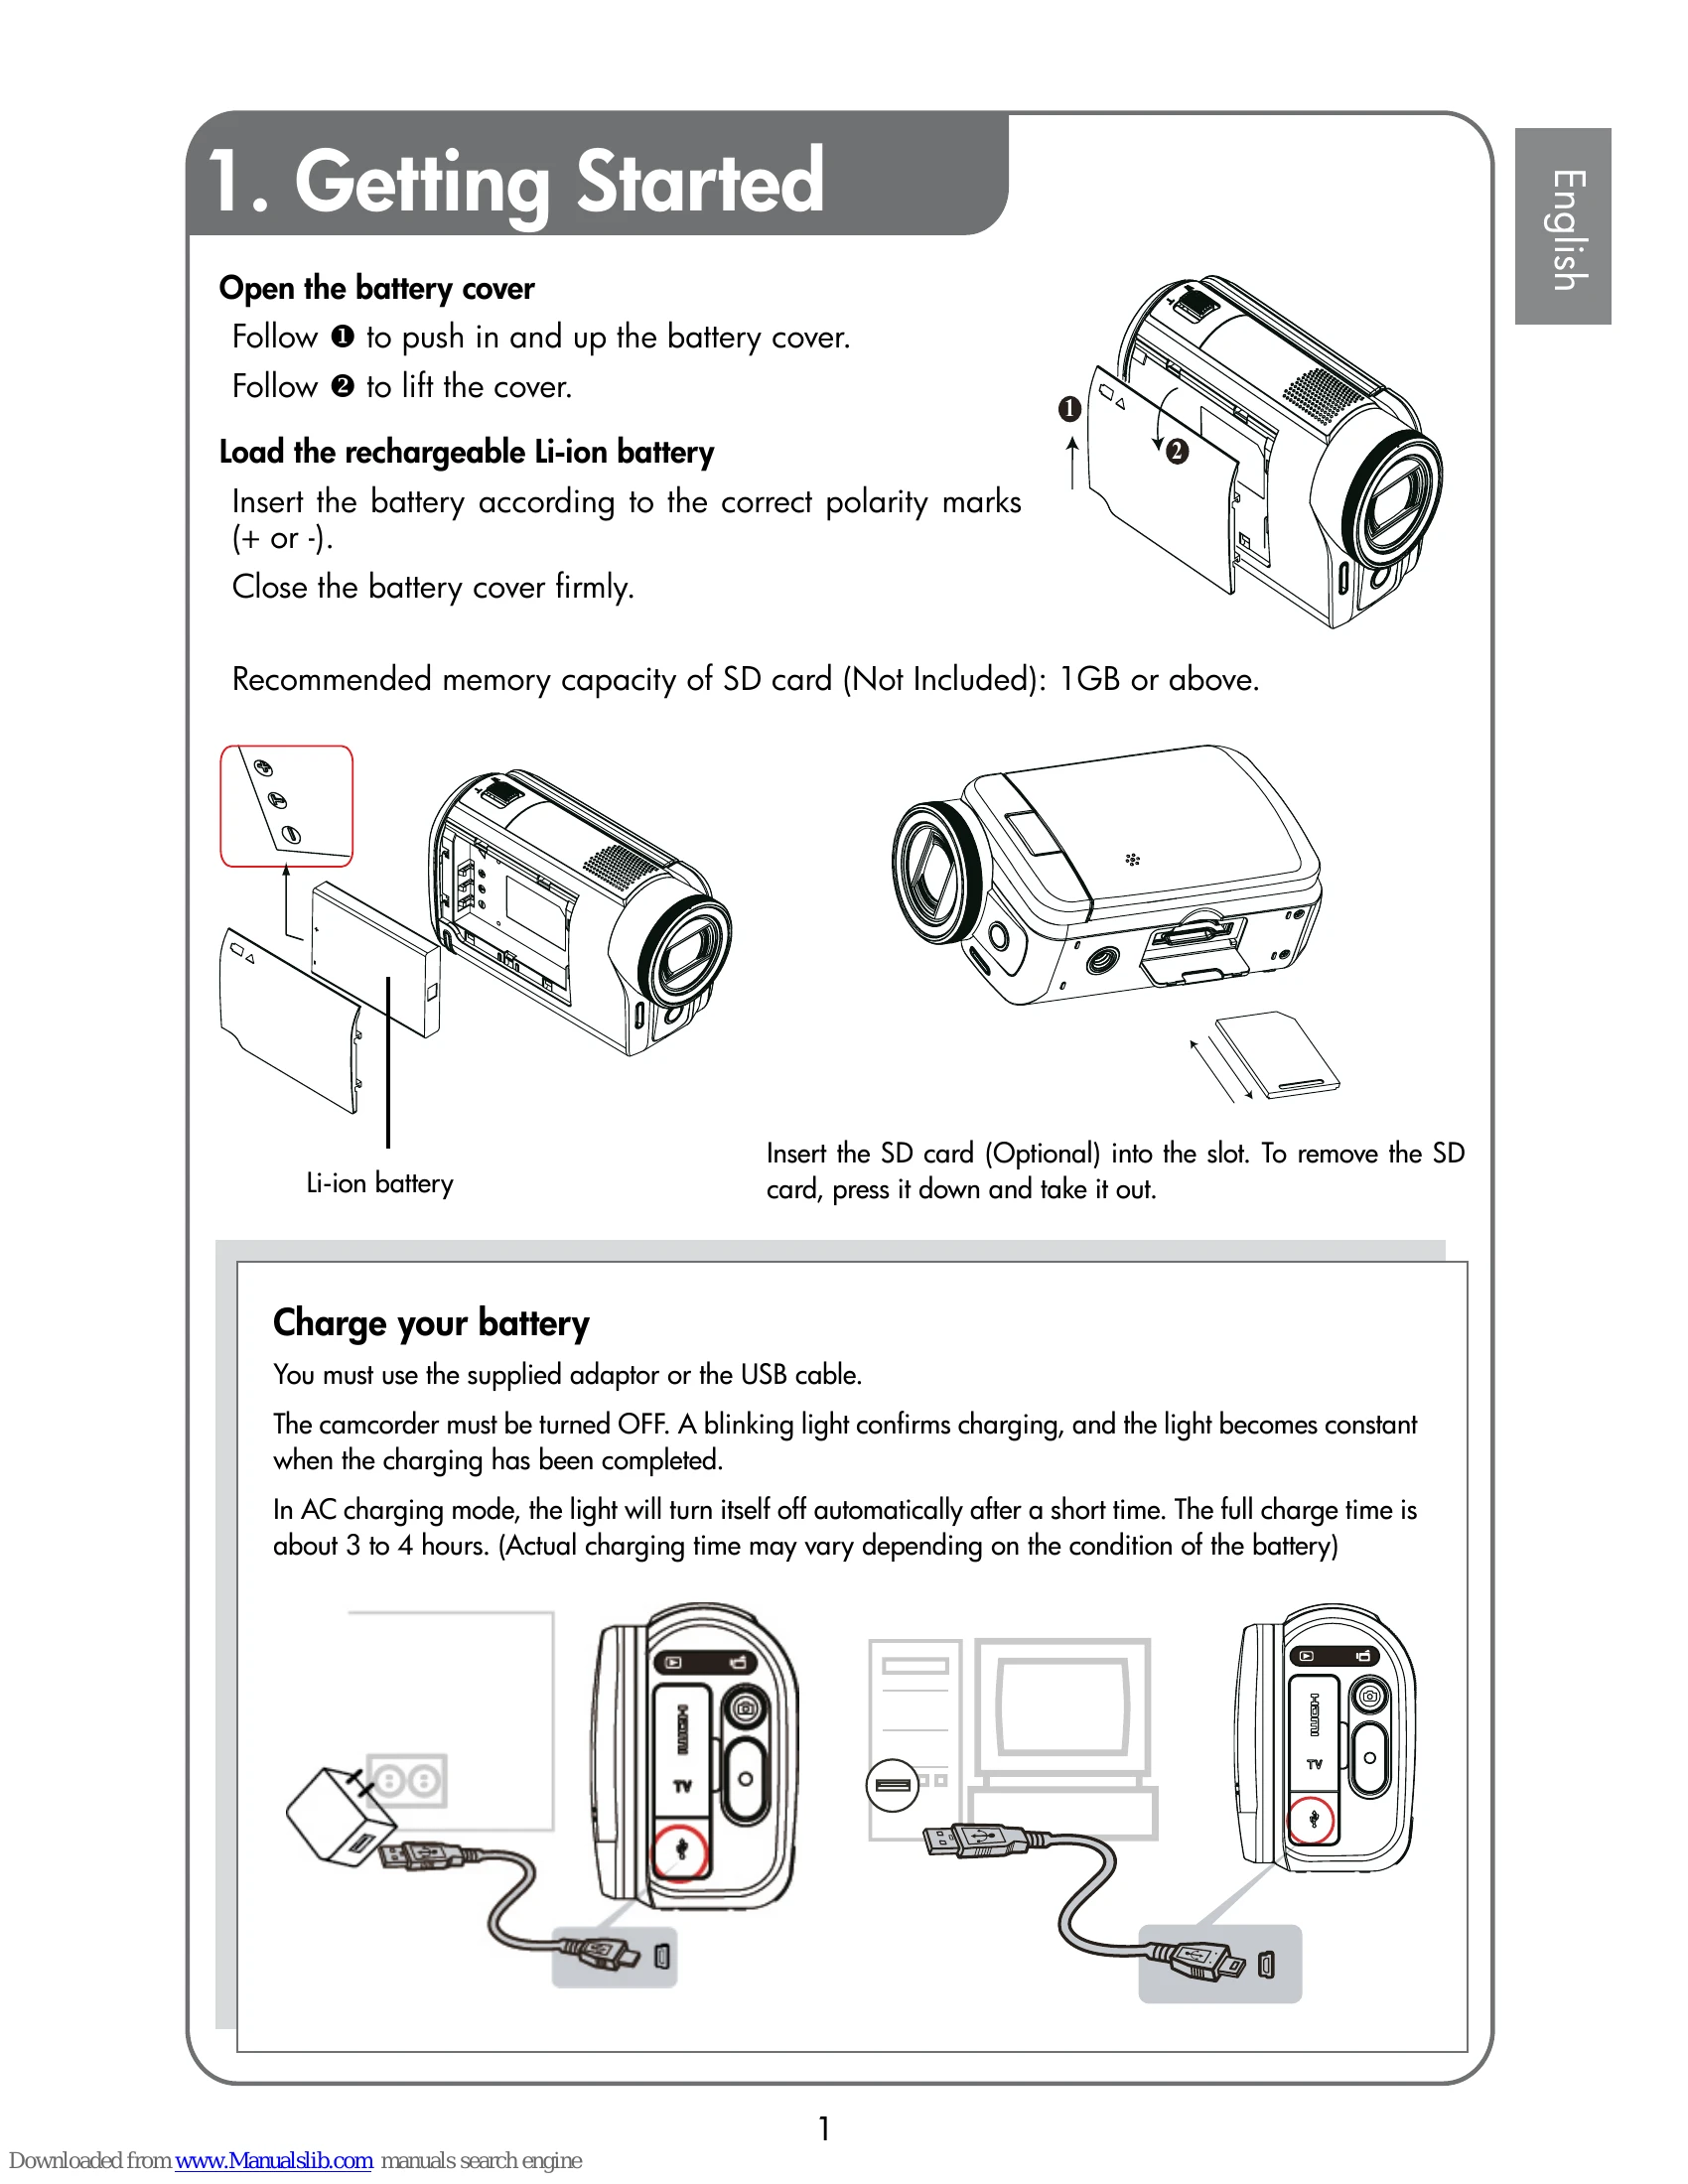
1. Getting Started

  • Open the battery cover: Follow the arrows to push in and up, then lift the cover.
  • Load the battery: Insert the rechargeable Li-ion battery according to polarity marks (+ or -) and close the cover firmly.
  • Insert SD card (Optional): Insert the card into the slot. Press down and take it out to remove. Recommended capacity is 1GB or above.
  • Charge your battery: Use the supplied adapter or USB cable. Ensure the camcorder is OFF. A blinking light indicates charging, and a solid light signifies completion. Full charge is about 3-4 hours.

2. Record & Play

  • Power on: Flip out the LCD panel. If already open, hold the Power Button. The camcorder turns off automatically after 3 minutes of inactivity.
  • Start/Stop Recording: Press the Record button (O).
  • Pause Recording: Press the Pause button. Press again to continue.
  • Capture Photo: Press the Photo button.
  • Zoom in/out: Use the [T] /[W] buttons.
  • Review videos/photos: Press the Playback button or touch the on-screen icon.
  • Advanced Options: Touch the Menu icon (on-screen) in review mode.

3. Plug & Share

  • View on PC: Install ArcSoft MediaImpression. Connect camcorder via USB cable. Videos/photos are found at "My Computer\Removable Disk\DCIM\100MEDIA".
  • Upload to Website: Use the built-in Internet Direct application.
  • Install Software: Insert the CD, click "Install ArcSoft MediaImpression", and follow on-screen instructions.

Troubleshooting and error codes

Problem Solution
LCD preview not clear when shooting Try switching between Macro and Normal Mode.
Memory card files not displaying smoothly (LCD shows "!") SD card is low speed or has incompatible content. Format the SD card using the camera, or upgrade to a higher speed card (SD/SDHC/SDXC).
Indoor photos blurry and dark Keep the camera steady for several seconds during low light/indoor shooting.
How to charge battery Use the supplied AC adapter with USB cable, or USB cable with a PC/laptop. Ensure camera is OFF. Blinking light indicates charging, solid light means complete. Full charge: 3-4 hours.
After connecting USB cable to computer a. External disk [DV] is the camera's internal memory.
b. External disk is the external memory card.
c. Disk [DVAP] contains the Internet Direct application. DO NOT format or delete this disk.
Privacy Policy