Quick Start Guide for hn210e

Quick Start Guide for hn210e

Brand: HP

Category: Networking

Document Type: Quick Start Guide

Language: EN

Uploaded: Nov. 21, 2025, 9:21 p.m.

Manual Publish Date: 2001-08-15

Warranty Information

Refer to the warranty sheet included in the box for specific warranty details.

This document provides quick setup instructions for the HP Ethernet USB Network Adapter hn210e.

Box Contents:

  • Ethernet USB Network Adapter
  • Installation and documentation CD-ROM
  • USB cable
  • Ethernet cable (blue)
  • Quick start guide
  • Warranty sheet

Before you begin:

  1. Verify all box contents are included.
  2. Ensure computers are running Windows 98, 98SE, Me, 2000, or XP. (Windows 2000 and XP Professional may require administrative privileges).
  3. Confirm each computer has a CD-ROM drive for installation.
  4. Turn off the computer if it is on.

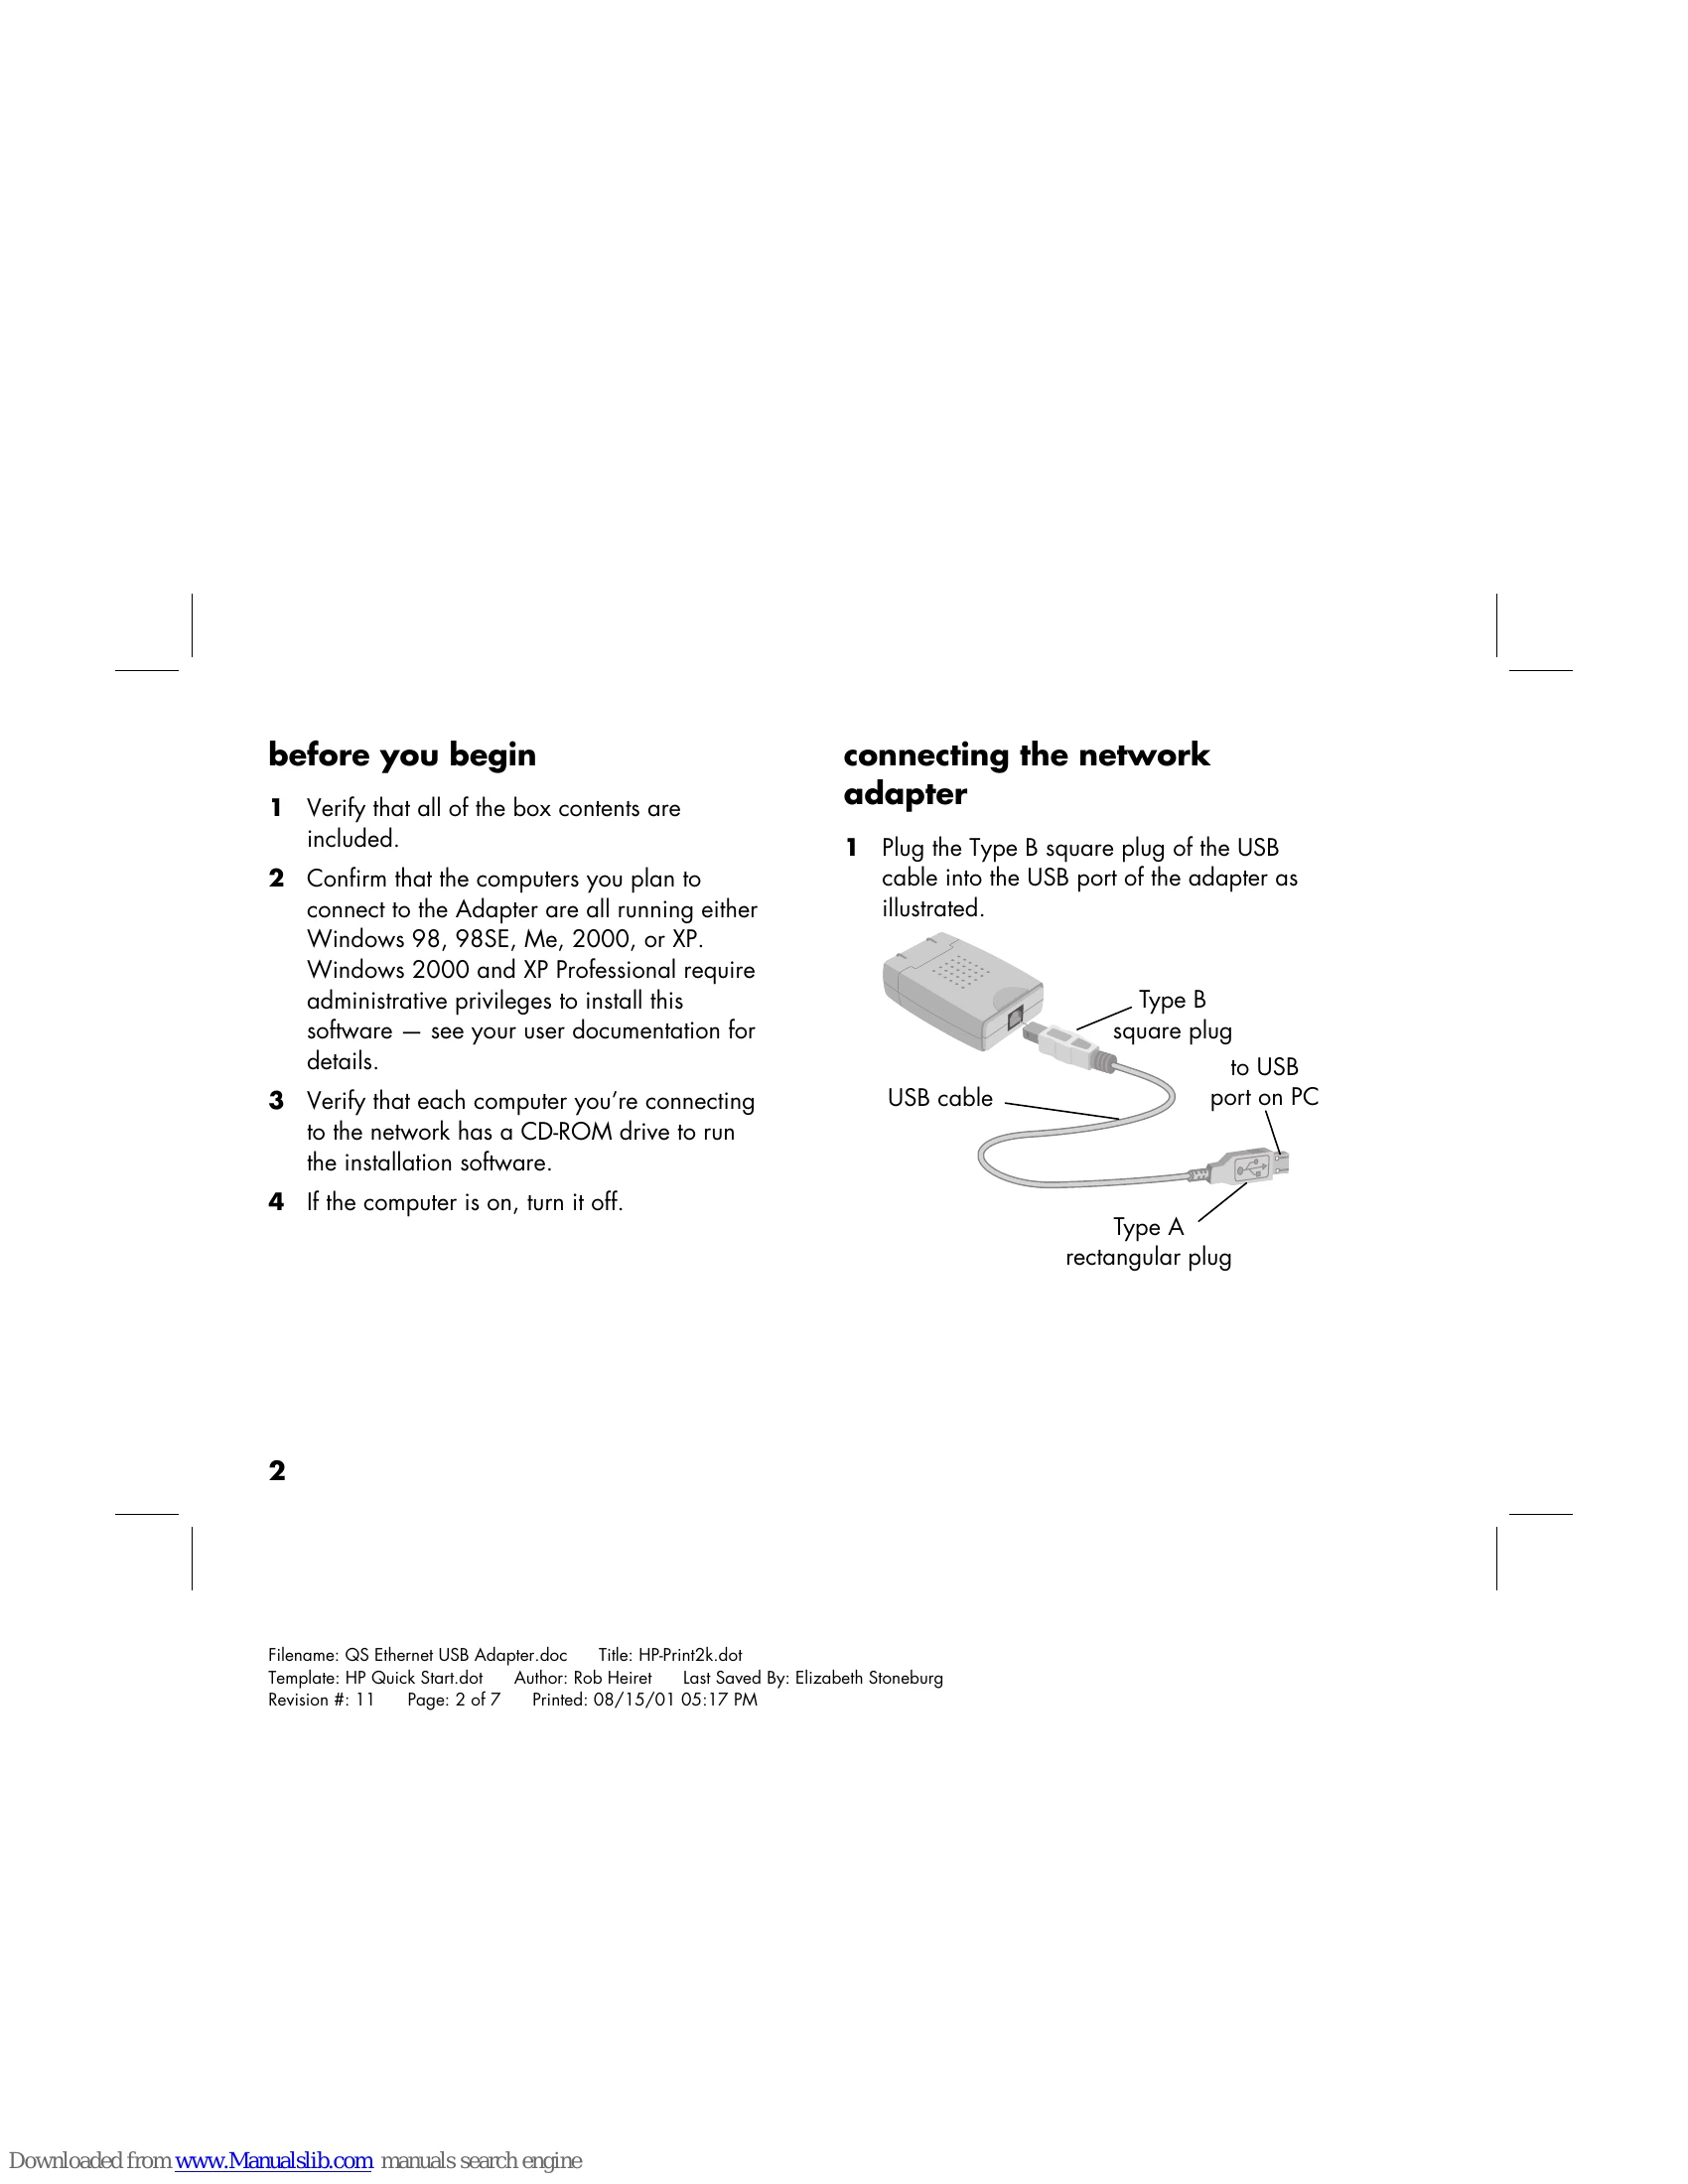
Connecting the network adapter:

  1. Plug the Type B square plug of the USB cable into the USB port of the adapter.
  2. Plug the Type A rectangular end into a USB port on your computer.
  3. Plug one end of the Ethernet cable into the adapter's Ethernet port.
  4. Plug the other end of the Ethernet cable into your Gateway, hub, or switch.

Installing the driver:

  1. Turn on the computer and insert the CD-ROM.
  2. The operating system should recognize the adapter and the Add New Hardware screen will appear.
  3. Select "Automatic search for a better driver" and click Next.
  4. The driver will install automatically from the CD-ROM. Click Finish upon successful installation.
  5. Restart the computer if prompted.

Registering the network adapter:

  • Visit http://register.hp.com in your web browser.

Accessing additional documentation:

  • Insert the CD-ROM and navigate to the "hn210e" folder, then your language folder, and double-click "user's guide".
Privacy Policy