Brand: JVC
Category: Audio System
Document Type: Manual
Language: EN
Brand: JVC
Category: Audio System
Document Type: Manual
Language: EN
Uploaded: Nov. 21, 2025, 7:51 p.m.
No warranty information is available in the provided pages.
Turning the system on/off: Press the ⌂ or ⌂ / AUDIO button on the remote control or center unit.
Selecting the source to play: Press source selecting buttons (DVD, FM/AM, VCR, DBS) on the remote or press SOURCE repeatedly on the center unit.
Adjusting the volume: Press AUDIO VOL +/- on the remote or turn VOLUME on the center unit.
Listening with headphones: Connect headphones to the PHONES jack. The system automatically cancels surround mode and deactivates speakers.
Turning off the sound temporarily: Press MUTING. Press again or adjust volume to restore.
Adjusting brightness: Press DIMMER to change display brightness.
Sleep Timer: Press SLEEP to set automatic turn-off time.
Adjusting speaker levels: Use S.WFR, CENTER, SURR.-L/R +/- buttons.
Adjusting treble: Press TREBLE +/-.
Smart Surround Setup: Follow on-screen prompts to optimize speaker settings by clapping.
Changing scan mode: Hold SCAN MODE for 2 seconds, then select PAL, PAL PROG., NTSC, or NTSC PROG. using Cursor buttons and press ENTER.
| PROBLEM | POSSIBLE CAUSE | SOLUTION |
|---|---|---|
| Power does not come on. | The power cord and/or system cord is not connected. | Connect the power cord and system cord correctly. (pg. 13) |
| The remote control does not work. | The batteries are exhausted. | Replace the batteries. (☞ pg. 7) |
| Sunlight is falling directly on the remote sensor. | Hide the remote sensor from direct sunlight. | |
| No sound. | The system cord and/or speaker cord is not connected. | Check the connection. ( pg. 12) |
| The audio cord is not connected to VCR IN and/or DIGITAL IN (DBS) correctly. | Connect the cord correctly. (pg. 12) | |
| No picture is displayed on the TV screen. | An incorrect source has been selected. | Select the correct source. (☞ pg. 17) |
| The decode mode is not set correctly. | Select the proper decode mode. ( pg. 35) | |
| The video cord is not connected correctly. | Connect the cord correctly. (☞ pg. 11) | |
| The disc is not playable. | Use a playable disc. ( pg. 3) | |
| No picture is displayed on the TV screen, the picture is blurred, or the picture is divided into two parts. | The scan mode is set to "PAL PROG." or "NTSC PROG." though the center unit is connected to the TV which does not support the progressive video input such as a conventional TV. | Change the scan mode to "PAL" or "NTSC”. (pg. 18) |
| Video and audio are distorted. | The disc is scratched or dirty. | Replace or clean the disc. |
| A VCR is connected between the center unit and the TV. | Connect the center unit and TV directly. (☞ pg. 11) | |
| The picture does not fit the TV screen. | The monitor type is not set correctly. | Set "MONITOR TYPE" properly. ( pg. 37) |
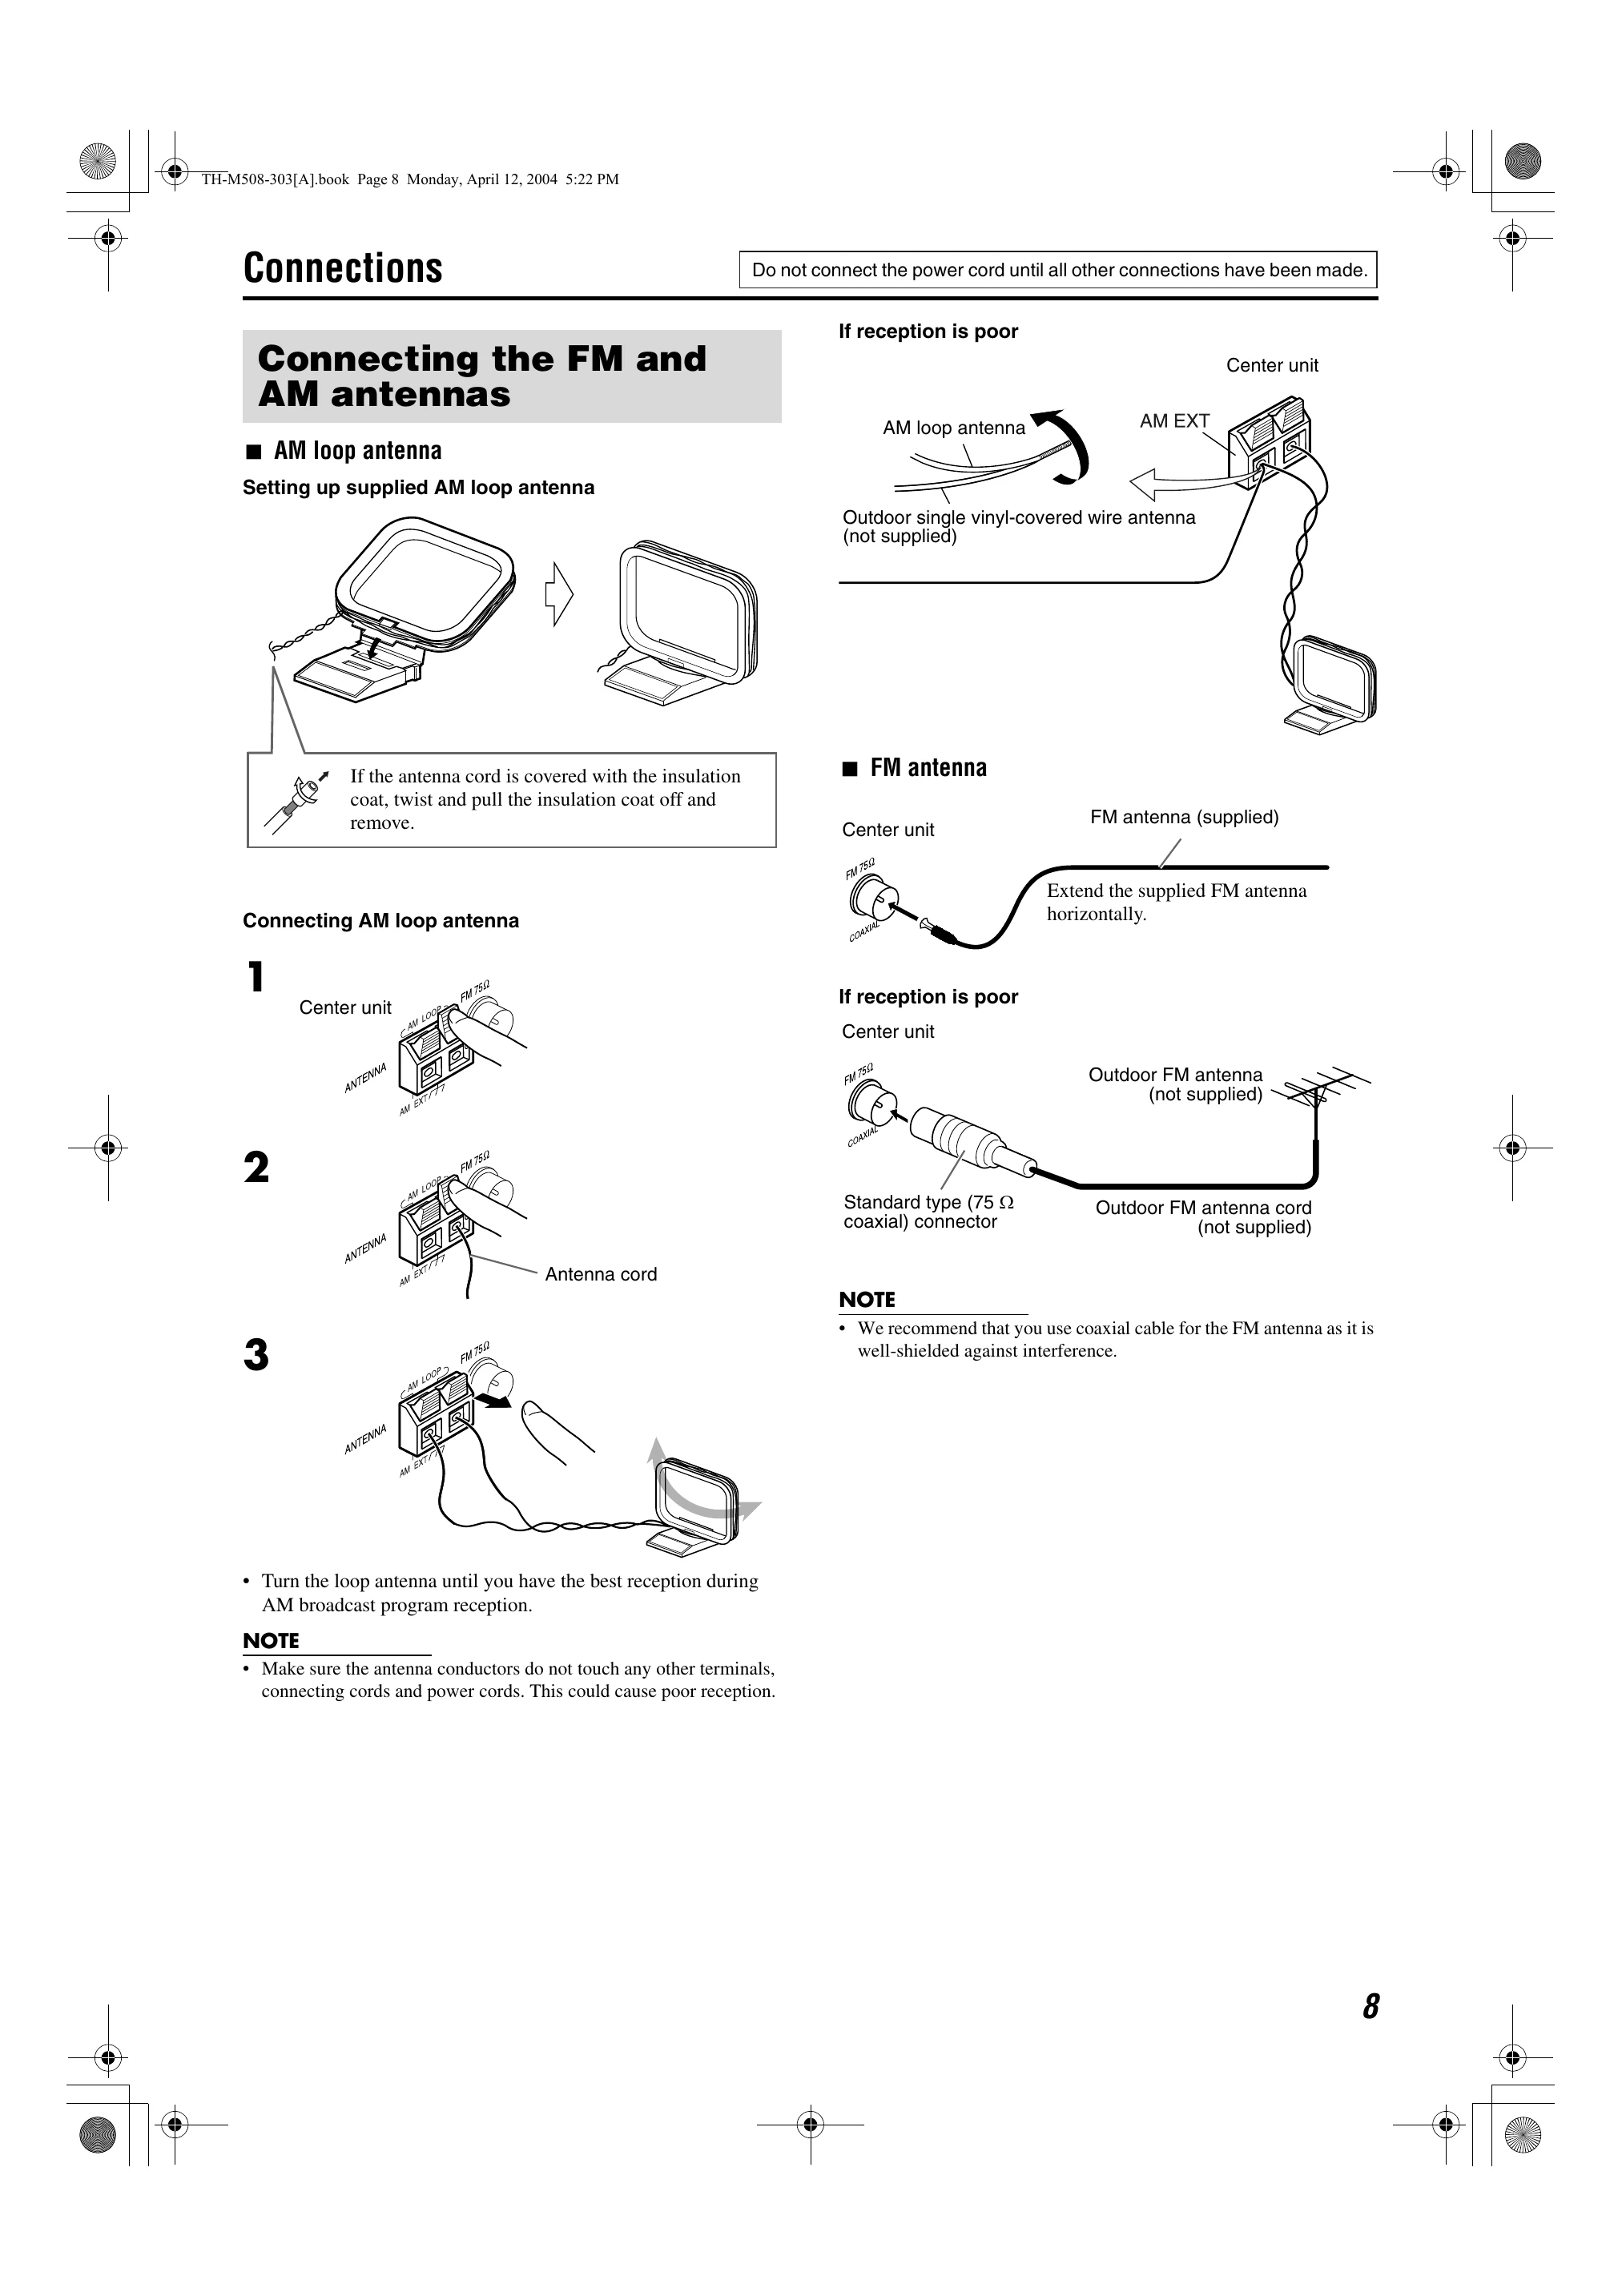
| Hard to listen to broadcast because of noise. | Antennas are disconnected. | Reconnect the antennas correctly and securely. (pg. 8) |