Brand: JVC
Category: Camcorder
Document Type: Quick Start Guide
Language: EN
Brand: JVC
Category: Camcorder
Document Type: Quick Start Guide
Language: EN
Uploaded: Aug. 10, 2025, 12:35 a.m.
None
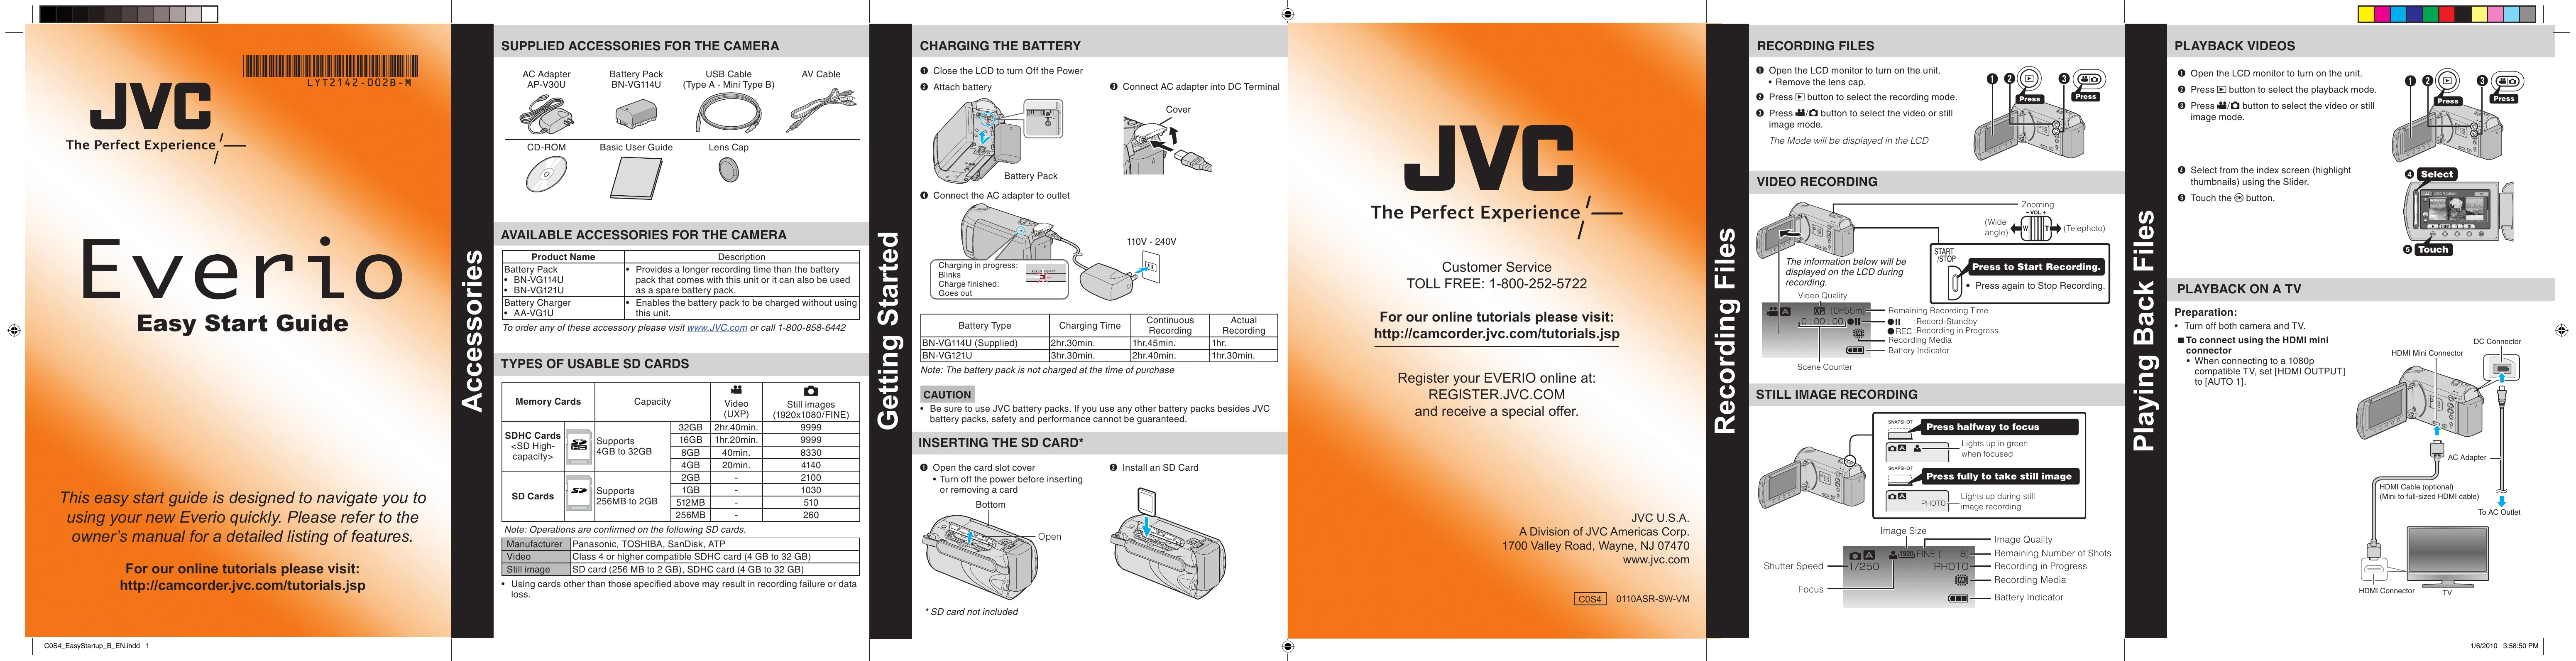
1. Close the LCD to turn Off the Power.
2. Attach battery.
3. Connect AC adapter into DC Terminal.
4. Connect the AC adapter to outlet.
1. Open the LCD monitor to turn on the unit. Remove the lens cap.
2. Press the button to select the recording mode.
3. Press / button to select the video or still image mode.
4. Press to Start Recording. Press again to Stop Recording.
1. Open the LCD monitor to turn on the unit.
2. Press the button to select the recording mode.
3. Press / button to select the still image mode.
4. Press halfway to focus. Press fully to take still image.
1. Open the LCD monitor to turn on the unit.
2. Press the button to select the playback mode.
3. Press / button to select the video or still image mode.
4. Select from the index screen (highlight thumbnails) using the Slider. Touch the button.
Preparation: Turn off both camera and TV.
Connect using HDMI mini connector or COMPONENT/AV connector.
Turn on the camera and TV. Select the TV input switch. Start playback.