Brand: JVC
Category: Camcorder
Document Type: Manual
Language: EN
Brand: JVC
Category: Camcorder
Document Type: Manual
Language: EN
Uploaded: Nov. 21, 2025, 7:49 p.m.
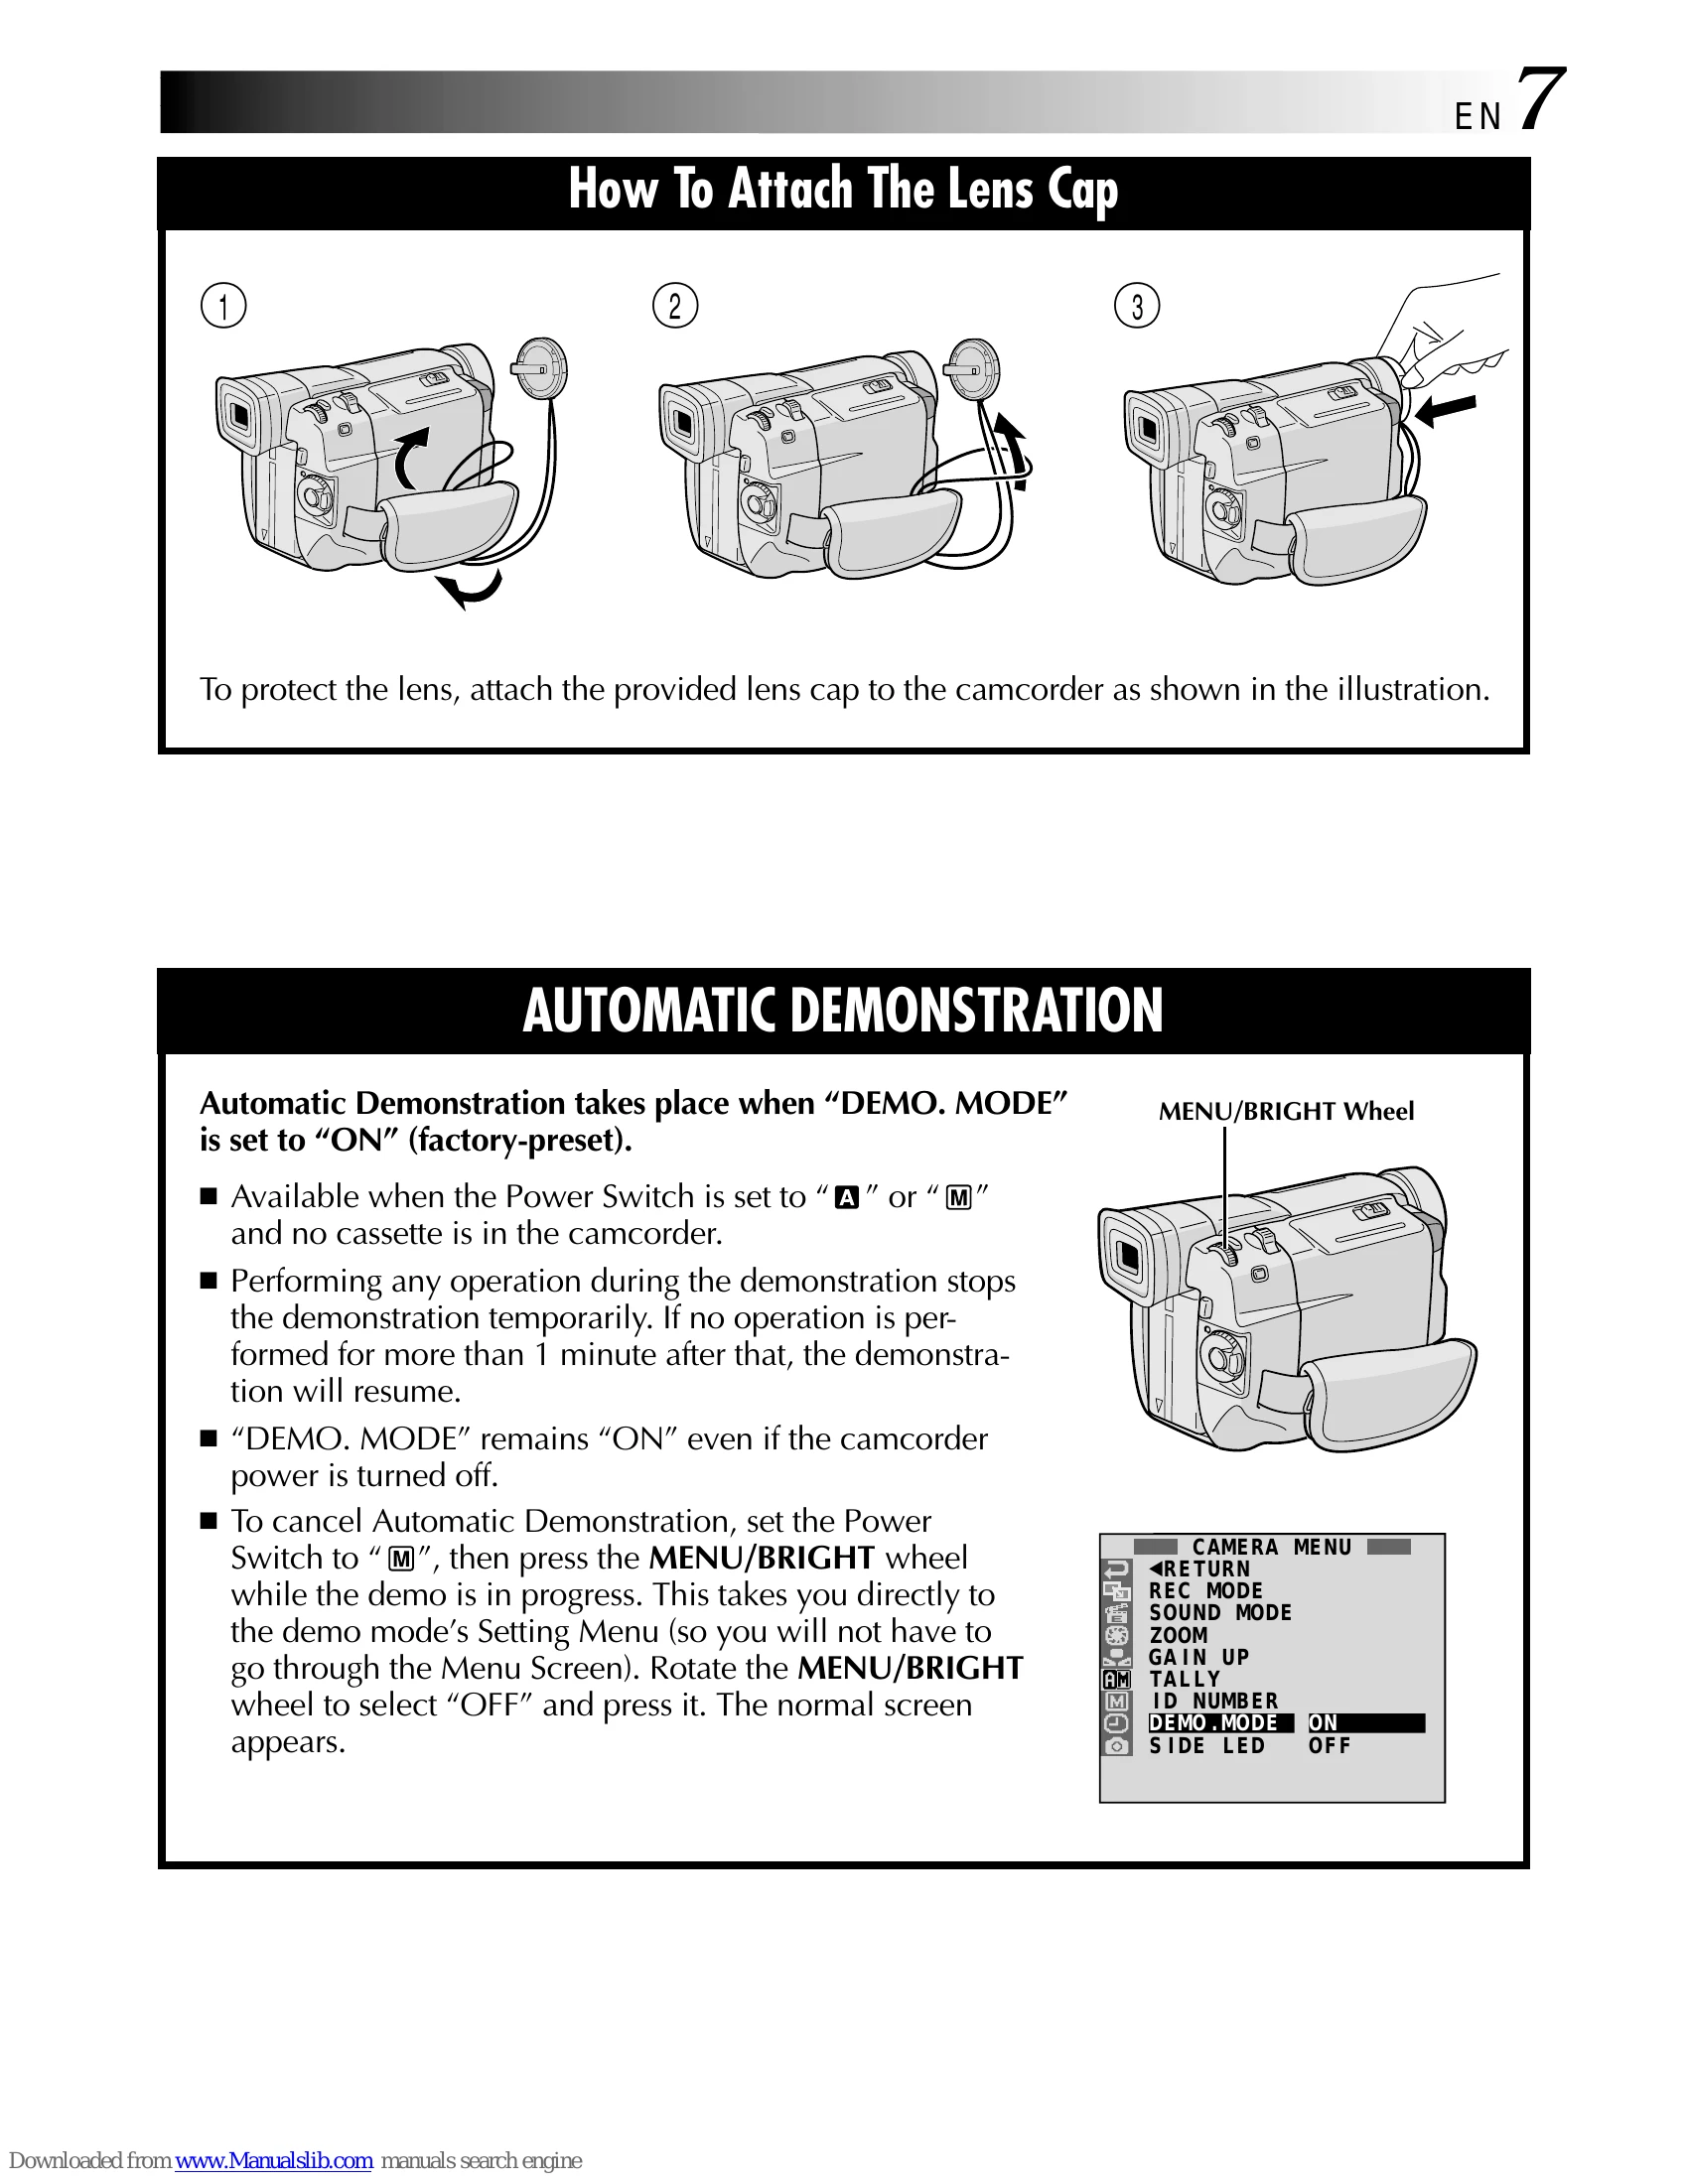
Power
This camcorder's 2-way power supply system lets you choose the most appropriate source of power. Do not use provided power supply units with other equipment.
 mark aligned with the corresponding marks on the AC Power Adapter/Charger. The CHARGE Indicator begins blinking to indicate charging has started., then slide down the battery pack until it locks in place .
To Detach The Battery Pack
tilt the viewfinder upward and slide the battery pack up slightly while pressing BATTERY RELEASE to detach it.
Use the AC Power Adapter/Charger (connect as shown in the illustration).
| Warning Indications | Function | |
|
Displays the battery remaining power. Remaining power level: high Remaining power level: exhausted As the battery power comes close to nil, the battery indicator blinks.When the battery power is exhausted, power turns off automatically. |
|
| CHECK TAPE'S ERASE PROTECTION SWITCH | Appears when no tape is loaded. (☞ pg. 12) | |
|
HEAD CLEANING REQUIRED USE CLEANING CASSETTE | Appears if dirt is detected on the heads. Use an optional cleaning cassette. (☞ pg. 78) |
|
CONDENSATION, OPERATION PAUSED PLEASE WAIT | Appears if condensation occurs. When this indication is displayed, wait more than 1 hour until condensation disappears. |
| TAPE! | Appears if a tape is not loaded when the Recording Start/Stop Button or SNAPSHOT Button is pressed while the Power Switch is set to "A" or "M" and the VIDEO/DSC Switch is set to "VIDEO". | |
| TAPE END | Appears when the tape ends during recording or playback. (☞ pg. 17) | |
| DIFFERENT FORMATTED TAPE | Appears if a tape in another format is loaded. |