Brand: JVC
Category: Camcorder
Document Type: Manual
Language: EN
Brand: JVC
Category: Camcorder
Document Type: Manual
Language: EN
Uploaded: Aug. 10, 2025, 12:34 a.m.
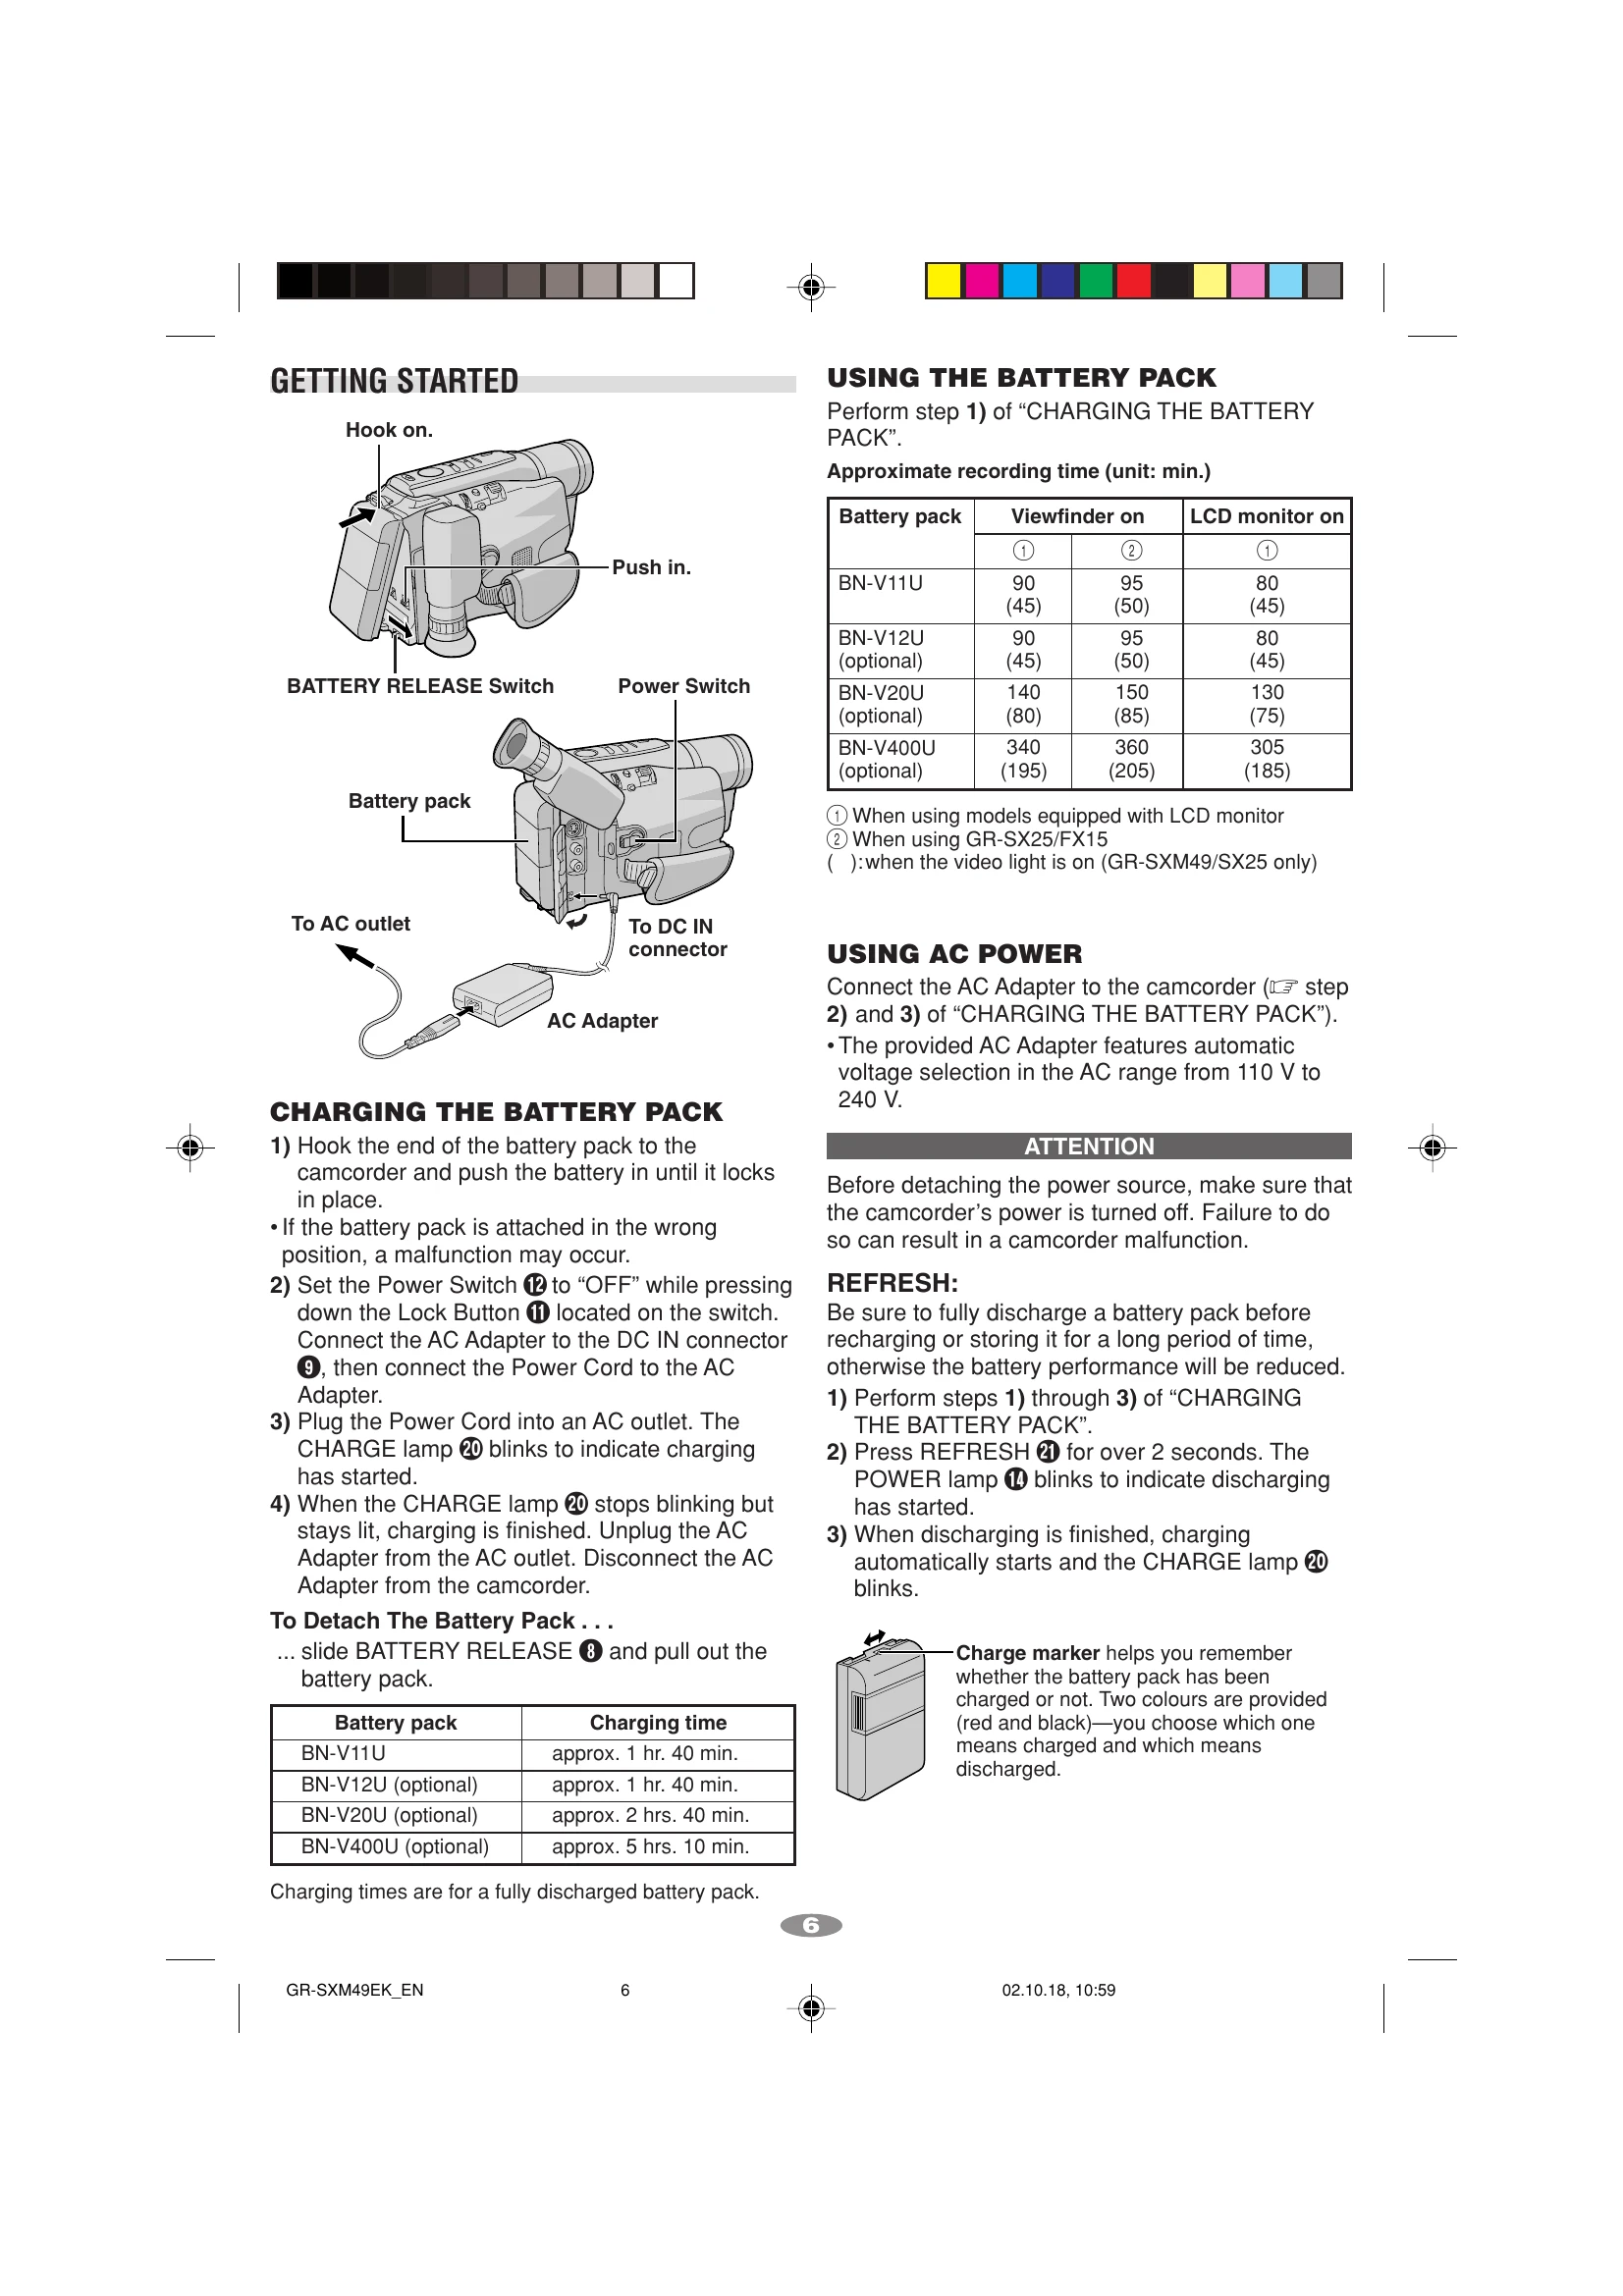
Hook the battery pack to the camcorder and push until it locks. Connect the AC adapter to the DC IN connector and plug into an AC outlet. The CHARGE lamp blinks while charging and stays lit when finished.
Connect the AC adapter to the camcorder and an AC outlet. Ensure the camcorder power is off before detaching the power source.
Set the power switch to "M", press MENU Wheel, navigate to SYSTEM MENU, then DATE/TIME. Select YEAR, MONTH, DAY, or TIME, rotate the MENU Wheel to adjust, and press to confirm. Exit to return to the normal screen.
Separate the Velcro strap, pass your hand through the loop, grasp the grip, and adjust for comfortable operation. Refasten the Velcro strap.
Set the power switch to "A" or "M", press the Lock Button, and turn the Dioptre Adjustment Control until the viewfinder indications are clear.
Thread the strap through the eyelets and buckle, adjusting the length as needed.
Open the LCD monitor, slide EJECT to open the cassette holder, insert or remove the cassette, and press the Close button. Ensure the erase protection tab is set for recording.
| Problem | Possible Cause/Solution |
|---|---|
| Vertical white lines appear when shooting a very bright object. | This sometimes occurs when the contrast between the back-ground and the object is great. It is not a defect of the camcorder. |
| Bright, crystal-shaped spots appear in the LCD monitor and the viewfinder. | Sunlight is directly entering the lens. This is not a defect of the camcorder. |
| Coloured bright spots appear all over the LCD monitor or the viewfinder. | The LCD monitor and the viewfinder are made with high-precision technology. However, black spots or bright spots of light (red, green or blue) may appear constantly on the LCD monitor or in the viewfinder. These spots are not recorded on the tape. This is not due to any defect of the unit. (Effective dots: more than 99.99%.) |
| Animation or Time-Lapse is not available. | Before recording in the Animation mode at the very beginning of a tape, set the camcorder to the Recording mode for about 5 seconds, so that the tape runs smoothly. Using the Fade-in function at this point is a good way to begin an animated programme (pg. 21, REC TIME/INT. TIME in SYSTEM MENU). |
| The tape is running, but there is no playback picture. | • The TV has not been set to its VIDEO mode or channel. • If A/V connection is used, the TV's VIDEO/TV Switch has not been set to VIDEO. |
| Playback picture is blurred or interrupted. | • The video heads are dirty or worn out. Consult your nearest JVC dealer for head cleaning or replacement. |
| The tape stops during fast-forward or rewind. | • The Counter Memory Function has been activated (pg. 14, "Counter Memory"). |
| The date and time displays disappear. | • If you remove the power source from the camcorder while the power is on, all settings and selections are erased. Make sure to turn the camcorder's power off before disconnecting the power source. |
| The tape will not eject. | • The battery pack is running low. • If the LCD monitor is not open over 60 degrees, the EJECT switch 19 does not function. |
| The camcorder is a microcomputer-controlled device. | External noise and interference (from a TV, a radio, etc.) might prevent it from functioning properly. In such cases, first disconnect its power supply unit (battery pack, AC Adapter, etc.); and then re-connect it and proceed as usual from the beginning. |