Brand: JVC
Category: Camcorder
Document Type: Manual
Language: EN
Brand: JVC
Category: Camcorder
Document Type: Manual
Language: EN
Uploaded: Aug. 10, 2025, 12:35 a.m.
Basic Camcorder Operation:
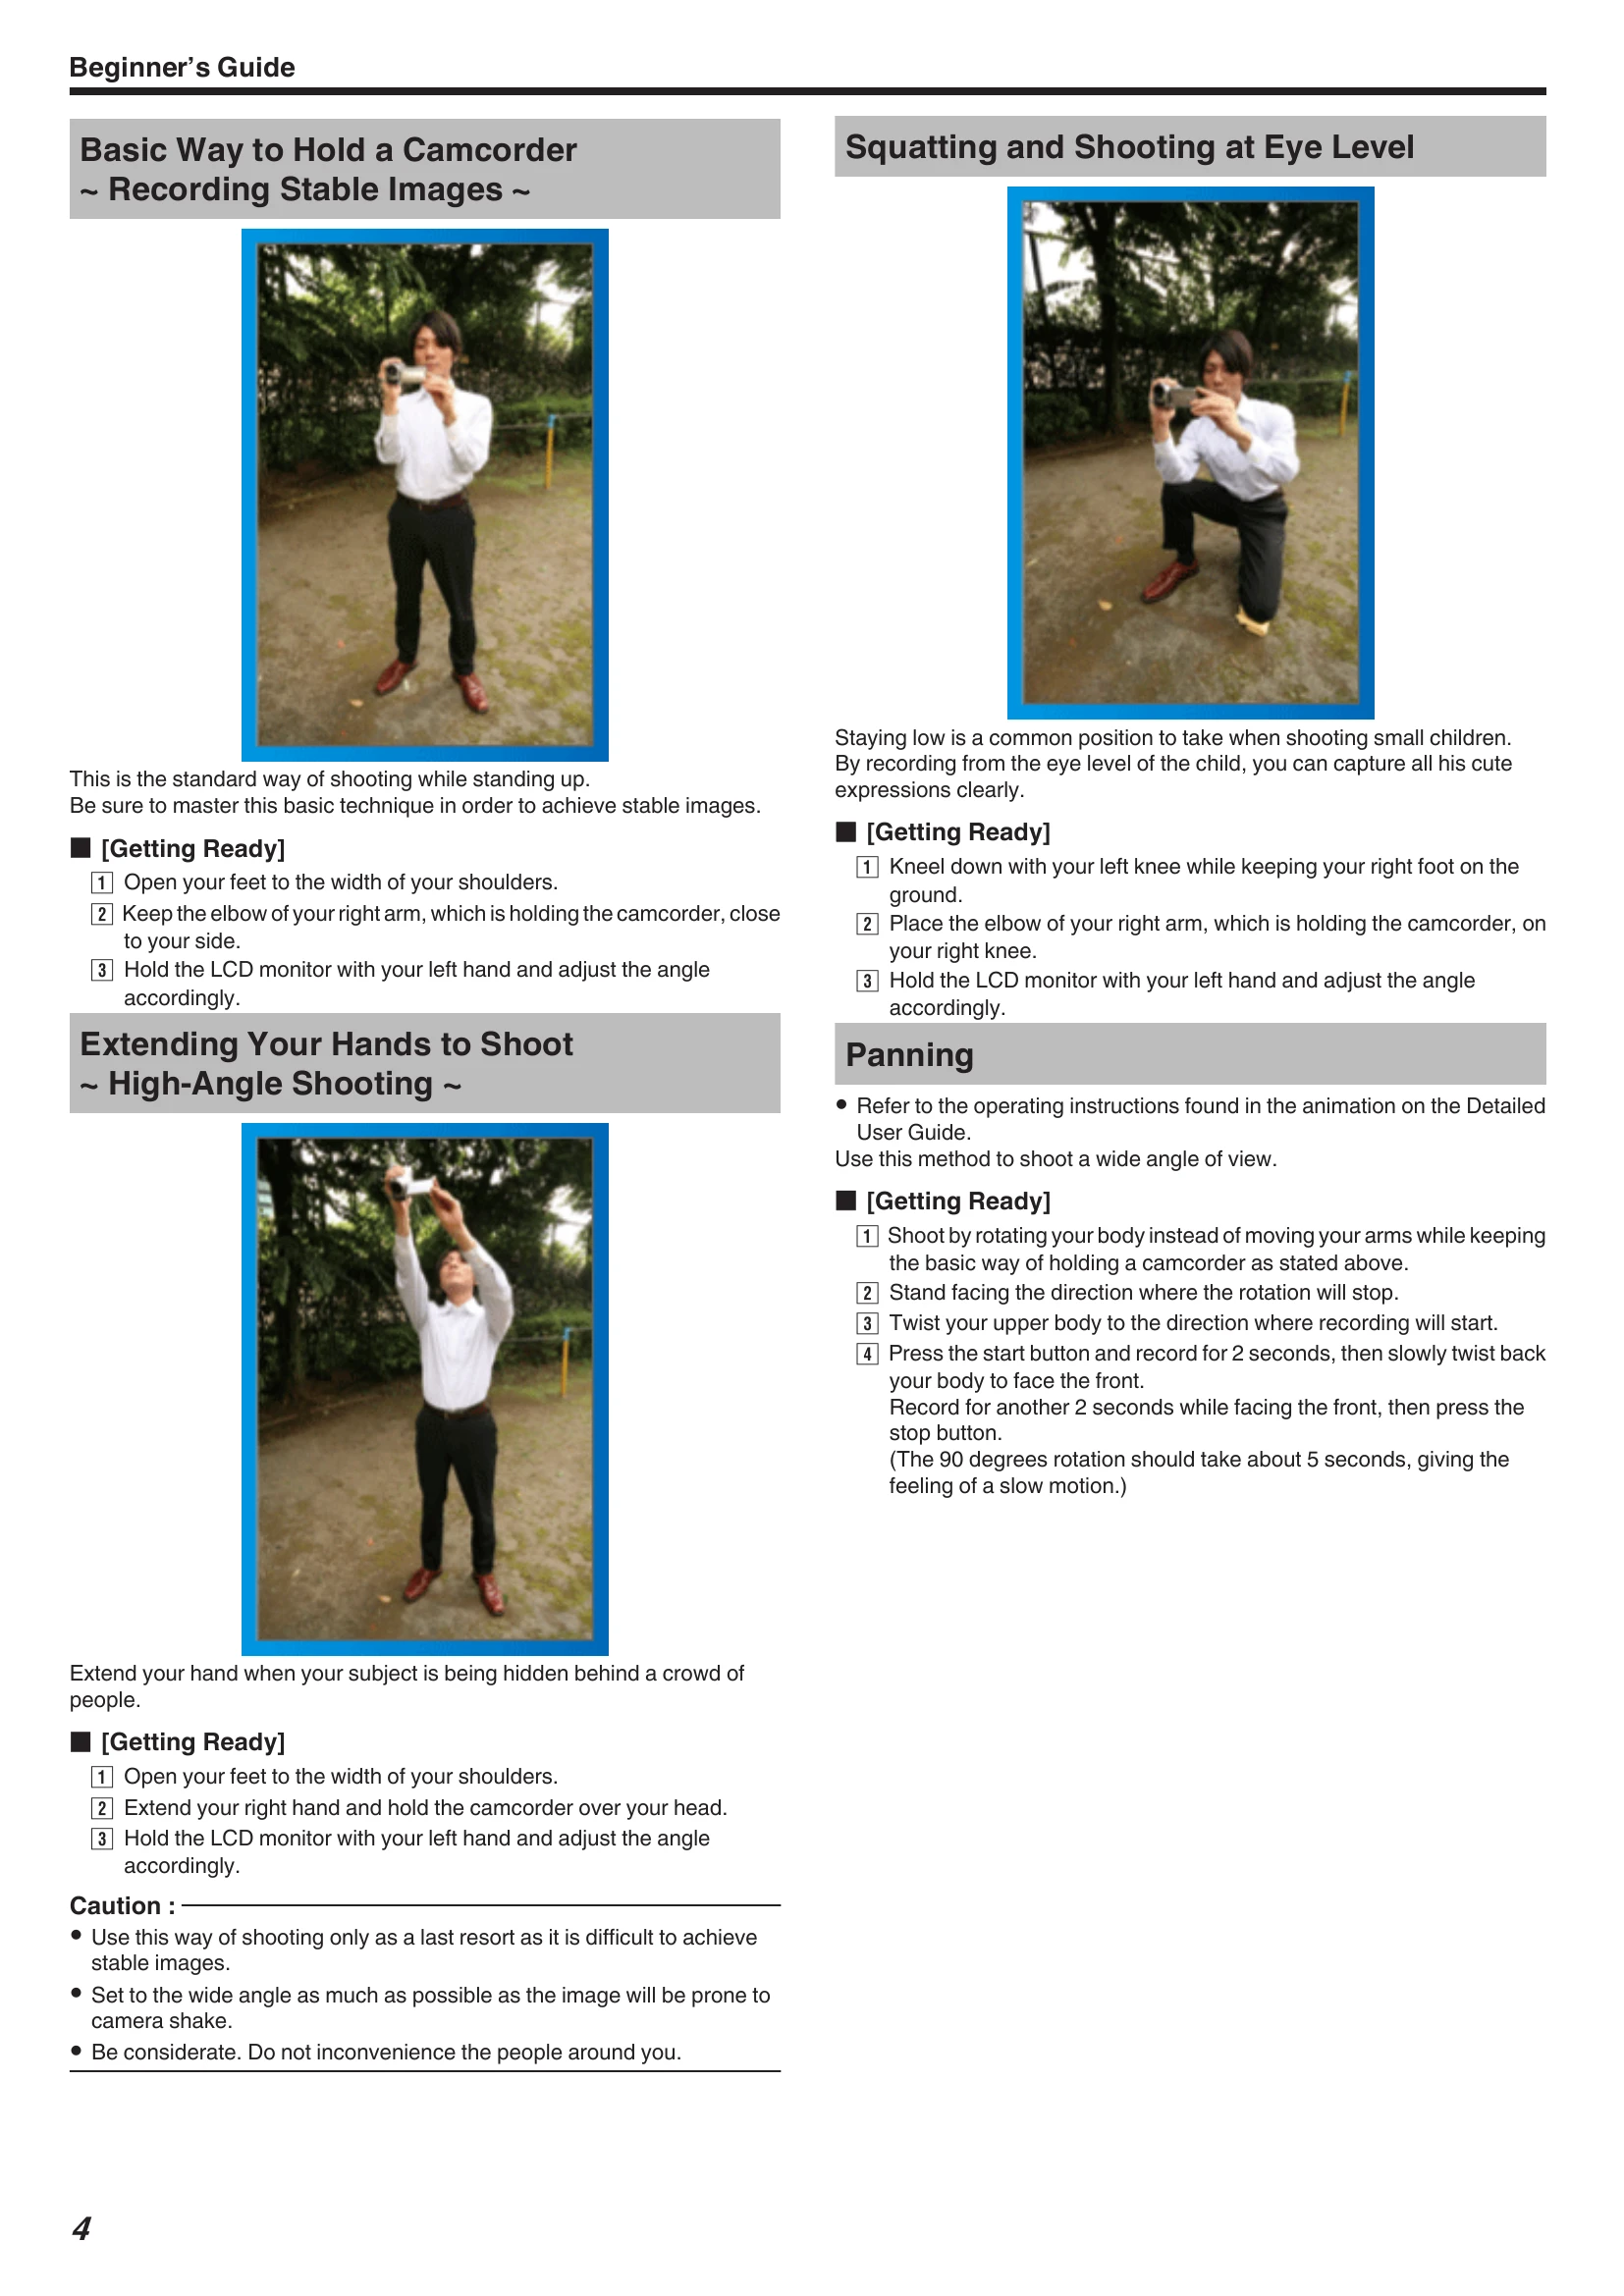
Holding the Camcorder: For stable images, hold the camcorder with your feet shoulder-width apart, keeping your right elbow close to your side. Adjust the LCD monitor with your left hand. For high-angle shots, extend your right arm overhead. For low-angle shots, kneel down and rest your right elbow on your knee.
Shooting Techniques: Explore techniques like panning for wide shots, capturing events like holidays and weddings, and framing subjects for travel and amusement park visits. Consider using a tripod for stability.
Basic Setup: Charge the battery pack using the AC adapter. Insert an SD card for extended recording. Adjust settings like date/time and display language as needed.
Playback: Use the touch screen to navigate playback options, including normal playback, digest playback, and creating playlists.
| Problem | Solution |
|---|---|
| Unable to turn on the power when using the battery pack. | Recharge the battery pack. Check if terminals are dirty. Use JVC battery packs. |
| Short usage time even after charging. | Battery deterioration may occur with repeated charging. Replace the battery pack. |
| Unable to charge the battery pack. | Check if terminals are dirty. Use the original AC adapter. |
| Remaining battery display is not correct. | The display may be incorrect when the AC adapter is connected or if the unit is used in extreme temperatures. |
| Recording cannot be performed. | Check the  button. Adjust settings manually if needed. button. Adjust settings manually if needed. |
| Recording stops automatically. | The unit may stop recording after 12 consecutive hours or if the temperature rises. Turn off the unit, wait, and turn it on again. |
| The continuous shooting speed of still images is slow. | This can happen with repeated use or depending on the SD card. |
| The focus is not adjusted automatically. | Adjust focus manually, especially in dark or low-contrast scenes. Wipe the lens. |
| Zoom does not work. | Digital zoom is unavailable in still image mode and time-lapse recording. Set "ZOOM" in the menu. |
| Mosaic-type noise occurs during fast movements or brightness changes. | Set "VIDEO QUALITY" to "UXP" or "XP". |
| Cannot insert the SD card. | Ensure the SD card is inserted in the correct direction. |
| Unable to copy to SD card. | Set "REC MEDIA FOR VIDEO"/"REC MEDIA FOR IMAGE" to SD card. Format the SD card if it was used on another device. |
| Sound or video is interrupted during playback. | This may occur at the connection point between scenes and is not a malfunction. |
| There is no sound. | Turn off Silent mode. Set "OPERATION SOUND" to "ON". Audio is not recorded with HIGH SPEED RECORDING/TIME-LAPSE RECORDING. |
| The same image is displayed for a long time. | Use a high-speed SD card. Clean the SD card terminals. Format the SD card. Verify computer system requirements for playback software. |
| The motion is choppy. | Use a high-speed SD card. Clean the SD card terminals. Format the SD card. Verify computer system requirements for playback software. |
| Cannot find a recorded file. | Cancel date search function. Change playback media. Select "PLAYBACK OTHER FILE". |
| Images do not appear on the TV properly. | Disconnect and reconnect the HDMI cable. Turn the unit off and on again. |
| Images are projected vertically on the TV. | Set "VIDEO OUTPUT" to "4:3". Adjust TV screen settings. |
| The image displayed on TV is too small. | Set "VIDEO OUTPUT" to "16:9". |
| When connected via HDMI, proper images/sounds are not output. | Disconnect and reconnect the HDMI cable. Turn the unit off and on again. |
| HDMI-CEC functions do not work properly. | Set "HDMI CONTROL" to "OFF". |
| The unit operates slowly. | Copy files to a computer and erase them from the unit. |
| Unit does not function properly or shows error messages. | Turn off the power, remove AC adapter and battery pack. Then reattach and turn on the unit. If the problem persists, contact service. |
| POWER/CHARGE lamp and ACCESS lamp are blinking. | Close the LCD monitor, remove power source, reattach, and turn on. Contact dealer if problem persists. |
| Error Message: CHECK LENS COVER | Open the lens cover. |
| Error Message: SET DATE/TIME! | Connect AC adapter and charge battery for >24 hours. Set the clock. If message persists, clock battery is exhausted. |
| Error Message: COMMUNICATION ERROR | Reconnect USB cable. Turn devices off and on again. Reattach battery. |
| Error Message: FORMAT ERROR! | Check procedure and perform again. Turn the unit off and on again. |
| Error Message: ERROR IN BUILT-IN MEMORY! | Turn the unit off and on again. If problem persists, back up files and format built-in memory. |
| Error Message: MEMORY CARD ERROR! | Check if card is supported. Turn the unit off and on again. Remove and re-insert SD card. Clean terminals. Back up files and format SD card if problem persists. |
| Error Message: NOT FORMATTED | Select "OK", then "YES" to format. |
| Error Message: RECORDING FAILURE | Turn the unit off and on again. |
| Error Message: CANNOT TAKE MORE STILL IMAGES AT THIS TIME | Stop video recording before taking still images. |
| Error Message: PLAYBACK FAILED | Remove and re-insert SD card. Clean terminals. Insert SD card before turning on power. Avoid strong impact or vibration. |
| Error Message: VIDEO MANAGEMENT FILE IS DAMAGED, RECOVERY IS REQUIRED TO RECORD/PLAYBACK, RECOVER? | Select "OK" to restore. Unrestorable videos will not be displayed. |
| Error Message: UNSUPPORTED SCENE! | Use files recorded with this unit. |
| Error Message: UNSUPPORTED FILE! | Use files recorded with this unit. |
| Error Message: THIS FILE IS PROTECTED | Switch off the "PROTECT/CANCEL" function in the "EDIT" menu. |
| Error Message: CHECK CARD'S WRITE PROTECTION SWITCH | Set the write protect switch of the SD card to off. |
| Error Message: INSUFFICIENT AVAILABLE SPACE | Delete files or move files to a computer. Replace SD card. Ensure enough free space before combining seamless videos. |
| Error Message: RECORDABLE MANAGEMENT CAPACITY LEVEL HAS BEEN REACHED | Back up files. Format built-in memory or SD card. |
| Error Message: SCENE QUANTITY EXCEEDED LIMIT | Back up files. Format built-in memory or SD card. |
| Error Message: NUMBER OF FOLDERS OVERFLOW | Back up files. Format built-in memory or SD card. |
| Error Message: FILE QUANTITY LIMIT EXCEEDED | Back up files. Format built-in memory or SD card. |
| Error Message: PLAYLIST QUANTITY EXCEEDS LIMIT | Reduce playlist files to 99 or less. |
| Error Message: CANCELLED BECAUSE PLAYLIST AMOUNT EXCEEDED MAXIMUM LIMIT | Reduce number of videos for DVD creation or playlist files. |
| Error Message: PROCESSING CANCELLED DUE TO LIMITED SPACE FOR OPERATION | Reduce the number of videos to add to playlist to 999 files. |
| Error Message: NO FILES | Check "REC MEDIA" settings and ensure files are recorded to the correct media. |
| Error Message: RECORDING CANCELLED | Set "REC MEDIA FOR VIDEO" to "SD CARD". Turn unit off and on again. Protect from vibration. |
| Error Message: CAMERA TEMPERATURE IS HIGH PLEASE TURN CAMERA OFF TO ALLOW IT TO COOL DOWN PLEASE WAIT | Turn off the unit and let it cool down before powering on again. |
| Error Message: POWER IS OFF, OR USB DEVICE IS UNSUPPORTED | Turn on the connected USB device. Connect AC adapter to DVD/BD writer. |