Brand: JVC
Category: Camcorder
Document Type: Manual
Language: EN
Brand: JVC
Category: Camcorder
Document Type: Manual
Language: EN
Uploaded: Nov. 21, 2025, 8:52 p.m.
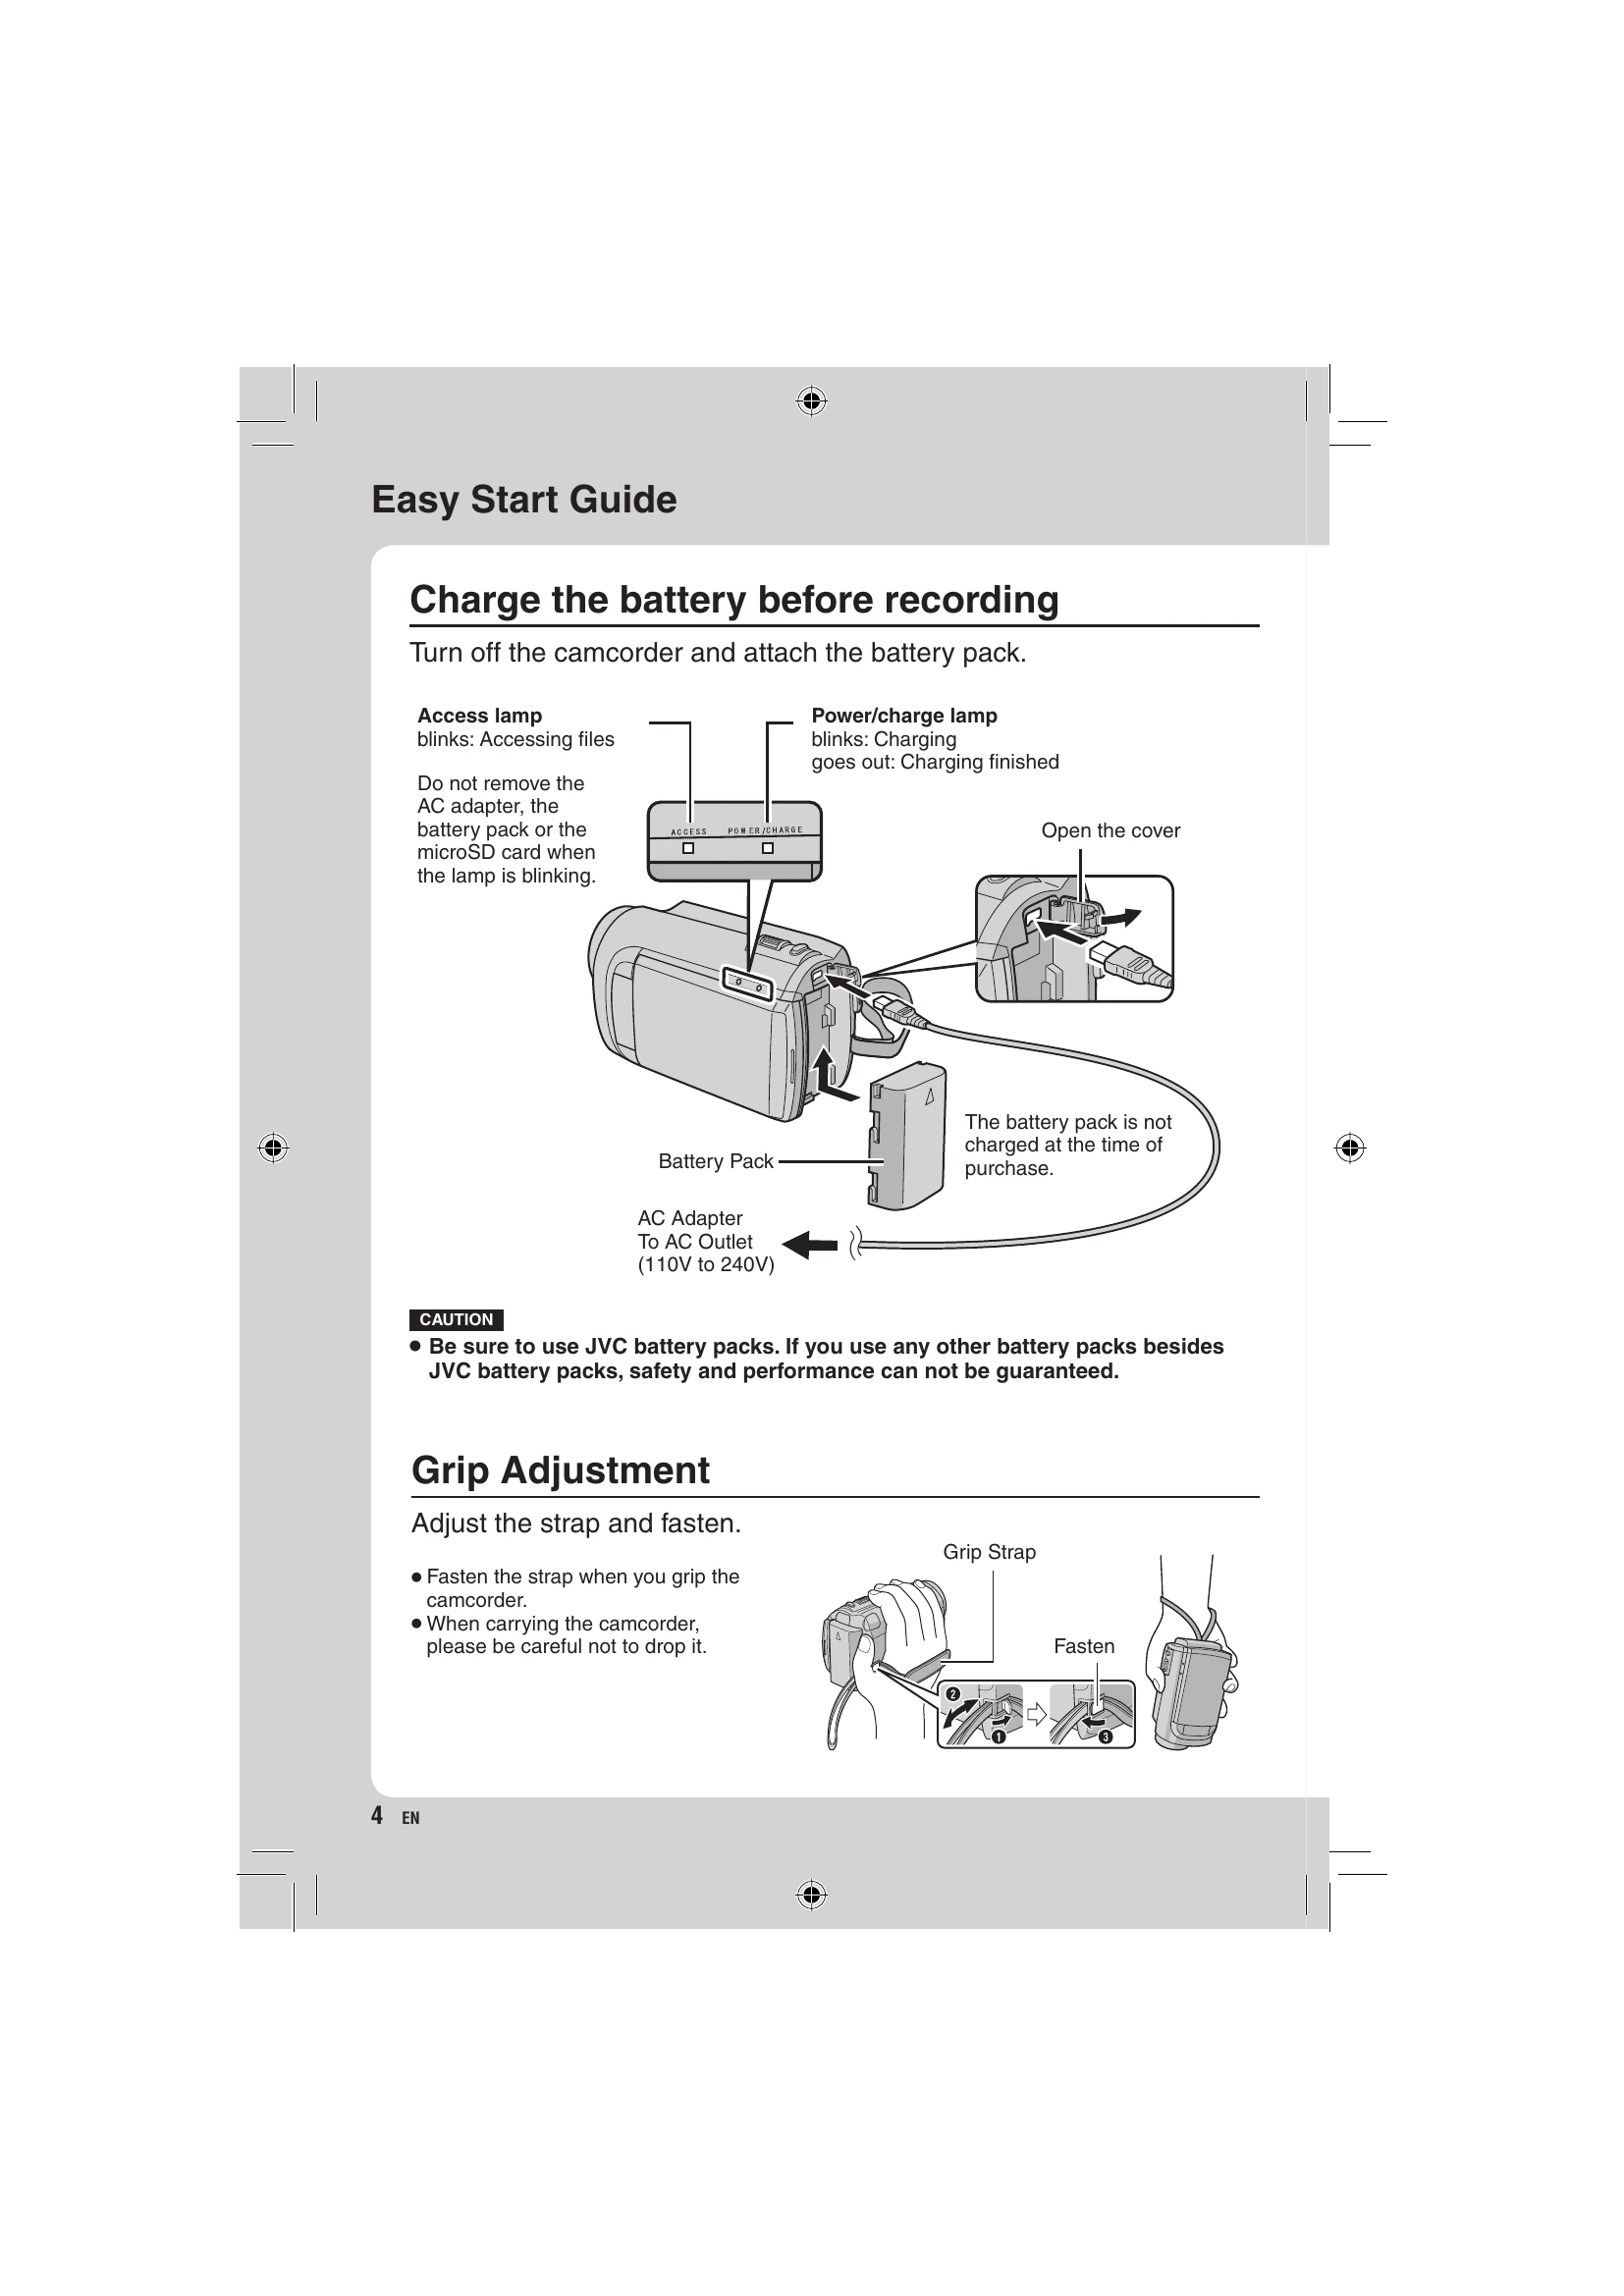
None
| Trouble | Action |
|---|---|
| No power is supplied. | Connect the AC adapter correctly. |
| Recharge the battery pack. | |
| The remaining battery display is not correct. | Fully charge the battery pack, run it down, and then recharge it again. If the camcorder is used for long periods of time in high or low temperatures, or if the battery pack is repeatedly charged, the amount of remaining battery may not be displayed correctly. |
| The LCD monitor is difficult to see. | The LCD monitor may be difficult to see if used in bright areas such as under direct sunlight. |
| Recording cannot be performed. | Slide the mode switch to select the desired mode ( or ). |
| If the camcorder temperature increases, REC flashes in the LCD monitor and recording stops automatically to protect the HDD. Turn off the camcorder, wait for a while, and start recording again. | |
| Move away from a place where the camcorder is affected by excessive sound or vibration (such as a concert hall). | |
| A malfunction may occur in the HDD of the camcorder. In this case, record to a microSD card. | |
| Insert a commercially available microSD card, and set each of the [REC MEDIA FOR VIDEO] and [REC MEDIA FOR IMAGE] to [SD]. | |
| Recording stops by itself. | Recording stops automatically after 12 hours of continuous recording. |
| Sound or video are interrupted. | Sometimes playback is interrupted at the connecting section between two scenes. This is not a malfunction. |
| Cannot find a recorded video. | Select [PLAYBACK MPG FILE] then search the video on the index screen. (Video files that have damaged management information can be played back.) Cancel group display and date search functions. Change the setting in [REC MEDIA FOR VIDEO] or [REC MEDIA FOR IMAGE]. (Files on other media are not displayed.) |
| The lamp does not flash during battery pack charging. | Check the remaining battery pack charge. (When the battery pack is fully charged, the lamp does not flash.) When recharging in either a hot or cold environment, ensure that battery is being charged within the permitted temperature range. (If the battery pack is being recharged outside the permitted temperature range, recharging may stop to protect the battery pack.) |
| GZ-MG680 When connecting to the HDMI cable, the image or sound does not appear on the TV properly. | TVs may operate differently depending on the specifications, even if they are HDMI-CEC compliant. Therefore, the HDMI-CEC functions of the camcorder cannot be guaranteed to operate in combination with all the TVs. In such cases, set [HDMI CONTROL] to [OFF]. |
| GZ-MG680 HDMI-CEC functions do not work properly, and the TV does not work in conjunction with the camcorder. | When connecting to the HDMI cable, the image or sound may not appear on the TV properly depending on the TV connected. In such cases, perform the following operations. 1) Disconnect the HDMI cable and connect it again. 2) Turn off and on the camcorder again. |