Brand: JVC
Category: Camcorder
Document Type: Manual
Language: EN
Brand: JVC
Category: Camcorder
Document Type: Manual
Language: EN
Uploaded: Aug. 10, 2025, 12:35 a.m.
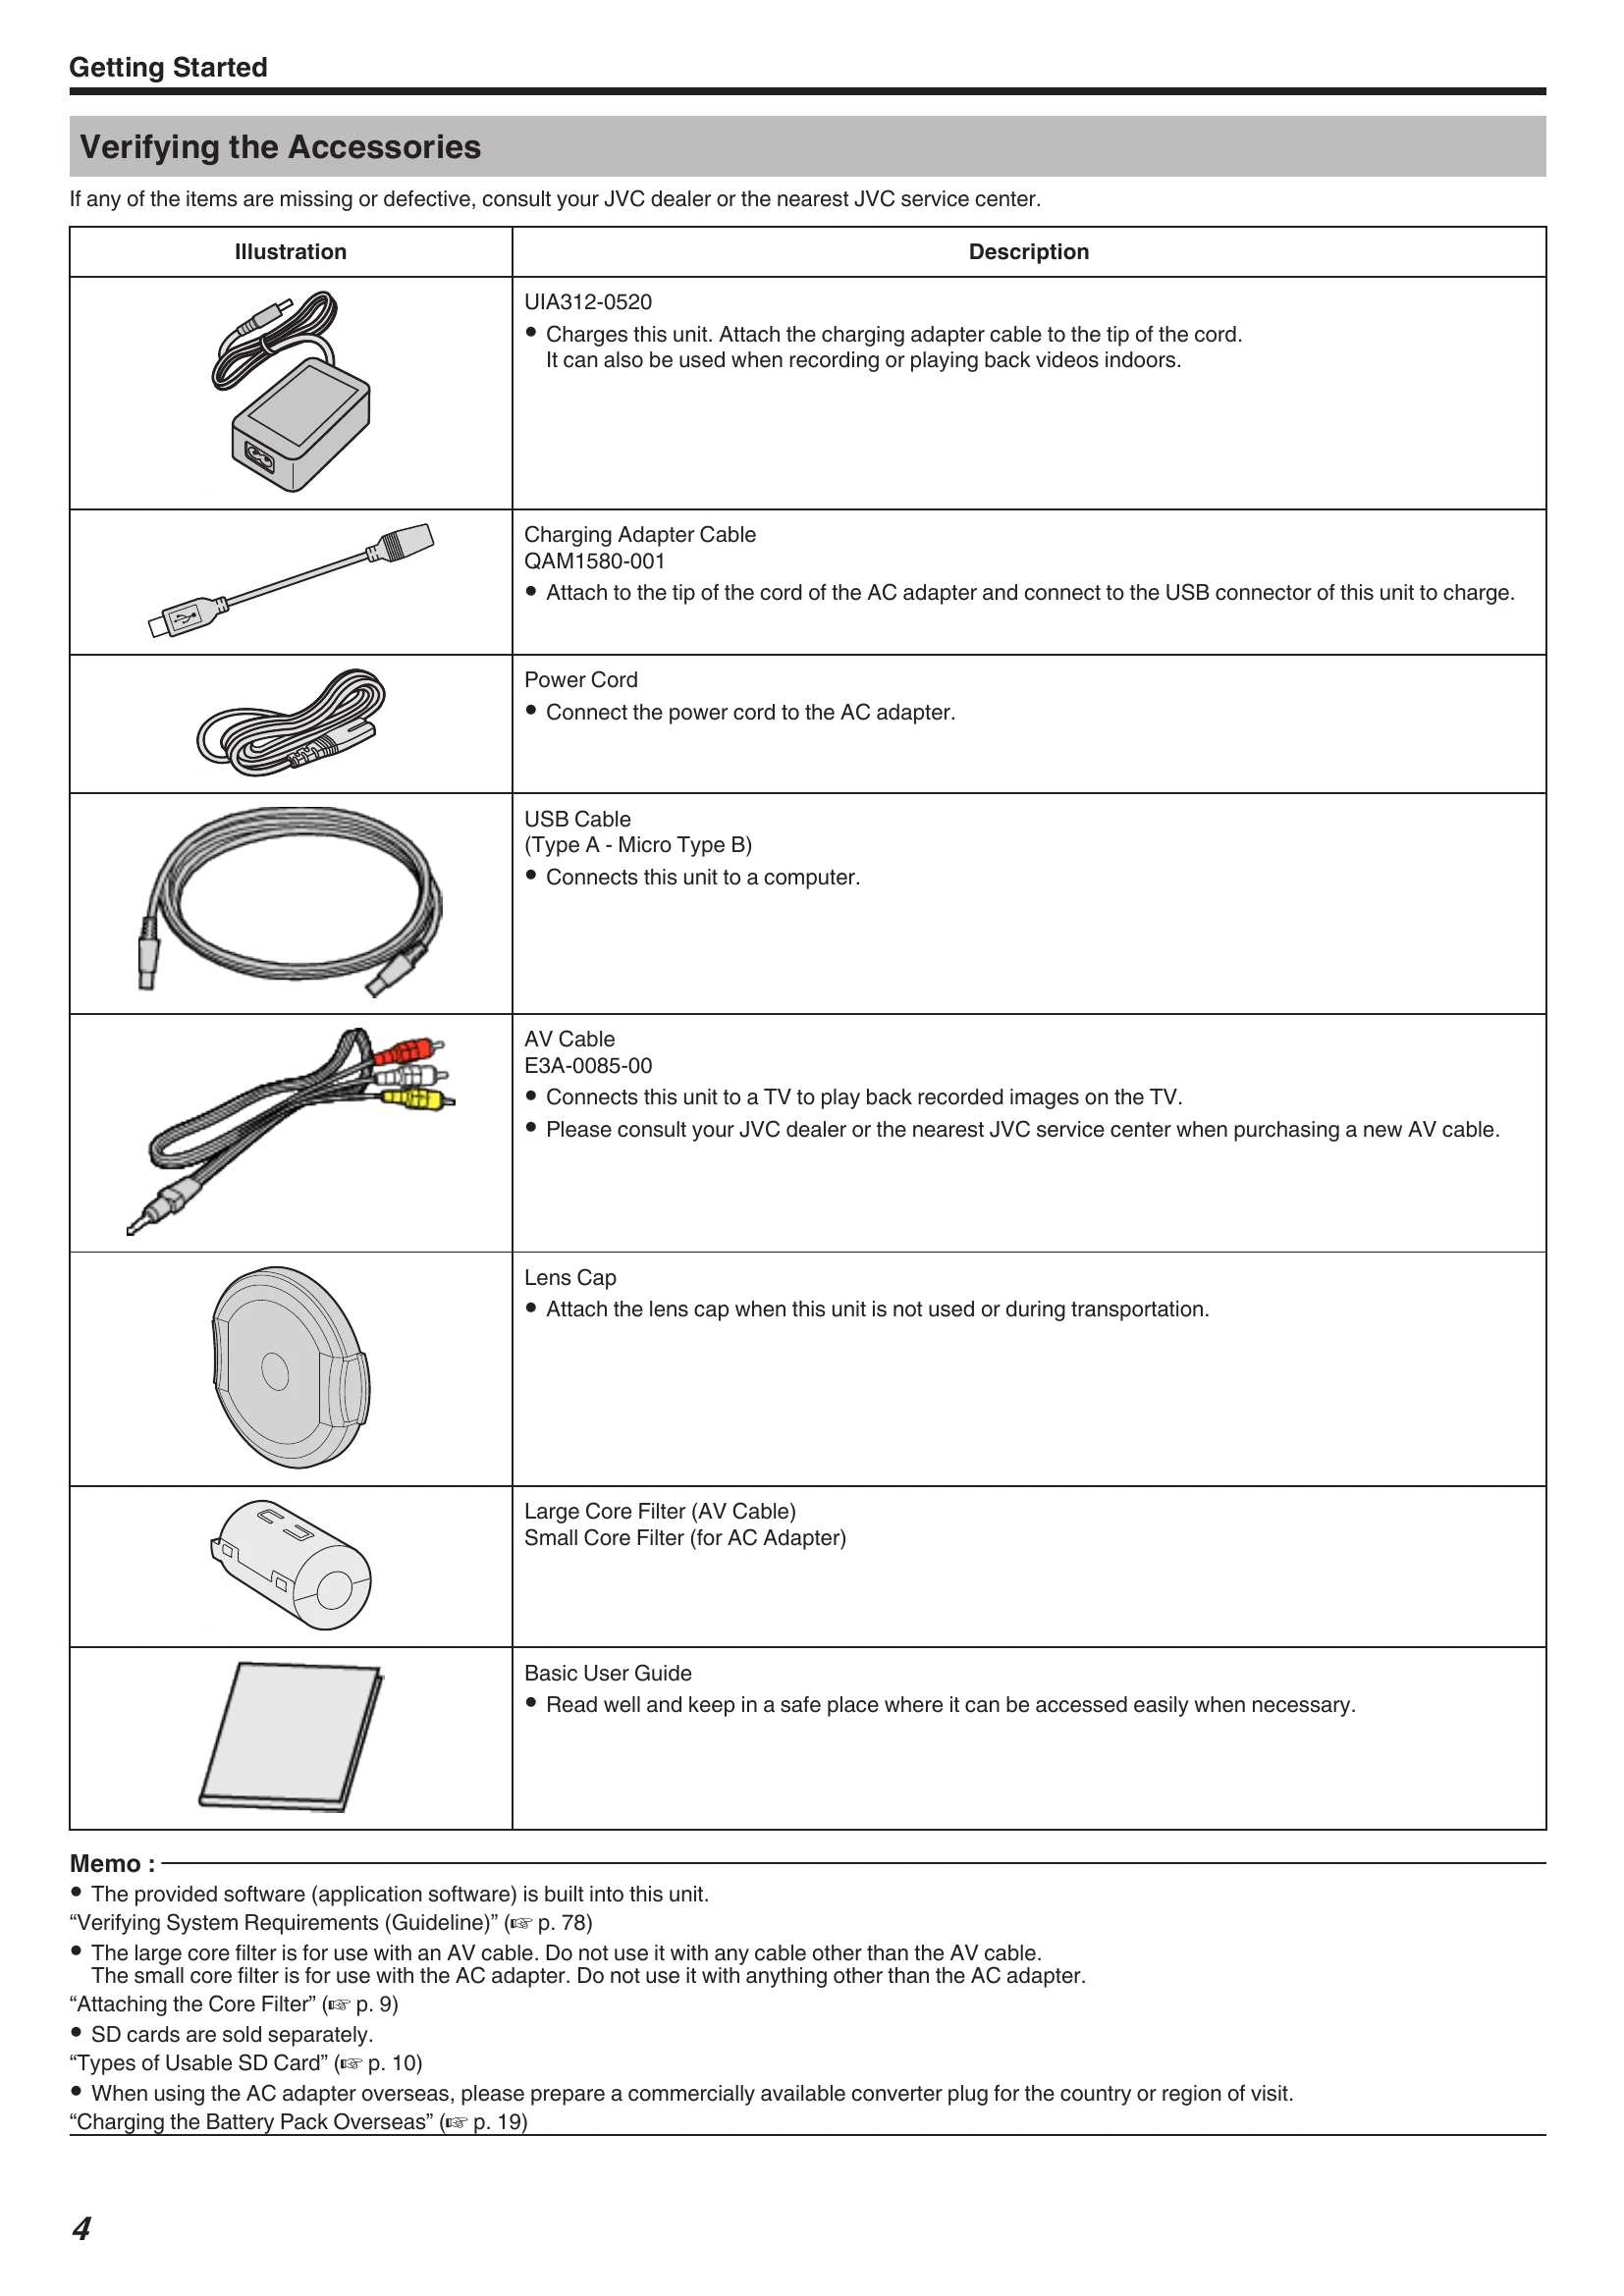
Check all included accessories. Contact dealer if any are missing or defective.
Open the LCD monitor to turn the unit on. Close it to turn it off.
Connect the AC adapter to charge the built-in battery. The CHARGE lamp indicates charging status.
The unit is waterproof, dust-proof, drop-proof, and freeze-proof.
Rinse with water and dry thoroughly after use, especially after underwater or beach use.
Mount on a tripod for stability. Ensure it's securely attached.
Keep elbows close to sides to prevent camera shake. Use left hand to stabilize.
Use a converter plug matching the power outlet shape for charging.
Adjust the date/time by selecting your travel destination in "AREA SETTING" of "DATE & TIME".
Turn ON "DST SETTING" in "DATE & TIME" to advance the time by 1 hour.
| Issue | Solution |
|---|---|
| Unable to charge the battery. | Use the supplied AC adapter. Charge within the temperature range of 10°C to 35°C. Do not use during progressive recording or Wi-Fi. |
| The remaining battery display is not correct. | Battery level may be inaccurate after long-term use or extreme temperatures. |
| The battery runs out quickly even after charging. | Use the supplied AC adapter. Battery performance may drop in cold temperatures. Replace battery if it consistently drains quickly. |
| Unable to turn on the power. | Charge the battery for at least 40 minutes. Reset the unit if it still doesn't turn on. |
| Recording cannot be performed. | Check that the recording mode is set correctly using the REC button. |
| Recording stops automatically. | Recording may stop after 12 consecutive hours or if the unit overheats. Turn off and on again. |
| The continuous shooting speed of still images is slow. | Speed may decrease with repeated use, depending on SD card or recording conditions. |
| The focus is not adjusted automatically. | Adjust focus manually. Clean the lens. Cancel manual focus if needed. |
| Zoom does not work. | Digital zoom is not available in still image mode or time-lapse recording. Set "ZOOM" in the menu. |
| Mosaic-type noise occurs with fast movements or brightness changes. | Set "VIDEO QUALITY" to "UXP" or "XP". |
| The inside of the lens is foggy. | Open terminal cover, close LCD, and let the unit adjust to room temperature. |
| Cannot insert the SD card. | Ensure correct orientation. Do not use miniSD/microSD cards with adapters. |
| Unable to copy to SD card. | Set "REC MEDIA FOR VIDEO"/"REC MEDIA FOR IMAGE" to SD card. Format the SD card using "FORMAT SD CARD" in the "SETUP" menu. Release write protection. |
| Sound or video is interrupted. | This is normal at connecting sections between scenes. |
| There is no sound. | Turn off "Silent Mode" or set "OPERATION SOUND" to "ON". Audio is not recorded in TIME-LAPSE RECORDING. |
| The same image is displayed for a long time. | Use a high-speed SD card. Clean card terminals. Format the SD card. Verify PC system requirements for playback. |
| The motion is choppy. | Use a high-speed SD card. Clean card terminals. Format the SD card. Verify PC system requirements for playback. |
| Cannot find a recorded file. | Change playback media. Select "PLAYBACK OTHER FILE". |
| Images do not appear on the TV properly. | Reconnect the cable. Reset the unit. |
| Images are projected vertically on the TV. | Set "VIDEO OUTPUT" to "4:3". Adjust TV screen. |
| The image displayed on TV is too small. | Set "VIDEO OUTPUT" to "16:9". |
| When connected to the TV via the HDMI mini cable, proper images and sounds are not output. | Reconnect the HDMI mini cable. Turn the unit off and on again. |
| The buttons on the touch screen do not work. | Use fingers, not fingernails or gloves. Disable "SCREEN LOCK". |
| The image is grainy. | This occurs with digital zoom. |
| This unit heats up. | Normal operation. Stop using if it becomes too warm. |
| The language on the display changed. | May occur when connecting to a TV with a different language setting via HDMI. |
| The unit operates slowly when switching between modes or power states. | Copy all files to a computer and erase them from the unit. |
| This unit does not function properly and error messages appear. | Reset the unit. If the problem persists, contact JVC service center. |
| CHARGE lamp and POWER/ACCESS lamp are blinking and operation is disabled. | Reset the unit. If the problem persists, contact JVC service center. |