Brand: JVC
Category: Digital Media Camera
Document Type: Manual
Language: EN
Brand: JVC
Category: Digital Media Camera
Document Type: Manual
Language: EN
Uploaded: Nov. 21, 2025, 6:21 p.m.
No warranty information provided in this manual.
Read all instructions, save them for later, adhere to warnings, unplug before cleaning, use only recommended attachments, avoid water, use with stable cart/stand, ensure proper ventilation, operate only from indicated power source, use grounding-type plug, unplug during lightning storms or long periods of disuse, do not rest anything on power cord, do not overload outlets, never push objects into slots, never spill liquid, refer servicing to qualified personnel, unplug if cord/plug damaged, liquid spilled, exposed to rain/water, not operating normally, dropped, or exhibits distinct performance change. Ensure replacement parts have same characteristics. Ask technician to perform safety checks.
Storage and Location: Indoor use only (use housing outdoors), avoid rain/moisture, vapor/oil, extreme temperatures (-10°C to 50°C), corrosive gases, radiation, strong radio waves/magnetism, vibration, excessive dirt. Using near sources of strong radio waves/magnetism may cause noise/color changes.
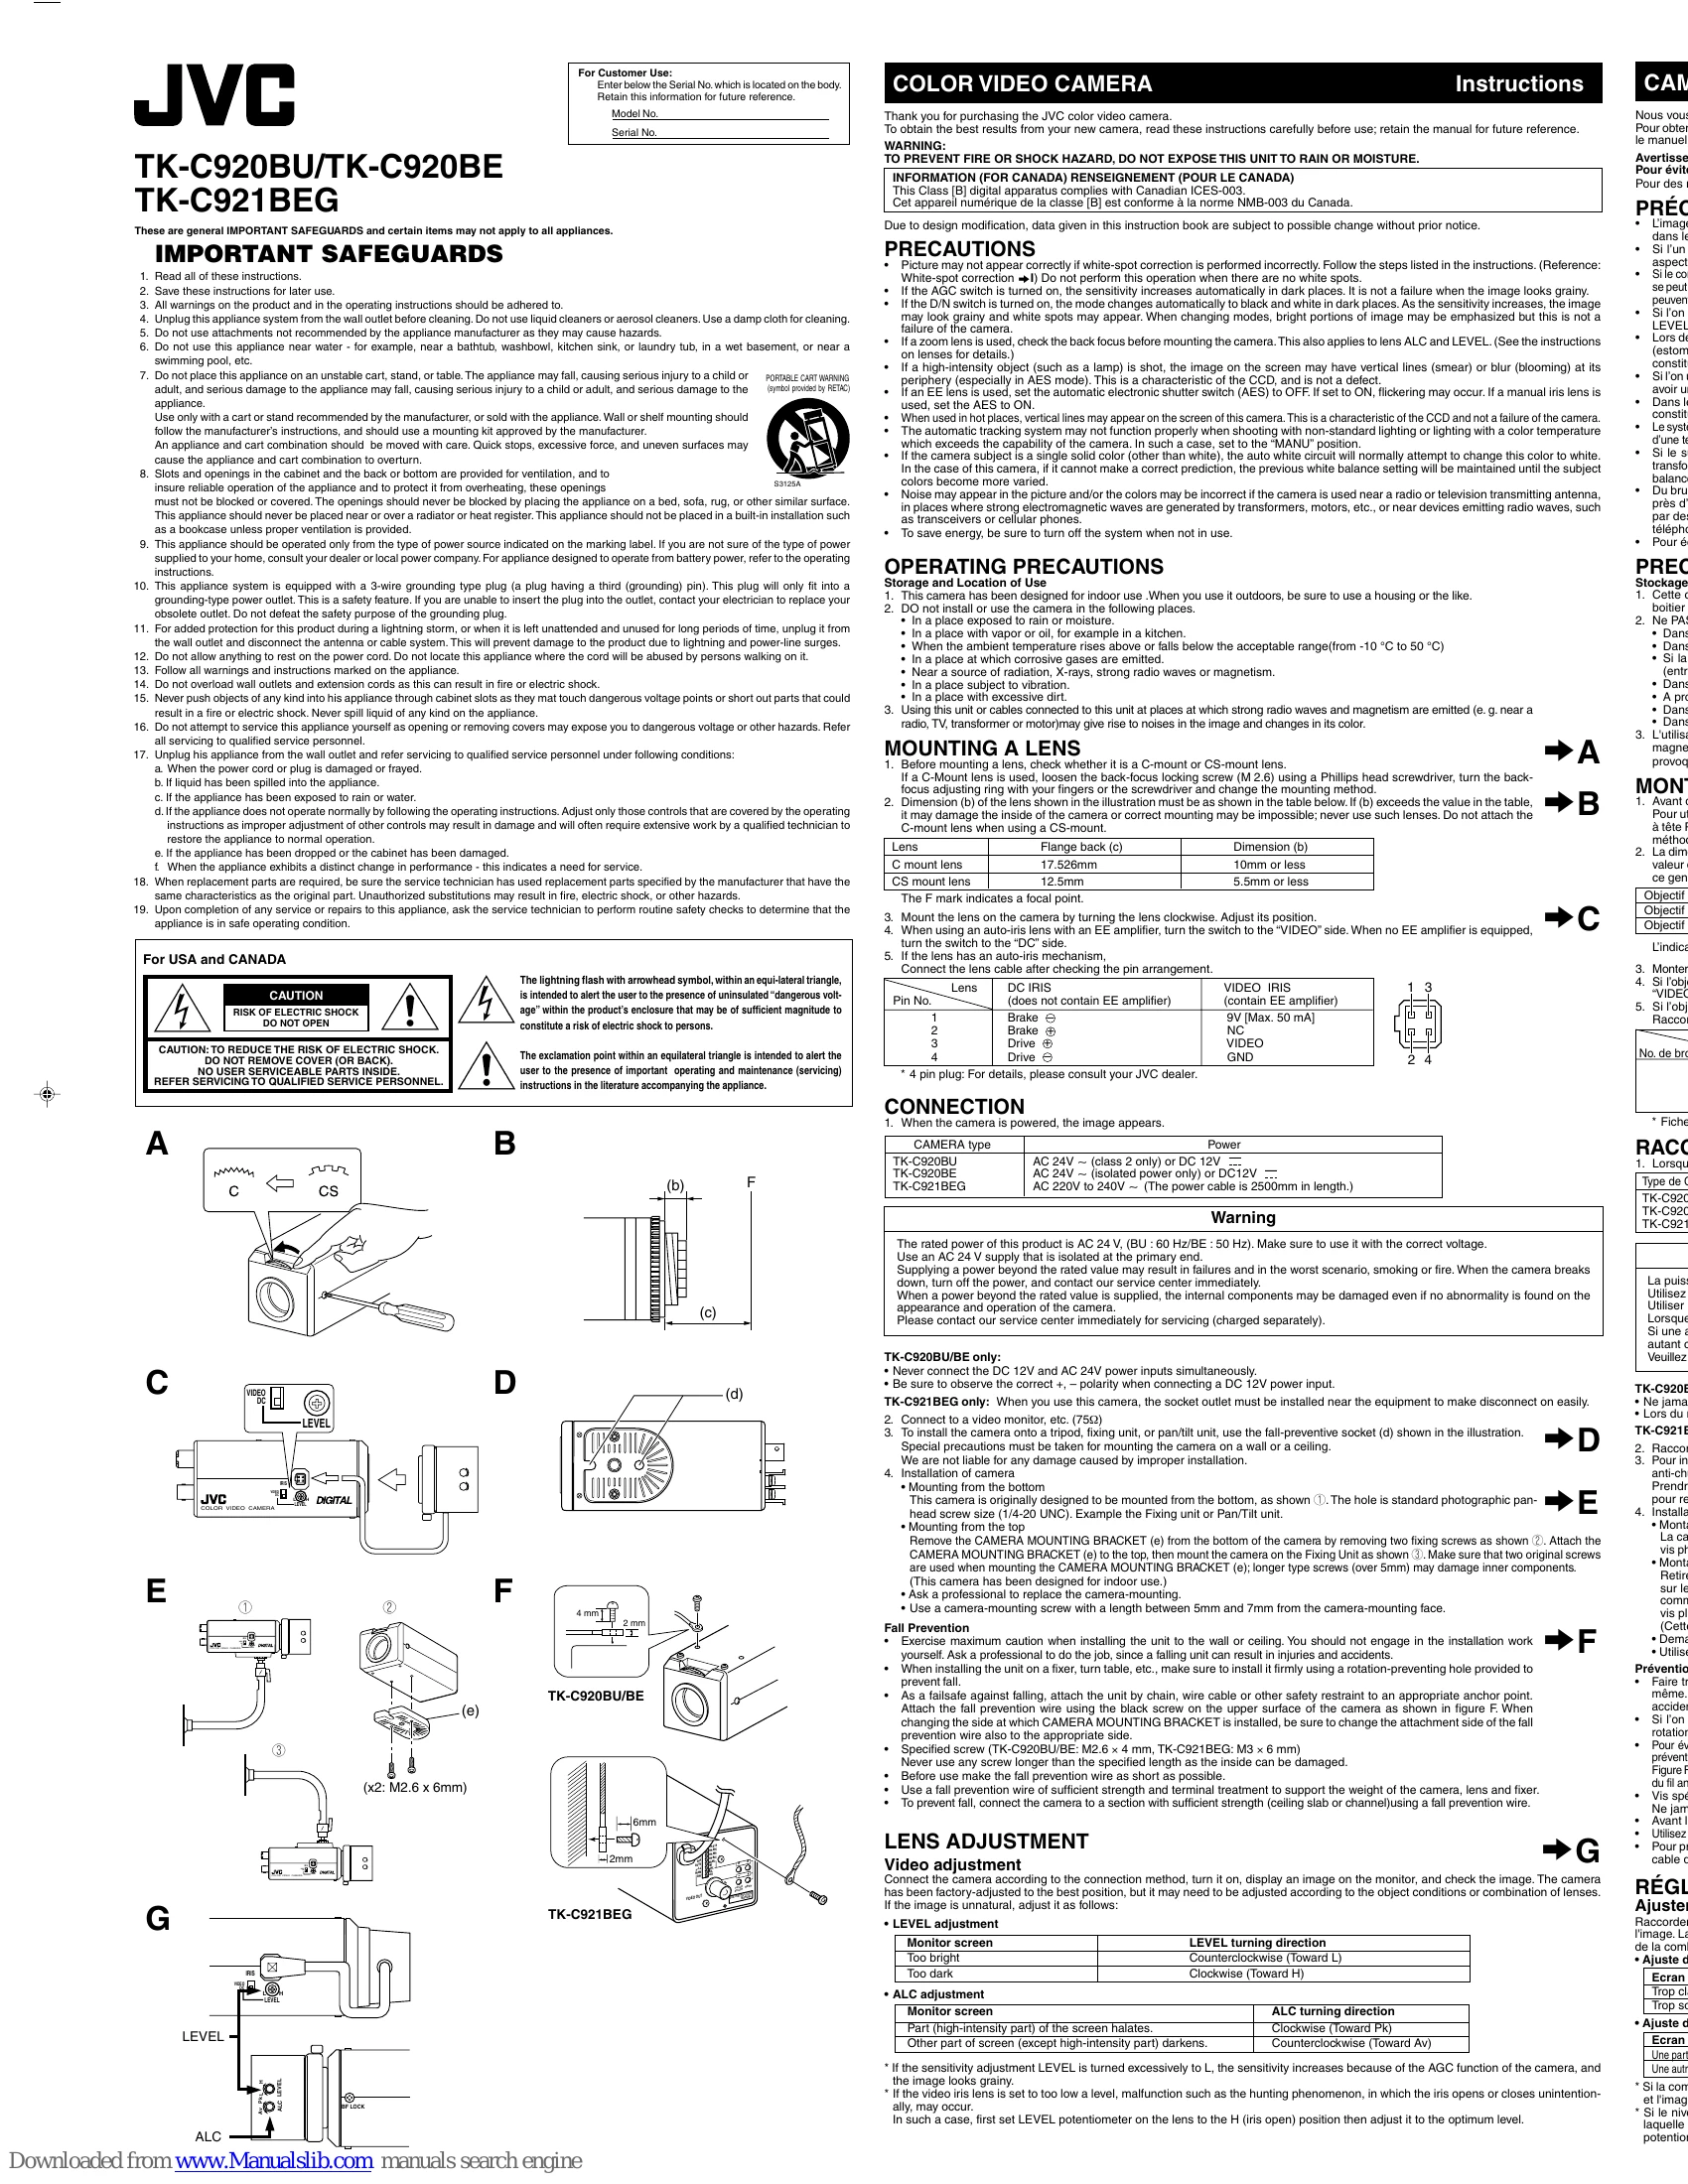
Check C-mount or CS-mount. Loosen back-focus screw, adjust ring for C-mount. Ensure lens dimension (b) is within limits (C-mount: 10mm or less, CS-mount: 5.5mm or less). Mount lens clockwise. For auto-iris lens with EE amplifier, set switch to VIDEO; without EE amplifier, set to DC. Connect lens cable after checking pin arrangement.
Power: Connect according to type (AC 24V~ or DC 12V). Ensure correct voltage and isolated power for AC 24V. Do not connect DC 12V and AC 24V simultaneously. Observe polarity for DC 12V. Video: Connect to a video monitor (75Ω). Mounting: Use fall-preventive socket for tripod/fixing unit/pan/tilt. Wall/ceiling mounting requires special care. Mounting from bottom uses standard photographic screw. Mounting from top involves attaching bracket with original screws. Use screws 5-7mm. Professional installation recommended for wall/ceiling mounting. Use fall prevention wire/chain as a failsafe.
After connecting and powering on, display image on monitor. Adjust LEVEL and ALC as needed using potentiometers and turning directions specified for brightness and sensitivity. Beware of over-adjustment leading to grainy images or hunting phenomenon.
| Symptom | Possible Cause | Remedy |
|---|---|---|
| Image may not appear correctly | White-spot correction performed incorrectly | Follow steps for white-spot correction. Do not perform when no white spots are present. |
| Image looks grainy (in dark places) | AGC switch is ON | This is normal; sensitivity increases automatically. |
| Image may look grainy, white spots may appear, bright portions emphasized when changing modes. | D/N switch is ON | This is normal; mode changes automatically to B&W in dark. Sensitivity increases. |
| Vertical lines (smear) or blur (blooming) at periphery of high-intensity objects. | High-intensity object shot (especially in AES mode) | This is a characteristic of the CCD, not a defect. |
| Flickering may occur. | EE lens used with AES switch set to ON. | Set AES to OFF when using an EE lens. Set AES to ON for manual iris lens. |
| Vertical lines may appear on screen in hot places. | Camera used in hot places | This is a characteristic of the CCD, not a failure. |
| Automatic tracking system may not function properly. | Non-standard lighting or lighting with color temperature exceeding camera's capability. | Set to "MANU" position. |
| Previous white balance setting maintained. | Auto white circuit cannot make correct prediction with single solid color subject. | Colors become varied. |
| Noise may appear in picture and/or colors may be incorrect. | Camera used near radio/TV antenna, strong electromagnetic waves (transformers, motors), or devices emitting radio waves (transceivers, cellular phones). | (No remedy specified, implies relocation or shielding may be necessary) |