Brand: KENWOOD
Category: Audio System
Document Type: Manual
Language: EN
Brand: KENWOOD
Category: Audio System
Document Type: Manual
Language: EN
Uploaded: Nov. 21, 2025, 9:05 p.m.
Warranty information is not provided in this section of the manual.
Welcome
This manual guides you through operating your Kenwood Spectrum system. Familiarize yourself with the system's capabilities for optimal enjoyment.
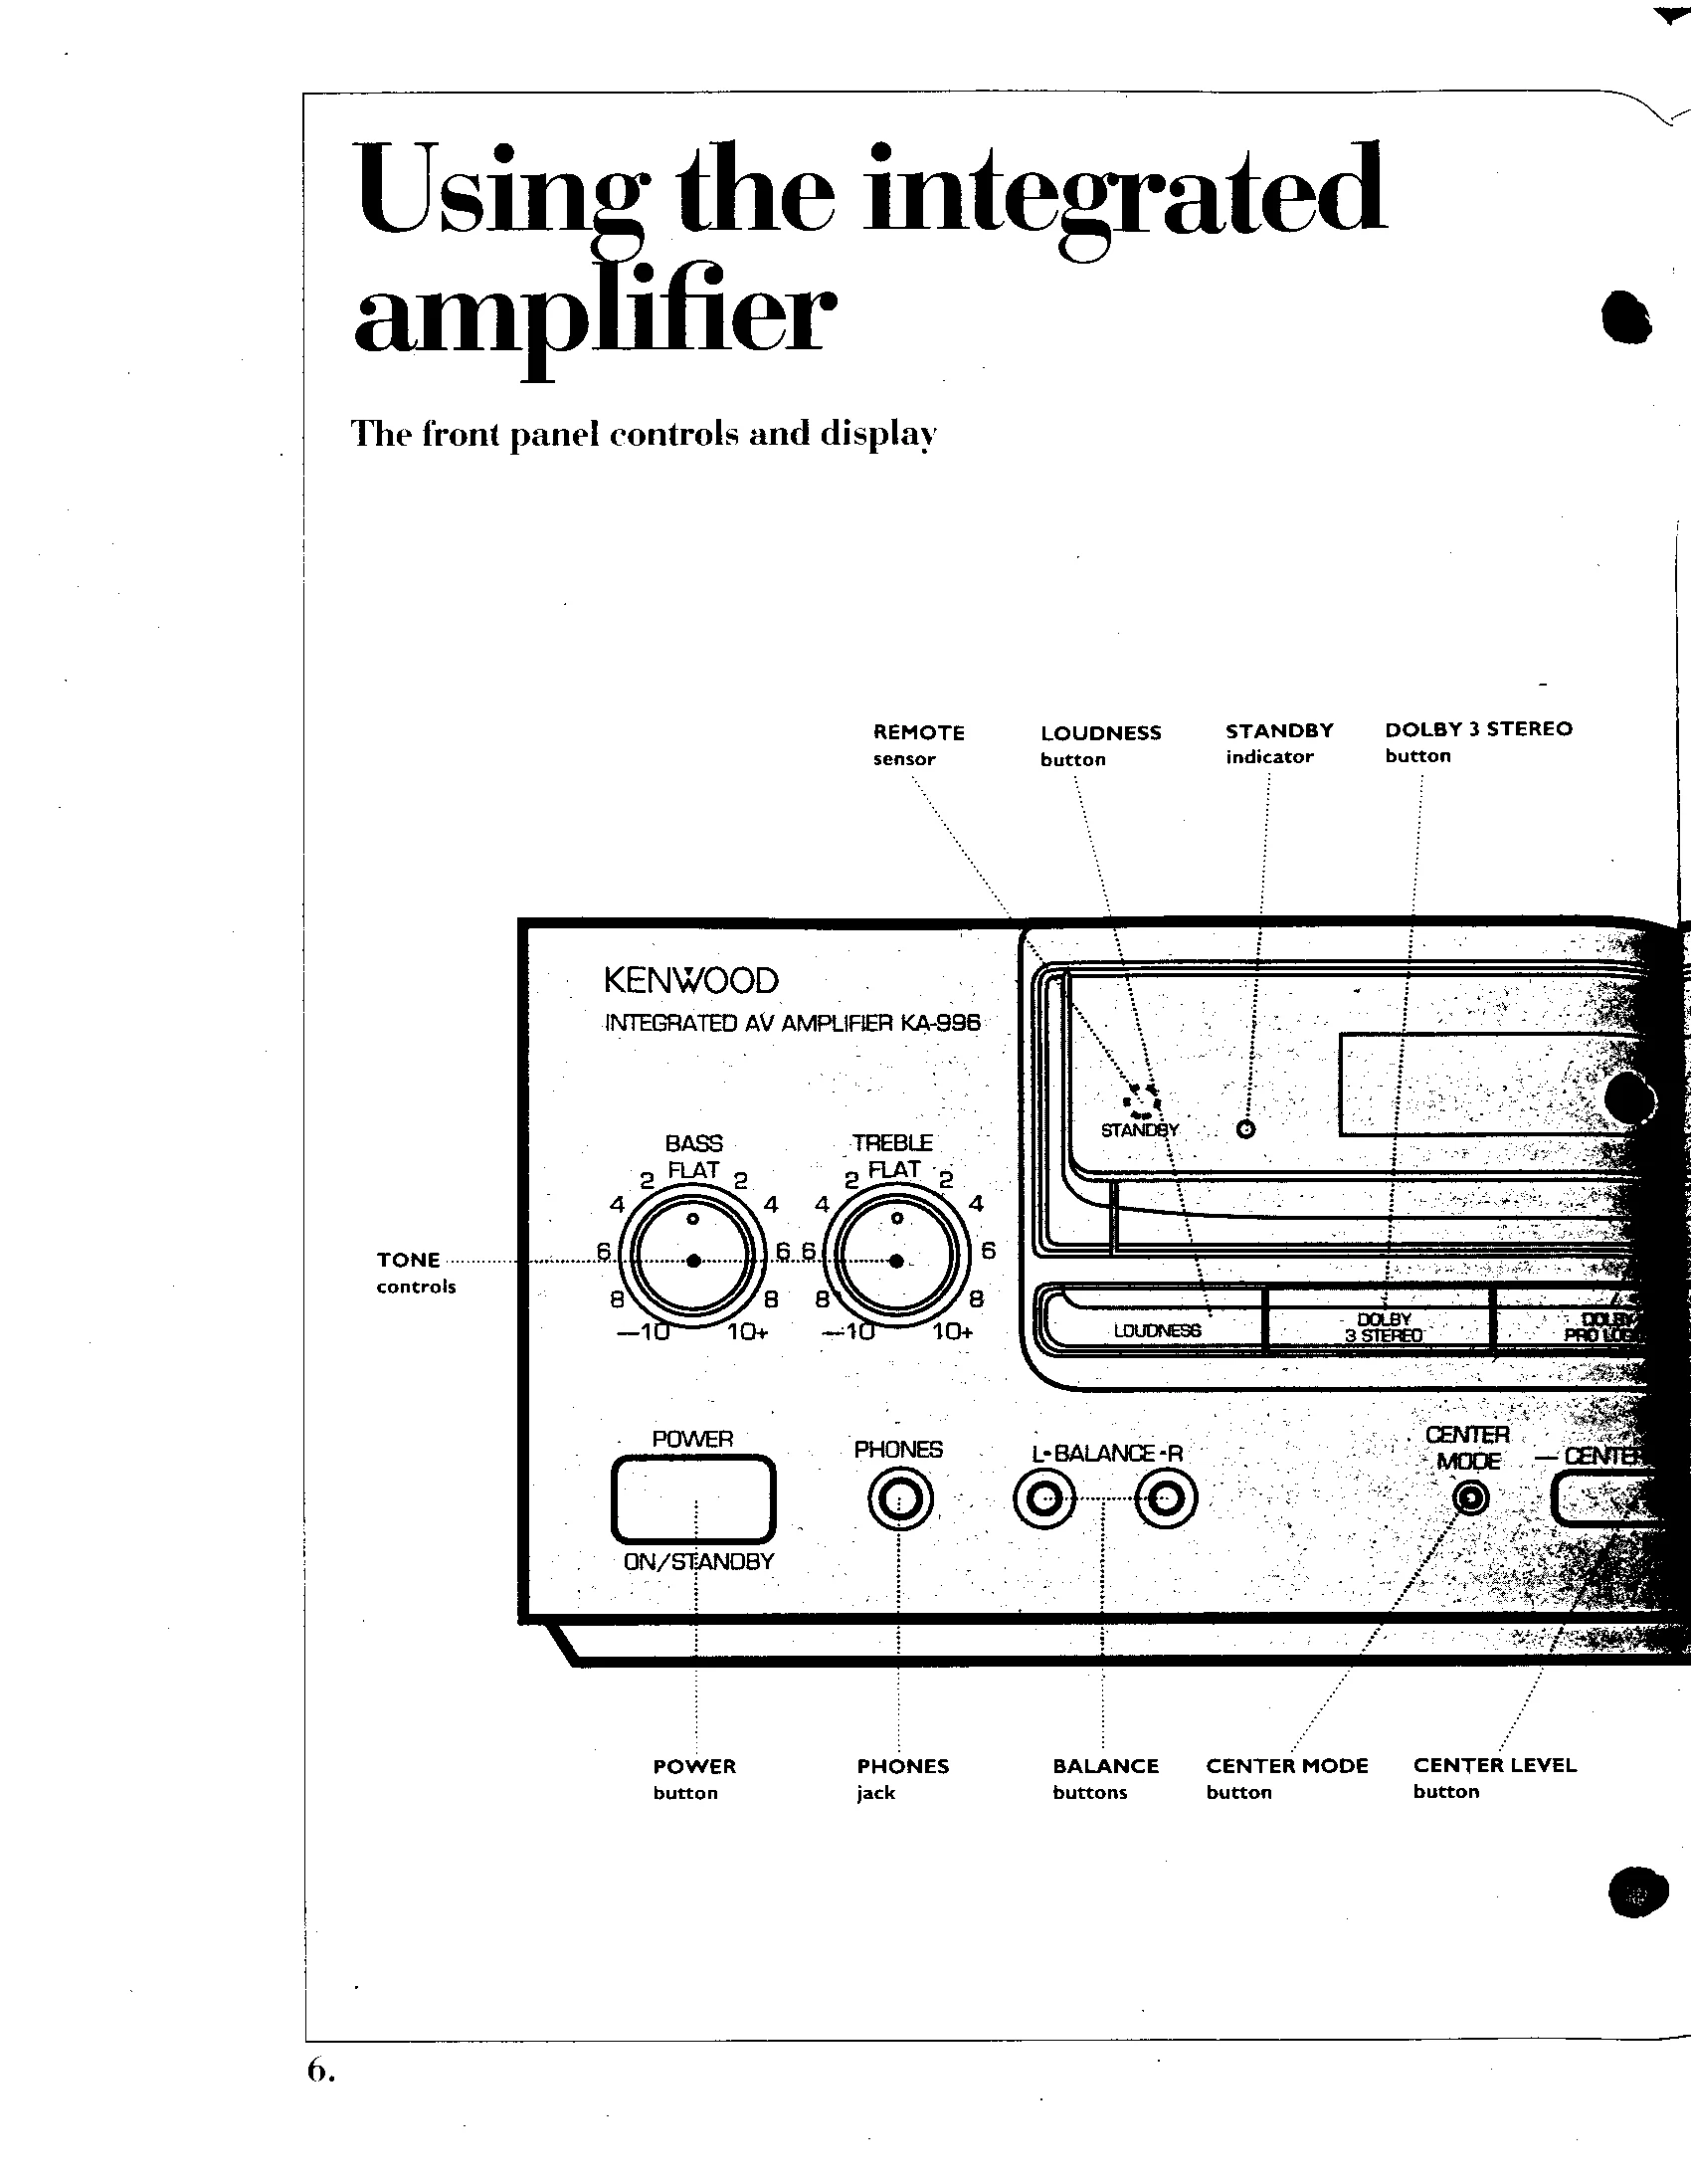
Basic Audio Functions:
Headphones:
Audio Modes:
| Issue | Possible Cause | Solution |
|---|---|---|
| CD Player | ||
| Power light doesn't come on | Power cord not plugged in | Check power cord connection to the electrical outlet and the back of the power amplifier. |
| Player doesn't play a loaded CD | CD loaded incorrectly or damaged | Ensure CD is loaded right-side up. Check for cracks or dirt on the CD. Allow player to warm up if condensation is present. |
| No sound | CD not loaded, damaged, or PLAY mode inactive | Check CD loading, condition, and ensure PLAY mode is active. Verify audio cable connections. |
| Skipping (mis-tracking) | CD damaged or player subjected to vibrations | Check CD for damage. Ensure player is not subjected to strong vibrations. |
| CD automatically plays when power is turned on | CD left in player | Remove all CDs before turning the unit OFF. |
| Cassette Deck | ||
| No sound when PLAY button is pressed | Tape is blank, wound improperly, or audio cables disconnected | Check if tape is blank. Ensure tape is wound properly in the case. Verify audio cable connections. |
| None of the operation buttons work | Tape not inserted, well door not closed, or insufficient delay after power-on | Insert tape, close well door, and wait at least 3 seconds before pressing buttons. Ensure tape is not fully wound. Close cassette well door. |
| Track-finding function doesn't work | Missing blank spaces between tracks | Ensure there are 4-second blank spaces between tracks on the tape. |
| Automatic recording doesn't work | Recording activation tabs removed or CD player not selected | Verify recording activation tabs are present on tape well B. Ensure there is a CD in the CD player. Check system control cables. |
| Cassette well door doesn't open | Player not in STOP mode | Ensure the player is in the STOP mode before pressing EJECT. |
| Recordings sound dull or distorted | Recording level too high or Dolby Noise Reduction activated | Adjust recording level. Ensure Dolby Noise Reduction is not activated for tapes recorded without it. Clean tape heads if necessary. |
| Pressing REC/ARM button doesn't start recording | Tabs removed, well door open, wrong input selected, recording level too low, or tape fully wound | Check recording activation tabs, well door closure, amplifier input setting, recording level, and tape winding. |
| Tape noise (hiss) level is high | Improper Dolby Noise Reduction or low recording level | Select proper Dolby Noise Reduction. Re-record at a higher level if necessary. Demagnetize tape heads. |
| Sound is 'sour', with unstable pitch | Dirty tape heads or tape wound improperly | Clean tape heads. Ensure tape is wound properly in the cassette case. |
| Tape automatically plays or records when power is turned ON | TIMER switch not OFF | Ensure the TIMER switch is OFF. |
| None of the functions operate, or display shows wrong information | Microcomputer issue | Reset the unit by unplugging the power cord, holding down the STOP button, and plugging it back in. |