Brand: KitchenAid
Category: Dryer
Document Type: Manual
Language: EN
Brand: KitchenAid
Category: Dryer
Document Type: Manual
Language: EN
Uploaded: Nov. 21, 2025, 6:56 p.m.
Manual Publish Date: 2000-05-01
KitchenAid offers a 2-year full warranty and a 5-year limited warranty for dryer parts.
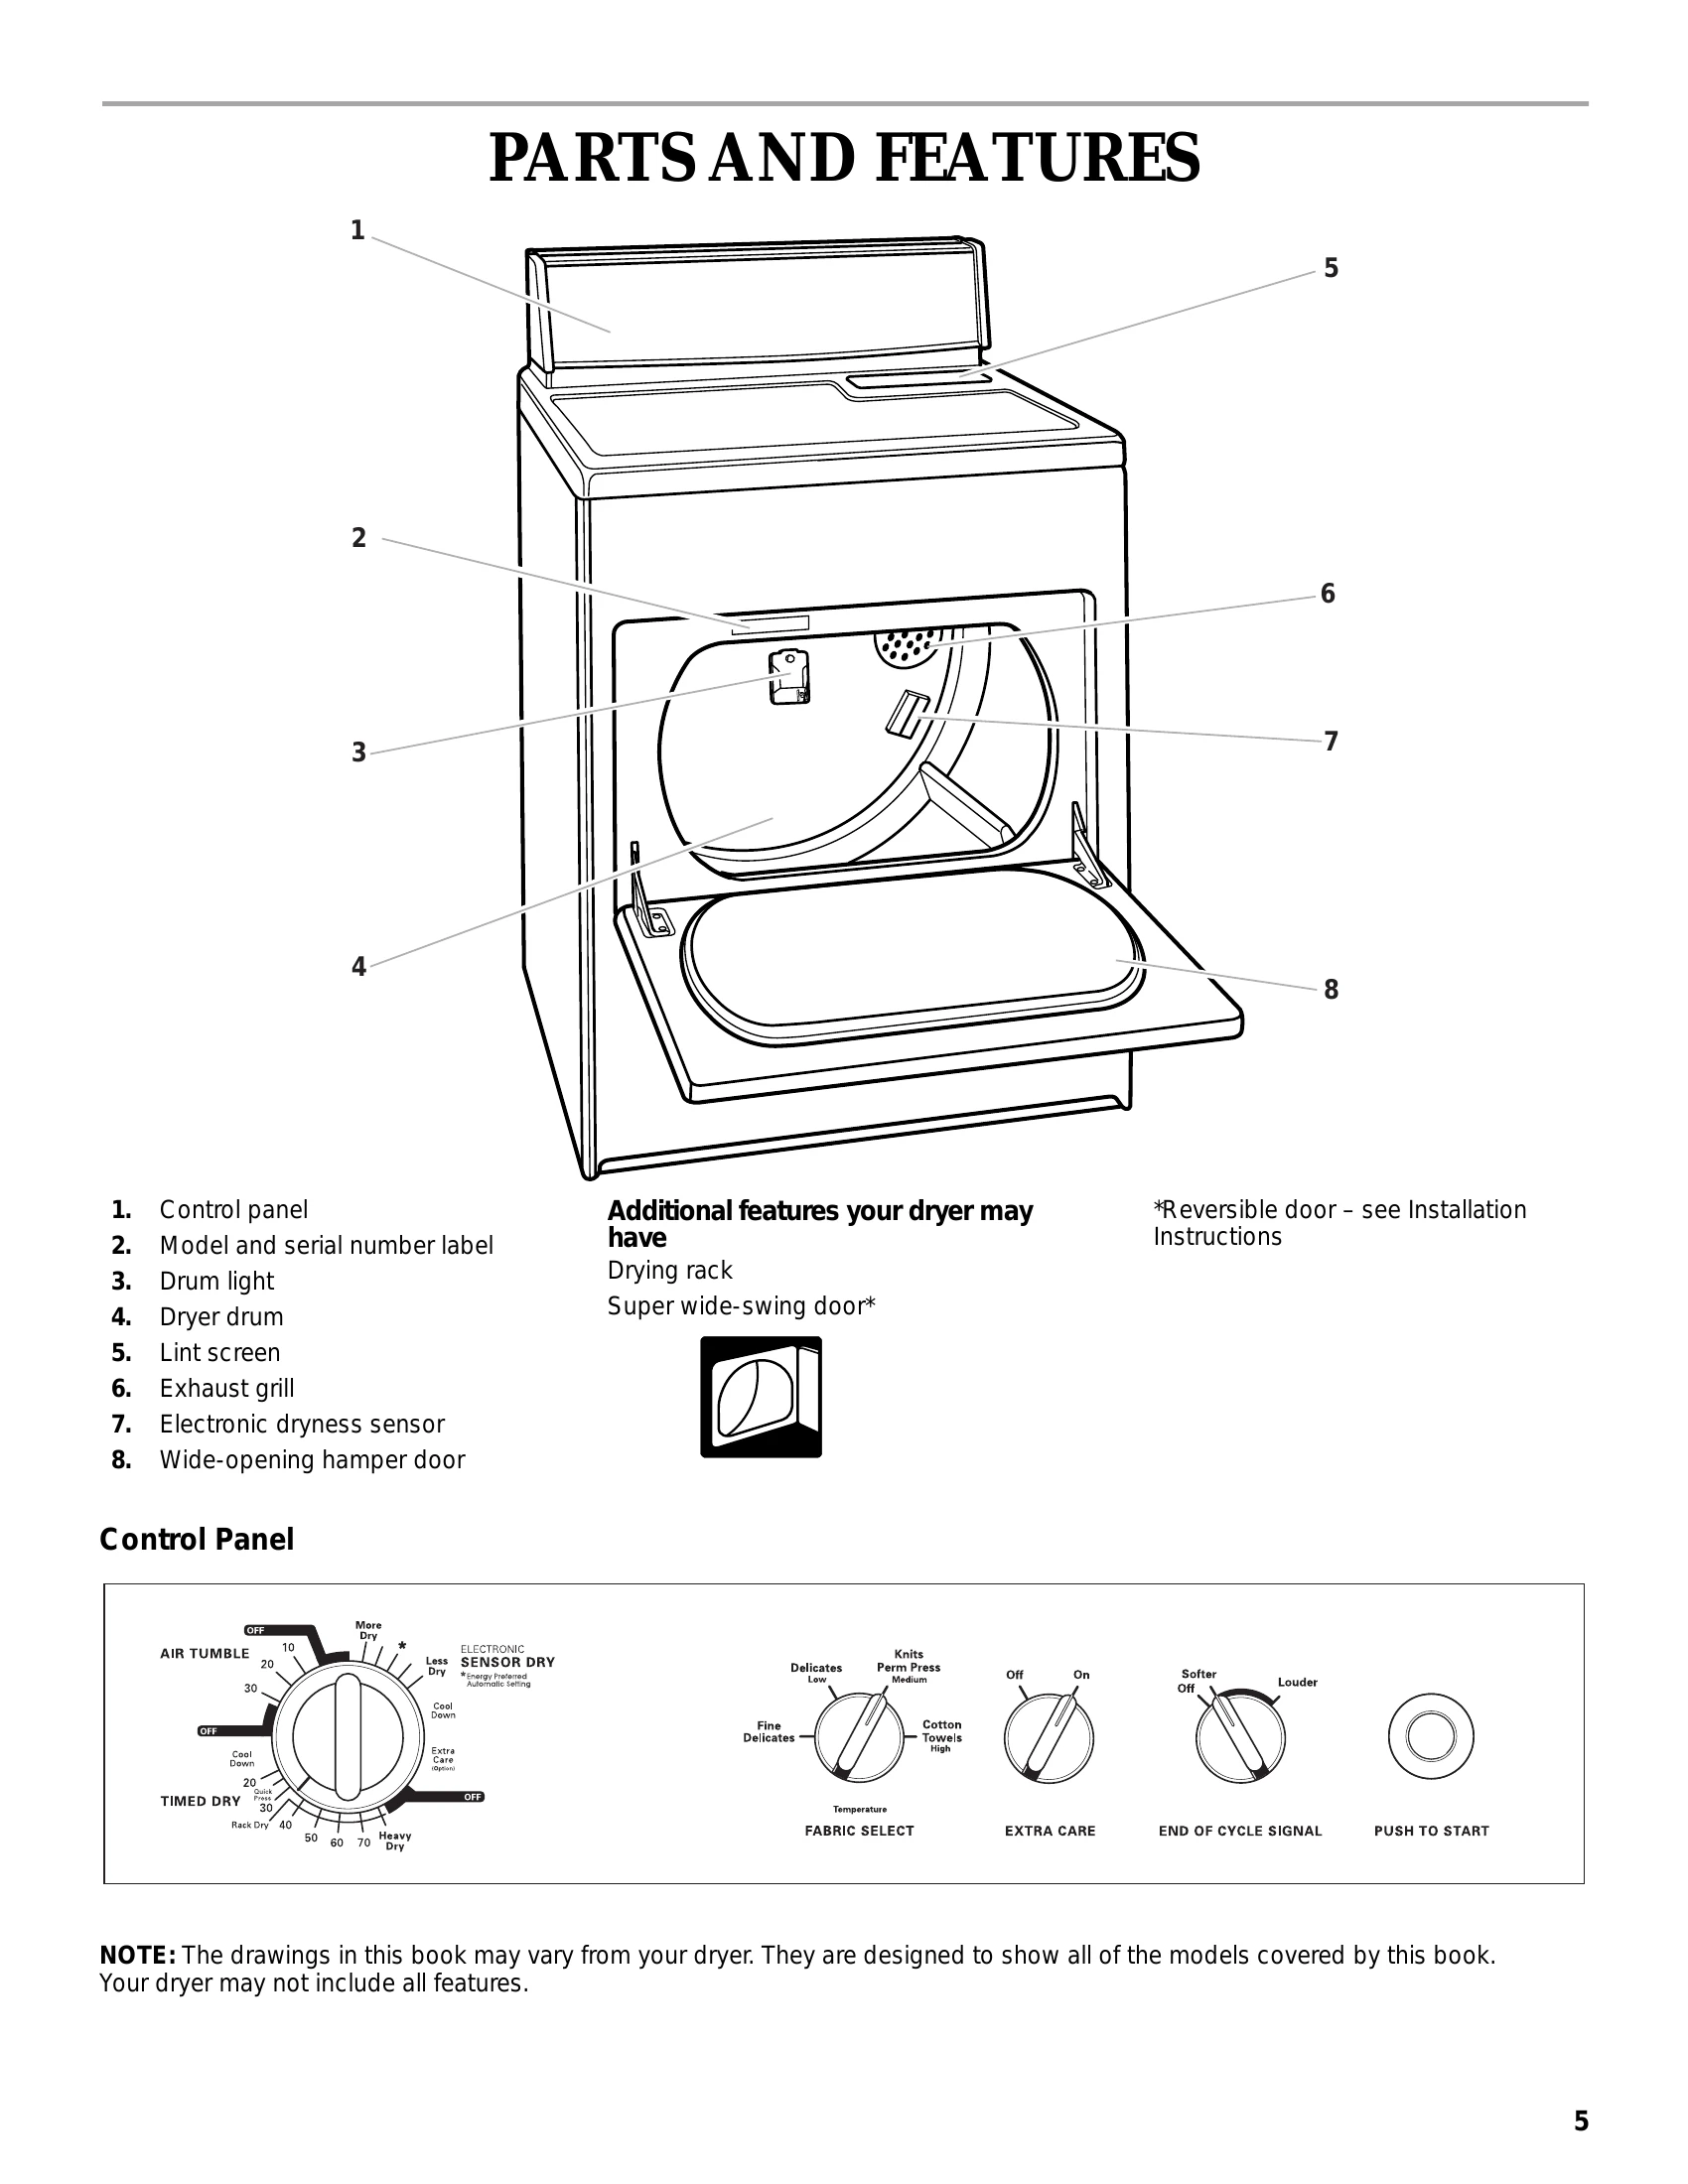
To start your dryer, load clothes loosely into the drum and close the door. Select the appropriate cycle and temperature using the control knobs. For most loads, use the "Energy Preferred Automatic Setting" on the SENSOR DRY cycle. For specific items or needs, utilize Timed Dry, Air Tumble, or the Drying Rack. Push the START button to begin. To stop, open the door or turn the knob to OFF. To restart, close the door, select a new cycle/temperature if needed, and push START.
| Problem | Possible Cause | Solution |
| Clothes are not drying satisfactorily | Lint screen clogged | Clean lint screen. Check for air movement. |
| Exhaust vent or hood clogged | Clean exhaust system. Replace vent if needed. | |
| Exhaust vent crushed or kinked | Replace with heavy metal or flexible metal vent. | |
| Fuse blown or circuit breaker tripped | Check fuses/breakers. Use time-delay fuse for electric dryers. | |
| Air dry cycle selected | Select appropriate cycle for garment type. | |
| Gas dryer valve not open | Check valve on supply line. | |
| Fabric softener sheets blocking grill | Use only one sheet and only once. | |
| Dryer will not run | Power cord not plugged in | Plug in the dryer. |
| Fuse blown or circuit breaker tripped | Check fuses/breakers. Use time-delay fuse. | |
| Door not closed firmly or START button not pressed | Close door firmly, press START button. Ensure a cycle is selected. | |
| Unusual sounds | Dryer has had a period of non-use | A thumping sound may occur during the first few minutes of operation. |
| Gas dryer | Gas valve clicking is normal. | |
| Lint on load | Lint screen clogged | Clean lint screen. Check for air movement. |
| Load not properly sorted | Sort lint givers from lint takers; sort by color. | |
| Load too big or too heavy | Dry smaller loads for better lint carrying. | |
| Load overdried | Use correct dryer settings to avoid static. | |
| Stains on load or color change | Dryer fabric softener improperly used | Add sheets at beginning of cycle, not to warm load. |
| Items soiled when placed in dryer | Items should be clean before drying. | |
| Items not properly sorted | Sort light/dark colors and colorfast/noncolorfast items. | |
| Items shrinking | Dryer overloaded | Dry smaller loads that tumble freely. |
| Load overdried | Match dryer setting to load type and care label. | |
| Loads are wrinkled | Load not removed at end of cycle | Remove load promptly. |
| Dryer overloaded | Dry smaller loads that tumble freely. | |
| Load overdried | Match dryer setting to load type and care label. | |
| Odors | Painting/varnishing in the area | Ventilate area, re-wash and dry. |
| Electric dryer used for first time | New heating element may have odor, which will dissipate. | |
| Gas dryer | Turn off gas, leave house, call gas company. | |
| Garment damage | Zippers, snaps, hooks left open | Close or protect these items. |
| Strings and sashes not tied | Tie strings and sashes to prevent tangling. | |
| Care label instructions not followed | Follow care label instructions. | |
| Items damaged before drying | Check items before drying. |