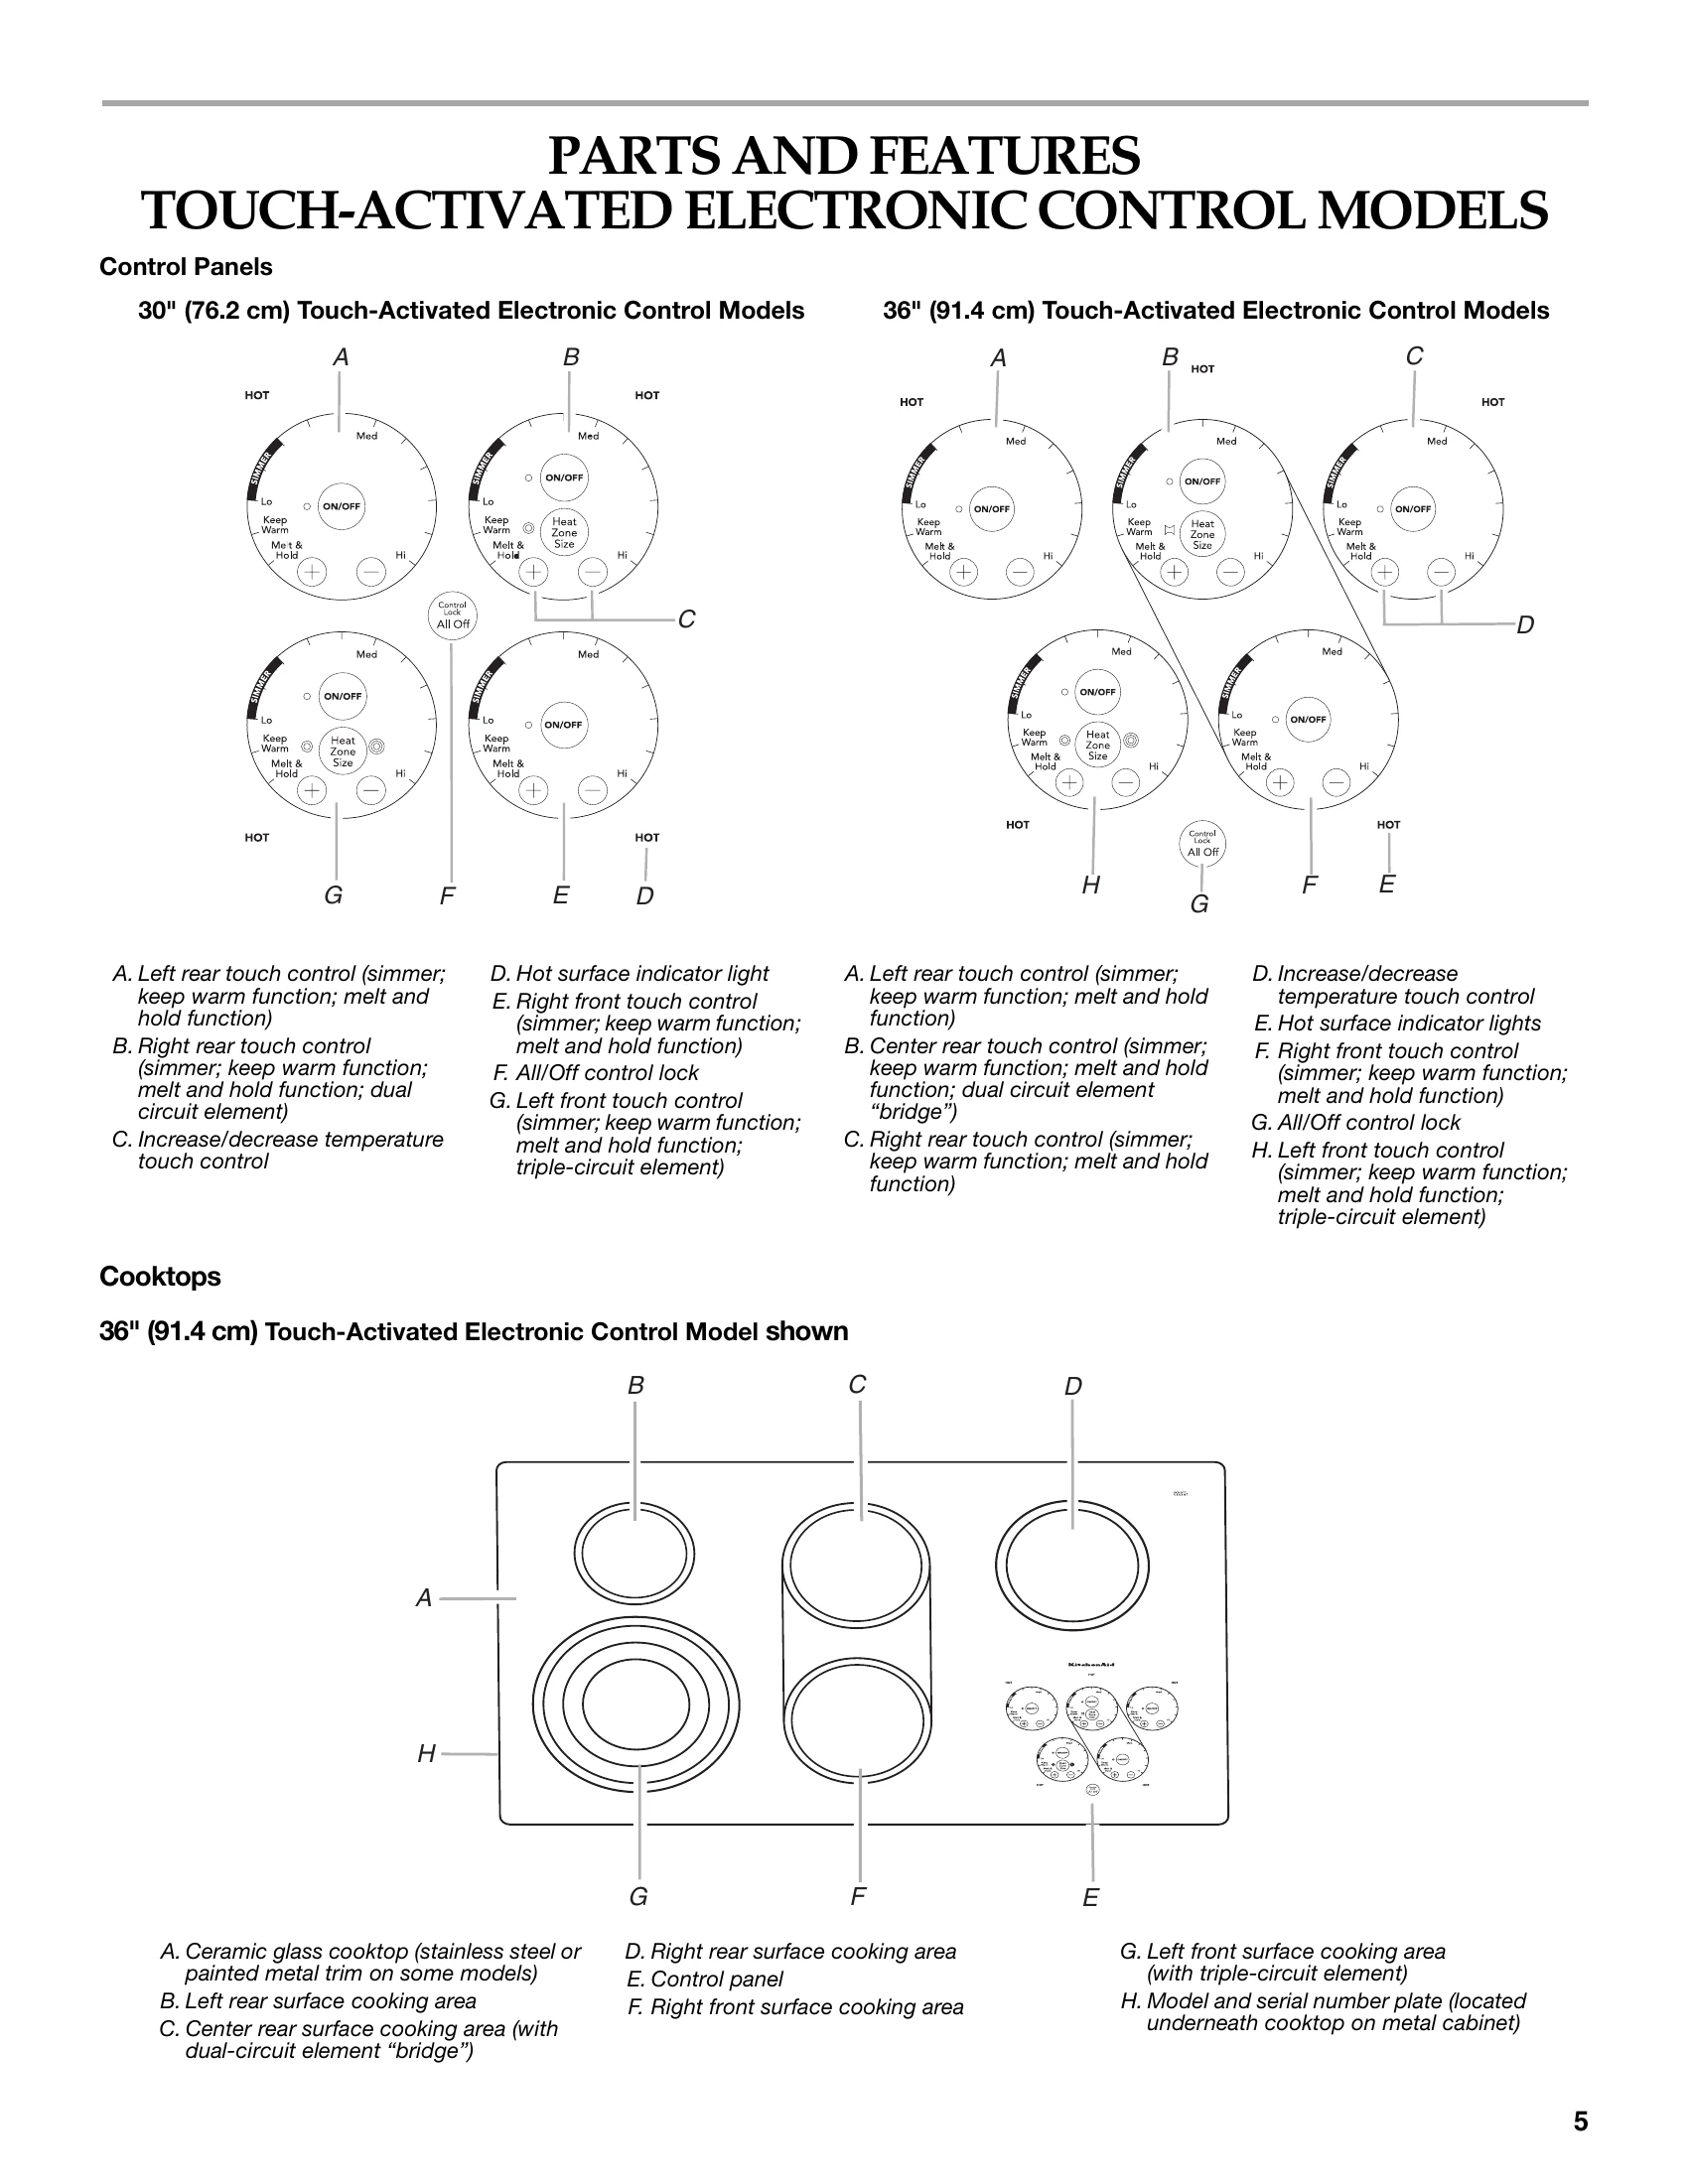
Brand: KitchenAid
Category: Electric Cooktop
Document Type: Manual
Language: EN
Brand: KitchenAid
Category: Electric Cooktop
Document Type: Manual
Language: EN
Uploaded: Nov. 21, 2025, 7:29 p.m.
Manual Publish Date: 2007-09-01
Limited warranty covers factory specified parts and labor for one year, with extended component part coverage for five years.
To use:
To Use:
To Use:
To Use SINGLE:
To Use DUAL:
To Use TRIPLE:
To use SINGLE (A):
To use SINGLE and BRIDGE area (A + B):
To use SINGLE (C):
To use both Single elements and Bridge (A+B+C):
To Use:
| Problem | Solutions |
|---|---|
| Nothing will operate | Is the cooktop wired properly? See the Installation Instructions for more information. Has a household fuse blown, or has a circuit breaker tripped? Replace the fuse or reset the circuit breaker. If the problem continues, call an electrician. |
| Cooktop will not operate | On models with knob controls, is the control knob set correctly? Push in the knob before turning to a setting. On models with electronic touch controls, is the cooktop control set correctly? Touch ON/OFF before selecting a setting. On models with touch controls, is the "Control Lock/ALL OFF" Cooktop Lockout set? See "Control Lock/All Off" section. |
| Excessive heat around cookware on cooktop | Is the cookware the proper size? Use cookware about the same size as the surface cooking area, element or surface burner. Cookware should not extend more than 1/2" (1.3 cm) outside the cooking area. |
| Cooktop has flashing lights | Are there lights on the cooktop flashing on and off? 1. Make sure the cooktop controls are OFF. 2. Clean the cooktop touch control panel thoroughly. See "General Cleaning" section. 3. If the cooktop lights continue to flash, disconnect power or unplug the cooktop. 4. After a few seconds, reconnect power or plug in the cooktop. 5. If the lights continue to blink on and off, call for service. |
| Cooktop cooking results not what expected | Is the proper cookware being used? See "Cookware" section. Is the cooktop control set to the proper heat level? See "Cooktop Controls" section. Is the appliance level? Level the appliance. See the Installation Instructions. |