Illustrations in this documentation might look different from your product.
Depending on the model, some optional accessories, features, and software programs might not be available on your computer.
Depending on the version of operating systems, some user interface instructions might not be applicable to your computer.
Documentation content is subject to change without notice. Lenovo makes constant improvements on the documentation of your computer, including this User Guide. To get the latest documentation, go to https://support.lenovo.com.
Microsoft® makes periodic feature changes to the Windows® operating system through Windows Update. As a result, some information in this documentation might become outdated. Refer to Microsoft resources for the latest information.
Chapter 1. Meet your computer
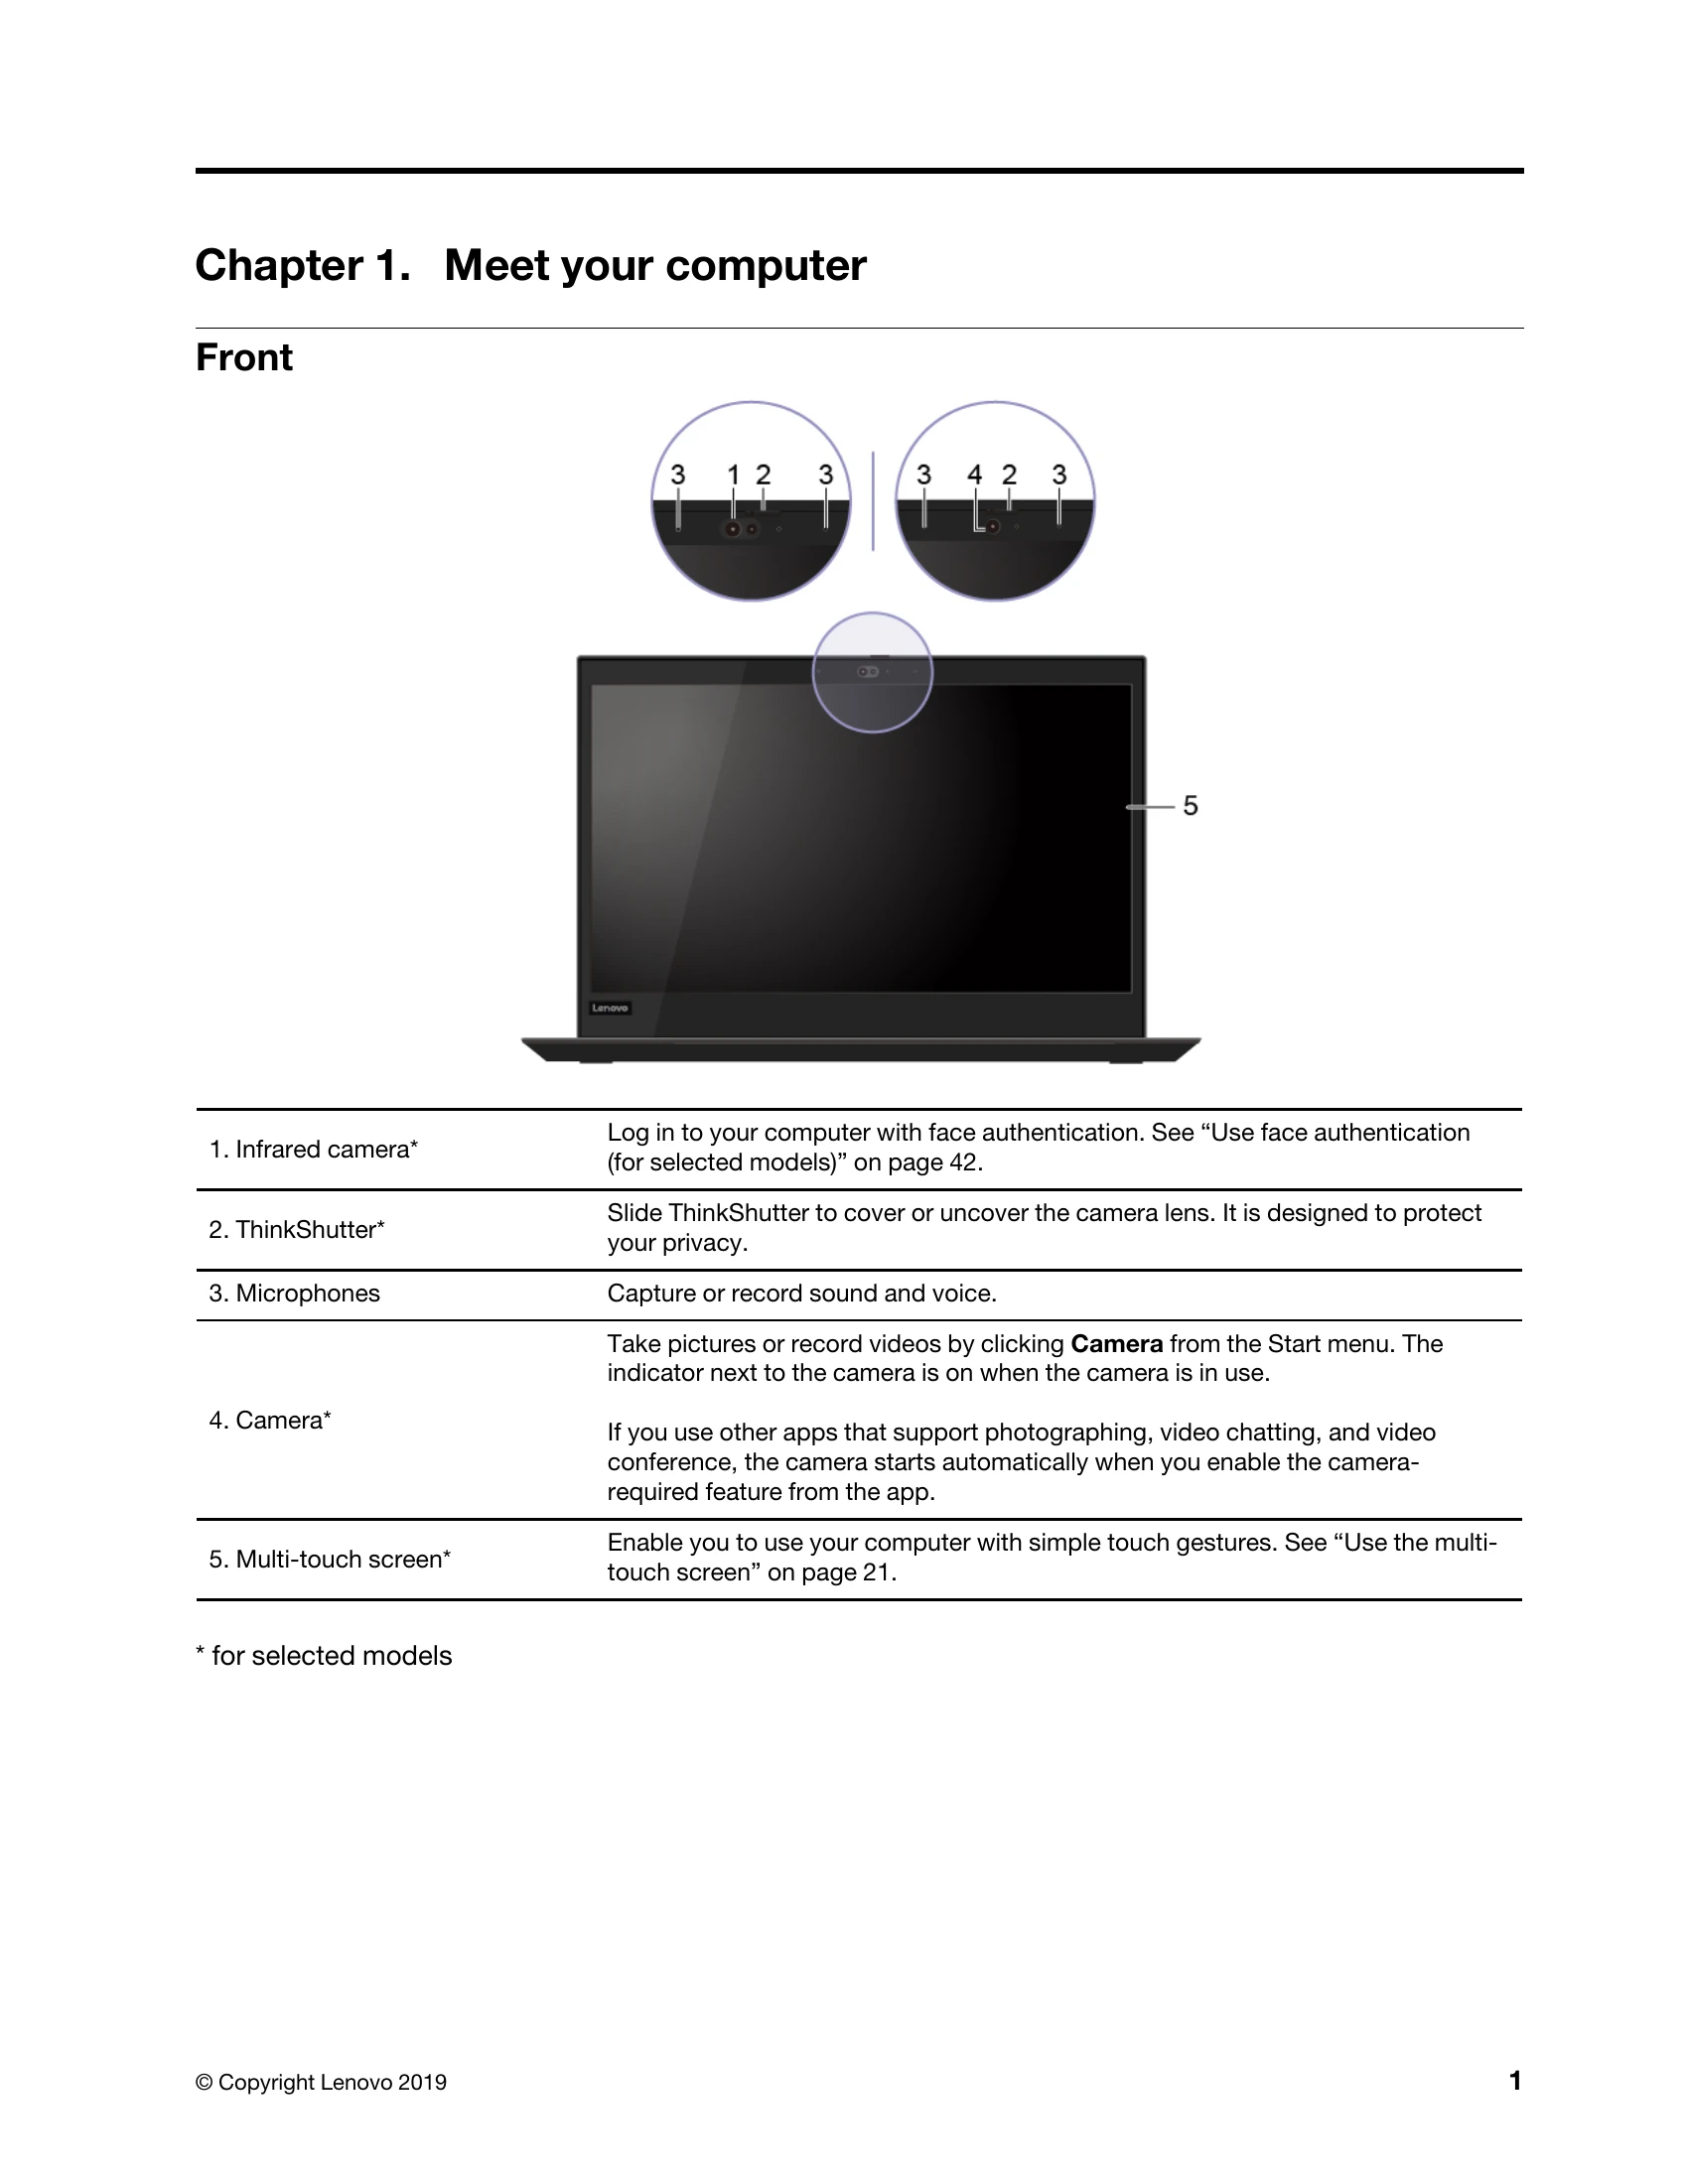
Front
1. Infrared camera*: Log in to your computer with face authentication.
2. ThinkShutter*: Slide ThinkShutter to cover or uncover the camera lens. It is designed to protect your privacy.
3. Microphones: Capture or record sound and voice.
4. Camera*: Take pictures or record videos by clicking Camera from the Start menu. The indicator next to the camera is on when the camera is in use.
5. Multi-touch screen*: Enable you to use your computer with simple touch gestures.
Base
1. Power button: Press to turn on the computer or put the computer to sleep mode.
2. Numeric keypad: Quickly input numbers.
3. Fingerprint reader*: Log in to your computer with enrolled fingerprints.
4. Trackpad: Perform finger touch and all the functions of a traditional mouse.
5. NFC label*: Your computer supports NFC (near field communication). You can share information with another NFC-enabled device.
6. TrackPoint® pointing device: Perform all the functions of a traditional mouse.
7. Speakers: Enable you to experience high-quality sound.
8. RFID mark or label*: If your computer comes with an integrated dual-band RFID reader, you will see an RFID mark or label around the trackpad area.
9. RFID tapping area*: Tap an RFID tag or card above the tapping area to transfer data from the tag or card to your computer.
Left
1. USB-C™ connector (USB 3.1 Gen 1): Charge your computer. Charge USB-C compatible devices with the output voltage and current of 5 V and 1.5 A. Transfer data at USB 3.1 speed, up to 5 Gbps. Connect to an external display. Connect to USB-C accessories. Supply power to another computer using P-to-P 2.0 charging function.
2. Thunderbolt™ 3 connector (USB-C): Charge your computer. Charge USB-C compatible devices with the output voltage and current of 5 V and 1.5 A. Transfer data at Thunderbolt 3 speed, up to 40 Gbps. Connect to an external display. Connect to USB-C accessories. Supply power to another computer using P-to-P 2.0 charging function.
3. Docking-station connector: Connect the computer to a supported dock.
4. USB 3.1 connector Gen 1: Connect a USB-compatible device.
5. HDMI™ connector: Connect to a compatible digital audio device or video monitor.
6. Audio connector: Connect headphones or a headset.
7. MicroSD card slot: Insert a microSD card for data access or storage.
Right
1. Smart-card slot*: Use smart cards for authentication, data storage, and application processing.
2. Always On USB 3.1 connector Gen 1: Charge a USB-compatible device when the computer is on, off, in sleep mode, or in hibernation mode.
3. Ethernet connector: Connect to a local area network (LAN).
4. Security-lock slot: Lock your computer to a desk, table, or other fixtures.
Bottom
1. Docking-station hook holes: Use the docking-station hook holes to secure a supported docking station.
2. Keyboard drainage hole: Drain out liquid from your computer if you accidentally spill liquid on the keyboard.
3. Emergency-reset hole: Disconnect your computer from ac power, insert a straightened paper clip into the hole, connect your computer to ac power and then turn on your computer.
Rear
1. Nano-SIM-card slot*: Use the Nano Subscriber Identity Module (SIM) card to connect to a wireless-WAN network.
2. System status indicator: The indicator in the ThinkPad logo shows the system status of your computer.
Chapter 2. Get started with your computer
Get started with Windows 10
Learn the basics of Windows 10 and start working with it right away.
Windows account
To use the Windows operating system, a user account is required. It can either be a Windows user account or a Microsoft account.
Windows user account: You are prompted to create a Windows user account when you start Windows for the first time.
Microsoft account: You can also log in to the Windows operating system with a Microsoft account.
Windows user interface
1. Account: Change account settings, lock the computer, or sign out from the current account.
2. Settings: Launch Settings.
3. Power: Shut down, restart, or put the computer into sleep.
4. Start button: Open the Start menu.
5. Windows Search: Type what you are looking for in the search box and get search results from your computer and the Web.
6. Task View: Display all opened apps and switch among them.
7. Windows notification area: Display notifications and status of some features.
8. Battery status icon: Display power status and change battery or power settings.
9. Network icon: Connect to an available wireless network and display the network status.
10. Action center: Display the latest notifications from apps and provide quick access to some features.
Windows label
Your computer might have a Windows 10 Genuine Microsoft label affixed to its cover.
Connect to networks
Your computer helps you connect to the world through a wired or wireless network.
Connect to the wired Ethernet: Connect your computer to a local area network (LAN) through the Ethernet connector.
Connect to Wi-Fi networks: Click the network icon in the Windows notification area, select a network, and provide required information.
Connect to a cellular network: If your computer has a wireless WAN card and a nano-SIM card installed, you can connect to a cellular data network.
Use Lenovo Vantage
Lenovo Vantage is a customized one-stop solution to help you maintain your computer with automated updates and fixes, configure hardware settings, and get personalized support.
Access Lenovo Vantage: Open the Start menu and click Lenovo Vantage.
Key features: System Update, Hardware Settings, Health & Support, Lenovo Wi-Fi Security.
Use Lenovo Quick Clean (for selected models of T490)
On 20Q9 and 20QH models, the preinstalled Lenovo Quick Clean enables you to temporarily disable the keyboard, screen, trackpad, and TrackPoint pointing device for cleaning.
Interact with your computer
Your computer provides you various ways to navigate the screen.
Use the keyboard shortcuts
1. Numeric keypad: Input numbers quickly when the Numeric Lock indicator is on.
2. Windows logo key: Open the Start menu.
3. Caps Lock key: Switch the letter case between the upper case and lower case.
4. F1-F12 function keys: Invoke the special function printed as an icon on each key or standard function.