Brand: Mamiya
Category: Camera
Document Type:
Language: EN
Brand: Mamiya
Category: Camera
Document Type:
Language: EN
Uploaded: Aug. 9, 2025, 11:44 p.m.
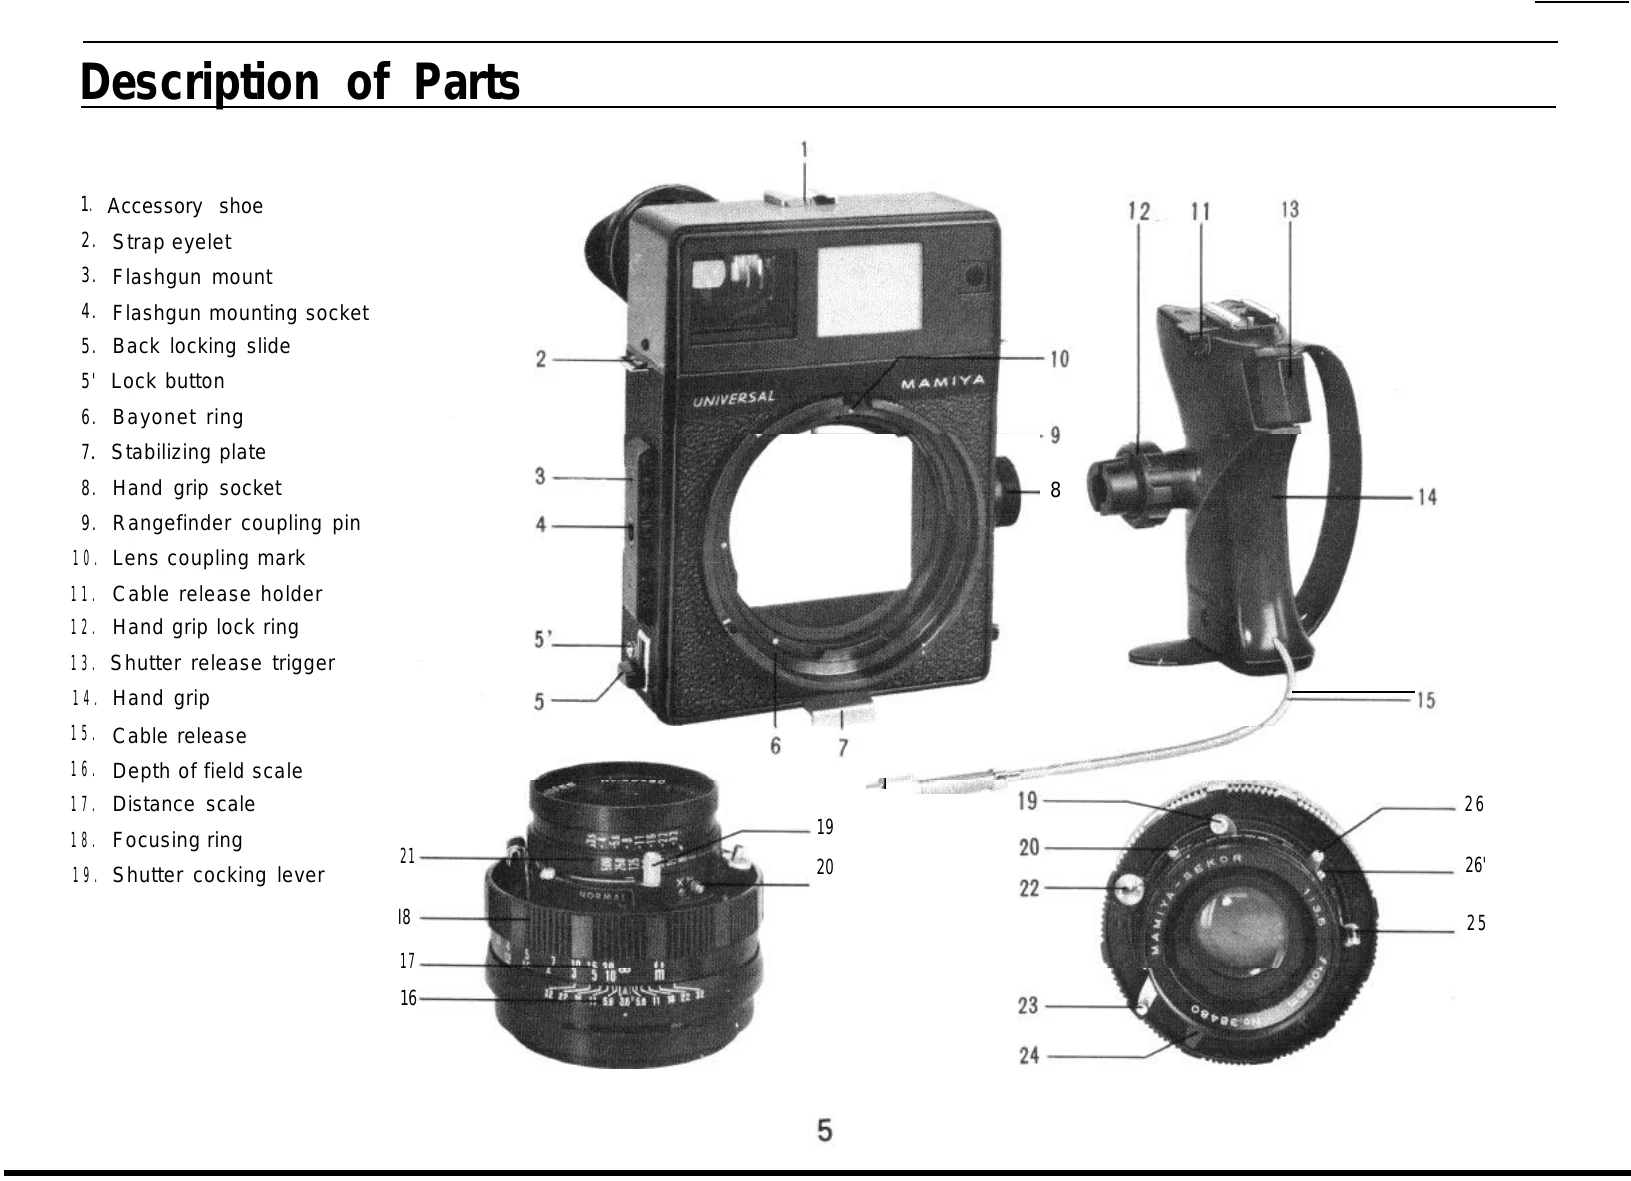
Rotate the bayonet ring counter-clockwise until it stops. Align the red dot on the lens coupling mark with the red dot on the bayonet ring. Insert the lens and turn the bayonet ring clockwise to lock it.
For the 100mm f/3.5 lens, pull the lens-shutter assembly out from its retracted position by turning it slightly counter-clockwise and then pulling. Secure it in place by turning it clockwise.
Insert the hand grip into the grip socket (8) and turn the hand grip lock ring (12) to secure it. Connect the cable release (15) to the release socket (25).
Pull out the stabilizing plate (7) on the bottom of the camera body when resting it on a surface.
The viewfinder frame for 6x9 and 6x7 formats is adjustable for different focal lengths. Use the slide button (28) to adjust the indicator window (27) to match the lens's focal length.
Turn the focusing ring to align the two superimposed images in the center of the viewfinder. Ensure the lens-shutter assembly is not retracted for proper rangefinder function.
Move the shutter cocking lever (19).
Press the shutter release trigger (13) on the hand grip or the shutter release lever (23).
To keep the shutter open for ground glass focusing, cock the shutter, disengage the lock button, and turn the press focus lever in the shutter cock direction. Push the lever back to close the shutter.
Refer to the Flash Synchronizing Table to determine the correct shutter speed and terminal for flash synchronization. Move the MX-selector lever to M or X for M-class or electronic flash respectively.