Brand: Meraki
Category: Network Cameras
Document Type: Installation Guide
Language: EN
Brand: Meraki
Category: Network Cameras
Document Type: Installation Guide
Language: EN
Uploaded: Sept. 12, 2025, 4:13 a.m.
Warranty information is not explicitly stated in this document.
The Cisco Meraki MV23 series are network cameras that are exceptionally simple to deploy and configure due to their integration into the Meraki Dashboard and cloud-augmented edge storage. The MV family eliminates complex and costly servers and video recorders required by traditional solutions, removing the limitations typically placed on video surveillance deployments.
The MV23 features a 1000BASE-TX Ethernet port and requires 802.3at PoE+ minimally for operation. Route the Ethernet cable from an active port on a PoE switch or injector.
Note: Power over Ethernet supports a maximum cable length of 300 ft (100 m).
During first-time setup, the MV23 series will automatically update to the latest stable firmware. Some features may be unavailable until this automatic update is completed.
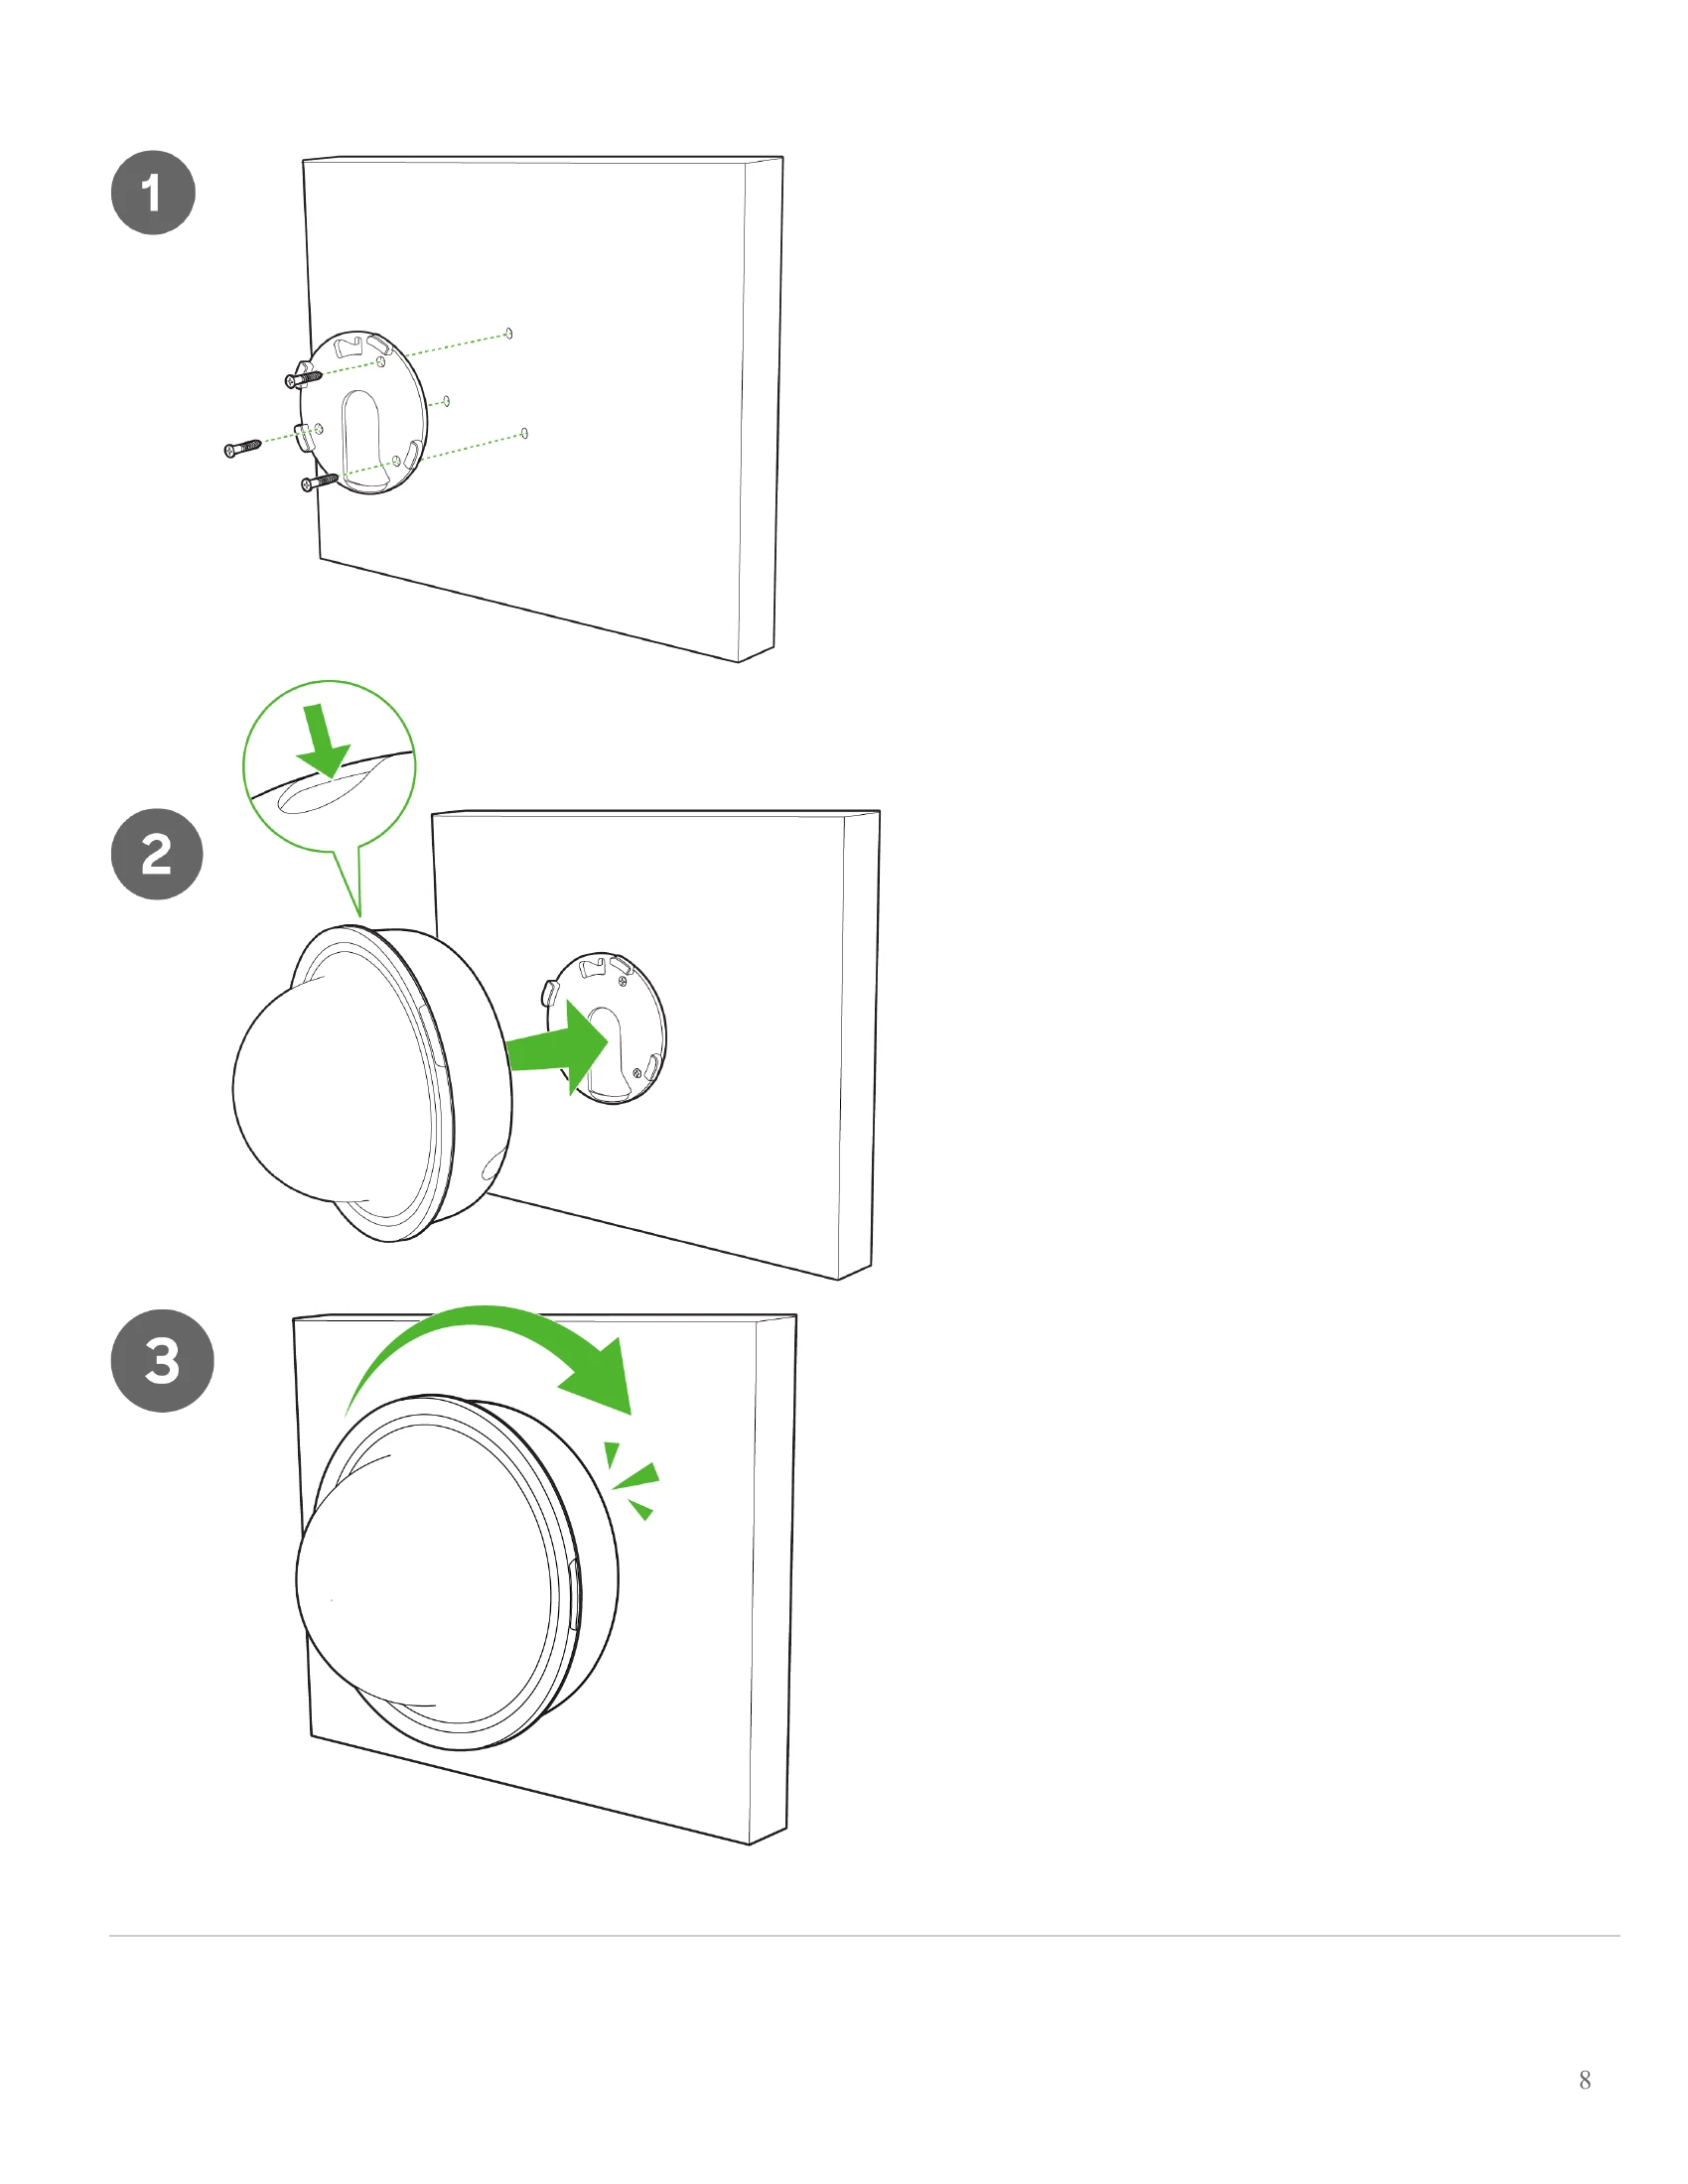
For most mounting scenarios, the MV23 wall mount provides a quick, simple, and flexible means for mounting your device. The installation should be done in a few simple steps:
Note: Leave the protective plastic cover on the optical dome throughout the installation process to prevent any damage to the dome. The protective cover should be removed once the installation is completed.
The MV23 Series has a new microphone cut-off switch at the camera's base. This switch can be used to disable audio and override the Dashboard Audio Settings for an added layer of security. If the regulations require disabling audio or Dashboard control for Audio enablement needs to be disabled, the microphone cut-off switch can be leveraged and set to Disabled.
The factory reset button for MV23 series is located on the front of the camera, under the dome.
An MV must first be provisioned over a wired Ethernet connection before it can be deployed wirelessly. See the setup guide here for information on how to connect via WiFi.
Your MV23 series is equipped with an LED light on the front of the unit to convey system functionality and performance information.
The following colours and patterns indicate the various status conditions of an MV:
Aim the lens. Look through the camera on the Meraki Dashboard to fine-tune the picture. The camera sensor and lens unit can be physically tilted through 65 degrees, rotated through a range of +/-90 degrees, and panned through 354 degrees. The image can only be rotated by 180 degrees in software, and no other adjustments can be made. Zoom and focus can be adjusted remotely and can not be adjusted physically on the camera.
Note: Never adjust or remove the rubber lens gasket or protective lens guard.
| Status LED Color | Pattern | Meaning |
|---|---|---|
| Rainbow | Solid, rotating through colors | MV is booting up. |
| Blue | Flashing | MV is searching for WiFi network(s). |
| Green | Flashing | MV is upgrading or initializing for the first time. |
| Green | Solid | MV is connected via Ethernet. |
| Blue | Solid | MV is connected via WiFi. |
| Violet | Solid | MV has audio recording enabled. |
| Amber | Solid | MV is not able to connect to the Dashboard. |