Brand: Mio
Category: Automotive Electronics
Document Type: Manual
Language: EN
Brand: Mio
Category: Automotive Electronics
Document Type: Manual
Language: EN
Uploaded: Aug. 10, 2025, 12:46 a.m.
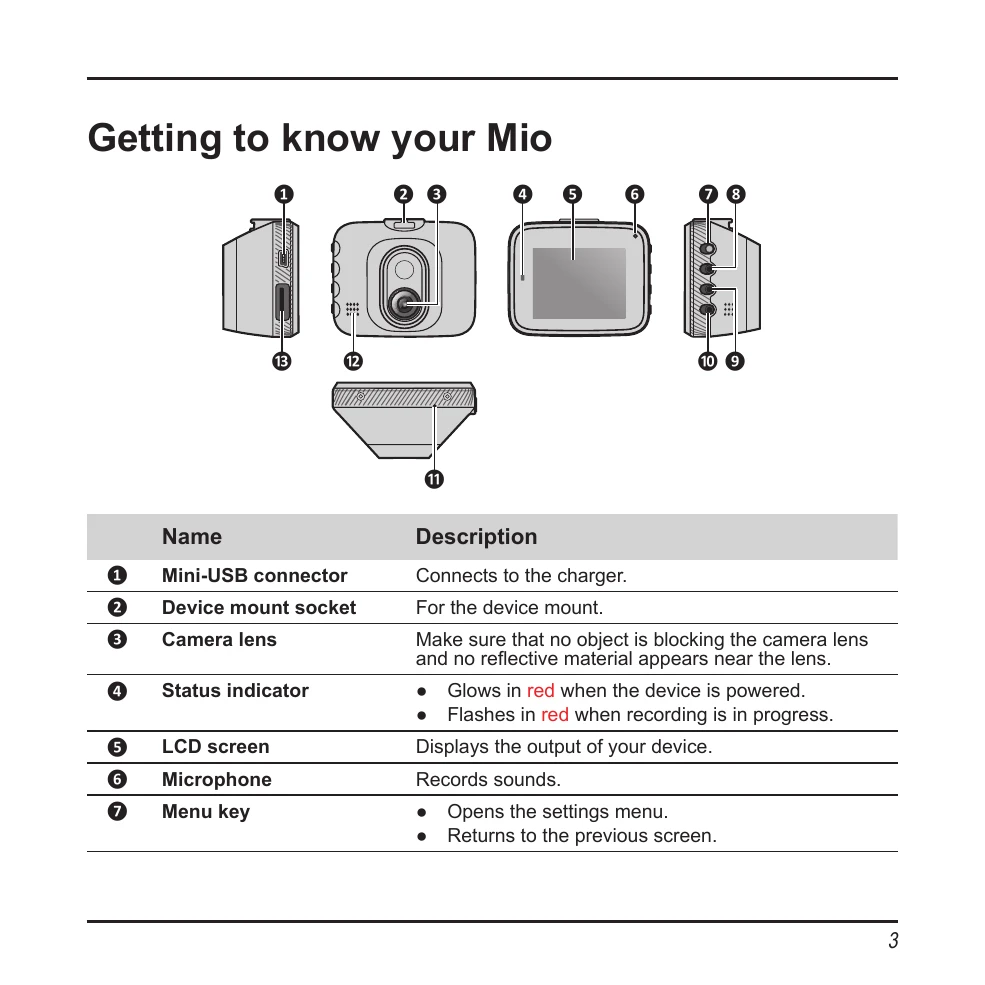
Familiarize yourself with the components of your Mio device, including the Mini-USB connector, device mount socket, camera lens, status indicator, LCD screen, microphone, and various keys for navigation and operation. Understand the purpose of each component as described in the manual.
Insert a Class 10 or higher memory card (up to 64 GB) into the device before starting recording. Format the card to avoid malfunctions. To insert, hold the card by the edges and gently push it into the slot. To remove, gently push the top edge inwards to release.
Mount the device in an appropriate location, ensuring it does not obstruct the driver's view. Secure the power cord with cable clips to avoid interference with driving. For optimal recording quality, place the Mio near the rear-view mirror and ensure the car is parked on a level ground.
The Mio automatically powers on when the vehicle engine starts. Follow on-screen prompts to select language and set date/time. To turn off, use the shutdown button. A hardware reset can be performed if the device becomes unresponsive.
The system begins continuous recording after start-up. Recordings may be divided into clips. When the memory card is full, the oldest files are overwritten. Event recording is triggered by impacts or sudden driving changes, or can be manually initiated.
Take photos by pressing the camera button. In playback mode, select videos or photos, play, pause, fast-forward/backward, and delete files. It is recommended to play videos on a computer for better viewing.
Access the settings menu to customize various options, including video clip length, light frequency, G-sensor sensitivity, date/time, volume, backlight settings, language, and system reset.