Brand: Mio
Category: Automotive Electronics
Document Type: Manual
Language: EN
Brand: Mio
Category: Automotive Electronics
Document Type: Manual
Language: EN
Uploaded: Aug. 10, 2025, 12:46 a.m.
Manual Publish Date: 2021-05-01
None
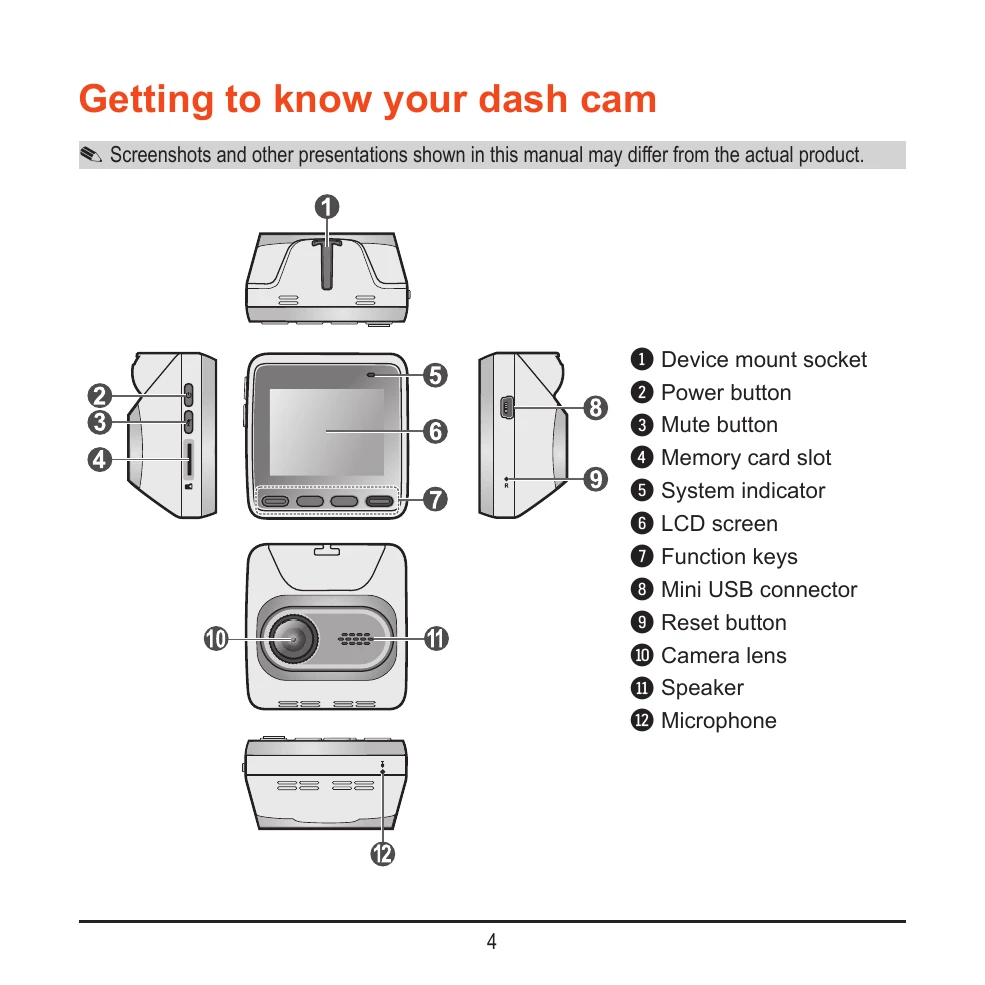
Familiarize yourself with the components of your Mio dash cam, including the mount socket, power and mute buttons, memory card slot, system indicator, LCD screen, function keys, USB connector, reset button, camera lens, speaker, and microphone.
Insert a MicroSD card into the designated slot. Ensure it is inserted correctly and avoid applying pressure to the center. Format the card before first use to prevent malfunctions. Remember to turn off the device before removing the memory card.
Mount the dash cam securely on your windshield, ensuring it does not obstruct the driver's view or airbags. Clean the mounting area and route cables safely. Adjust the angle for a 50/50 ground/sky ratio. Turn on the device after mounting.
The dash cam automatically turns on when the vehicle engine starts. For the first use, follow on-screen prompts to set language, date, and time. Manually turn the device on/off by pressing and holding the power button for 2 seconds. Use the reset button for hardware resets.
Continuous recording starts automatically. You can manually stop recording by pressing the menu button. Recordings are saved as video clips and will overwrite the oldest files when the memory card is full. Event-driven recording is triggered by impacts or sudden changes, capturing footage before and after the event.