Getting to know your dash cam
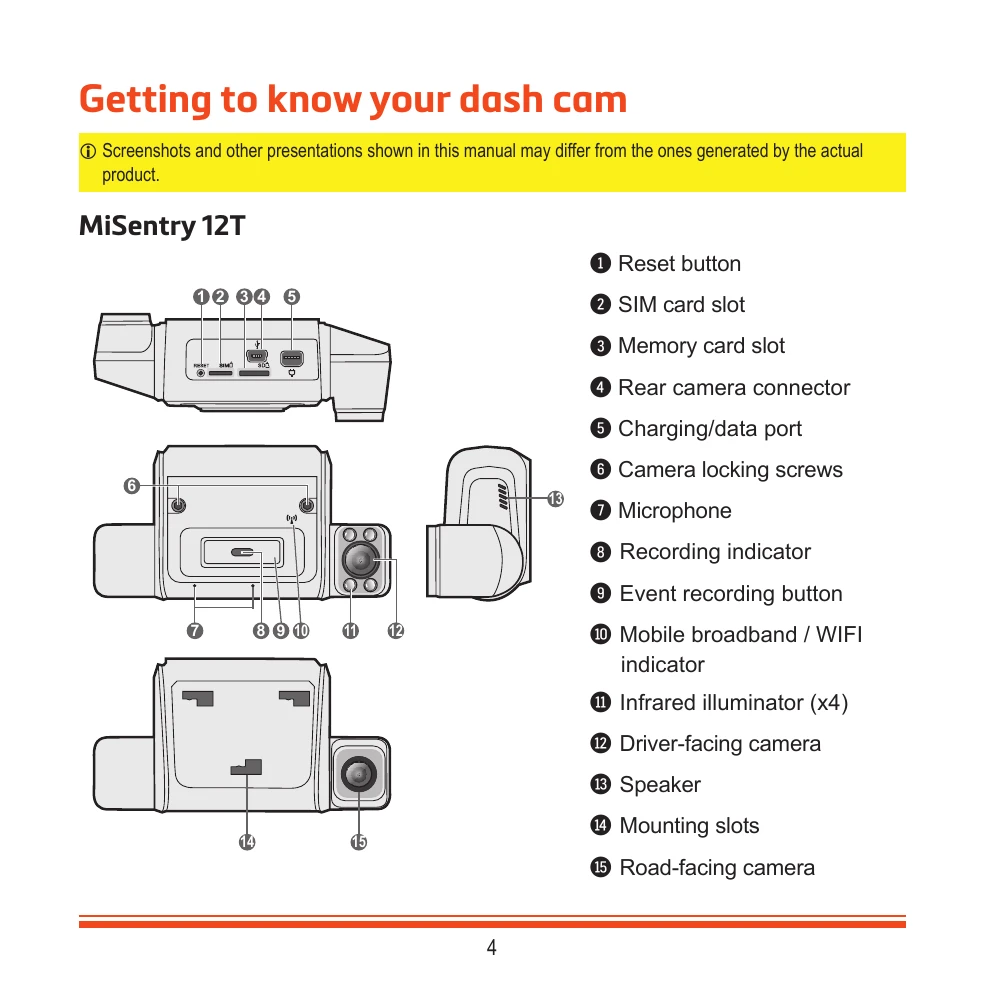
MiSentry 12T features various components including a reset button, SIM and memory card slots, rear camera connector, charging/data port, camera locking screws, microphone, recording and event recording indicators, mobile broadband/WIFI indicator, infrared illuminators, driver-facing and road-facing cameras, speaker, and mounting slots.
Installing your dash cam
Ensure the vehicle is parked on level ground. Clean the windscreen with rubbing alcohol and attach the static cling film. Mount the plate securely, wait for adhesive to bond, then attach the dash cam. Route cables carefully, avoiding interference with airbags or safety features.
Using MioNext
MioNext is a companion app for iOS and Android devices. Log in or register via the app or Mio's website. Connect the dash cam via Bluetooth and follow on-screen instructions. Adjust camera angles by loosening the locking screw and ensuring the view is parallel to the ground. The app allows map view, event viewing, trip tracking, video download, dash cam settings, and app settings.
Recording Modes
Continuous recording starts automatically when the engine is on. Event recording is triggered by G-sensor events (impact, etc.) or can be manually started. Parking recording activates based on G-sensor or motion detection. Battery over-discharge protection ensures the dash cam switches to a lower power mode to protect the vehicle battery.