Brand: MITSUBISHI ELECTRIC
Category: Projector
Document Type: Manual
Language: EN
Brand: MITSUBISHI ELECTRIC
Category: Projector
Document Type: Manual
Language: EN
Uploaded: Nov. 21, 2025, 7:10 p.m.
Contact your dealer for warranty information and support.
IMPORTANT SAFEGUARDS: Always read and follow safety instructions. Unplug before cleaning. Do not expose to water or moisture. Do not open the cabinet. Refer servicing to qualified personnel. Ensure proper ventilation. Use specified power cords. Do not look directly into the lens when the projector is on. Do not face the lens to the sun.
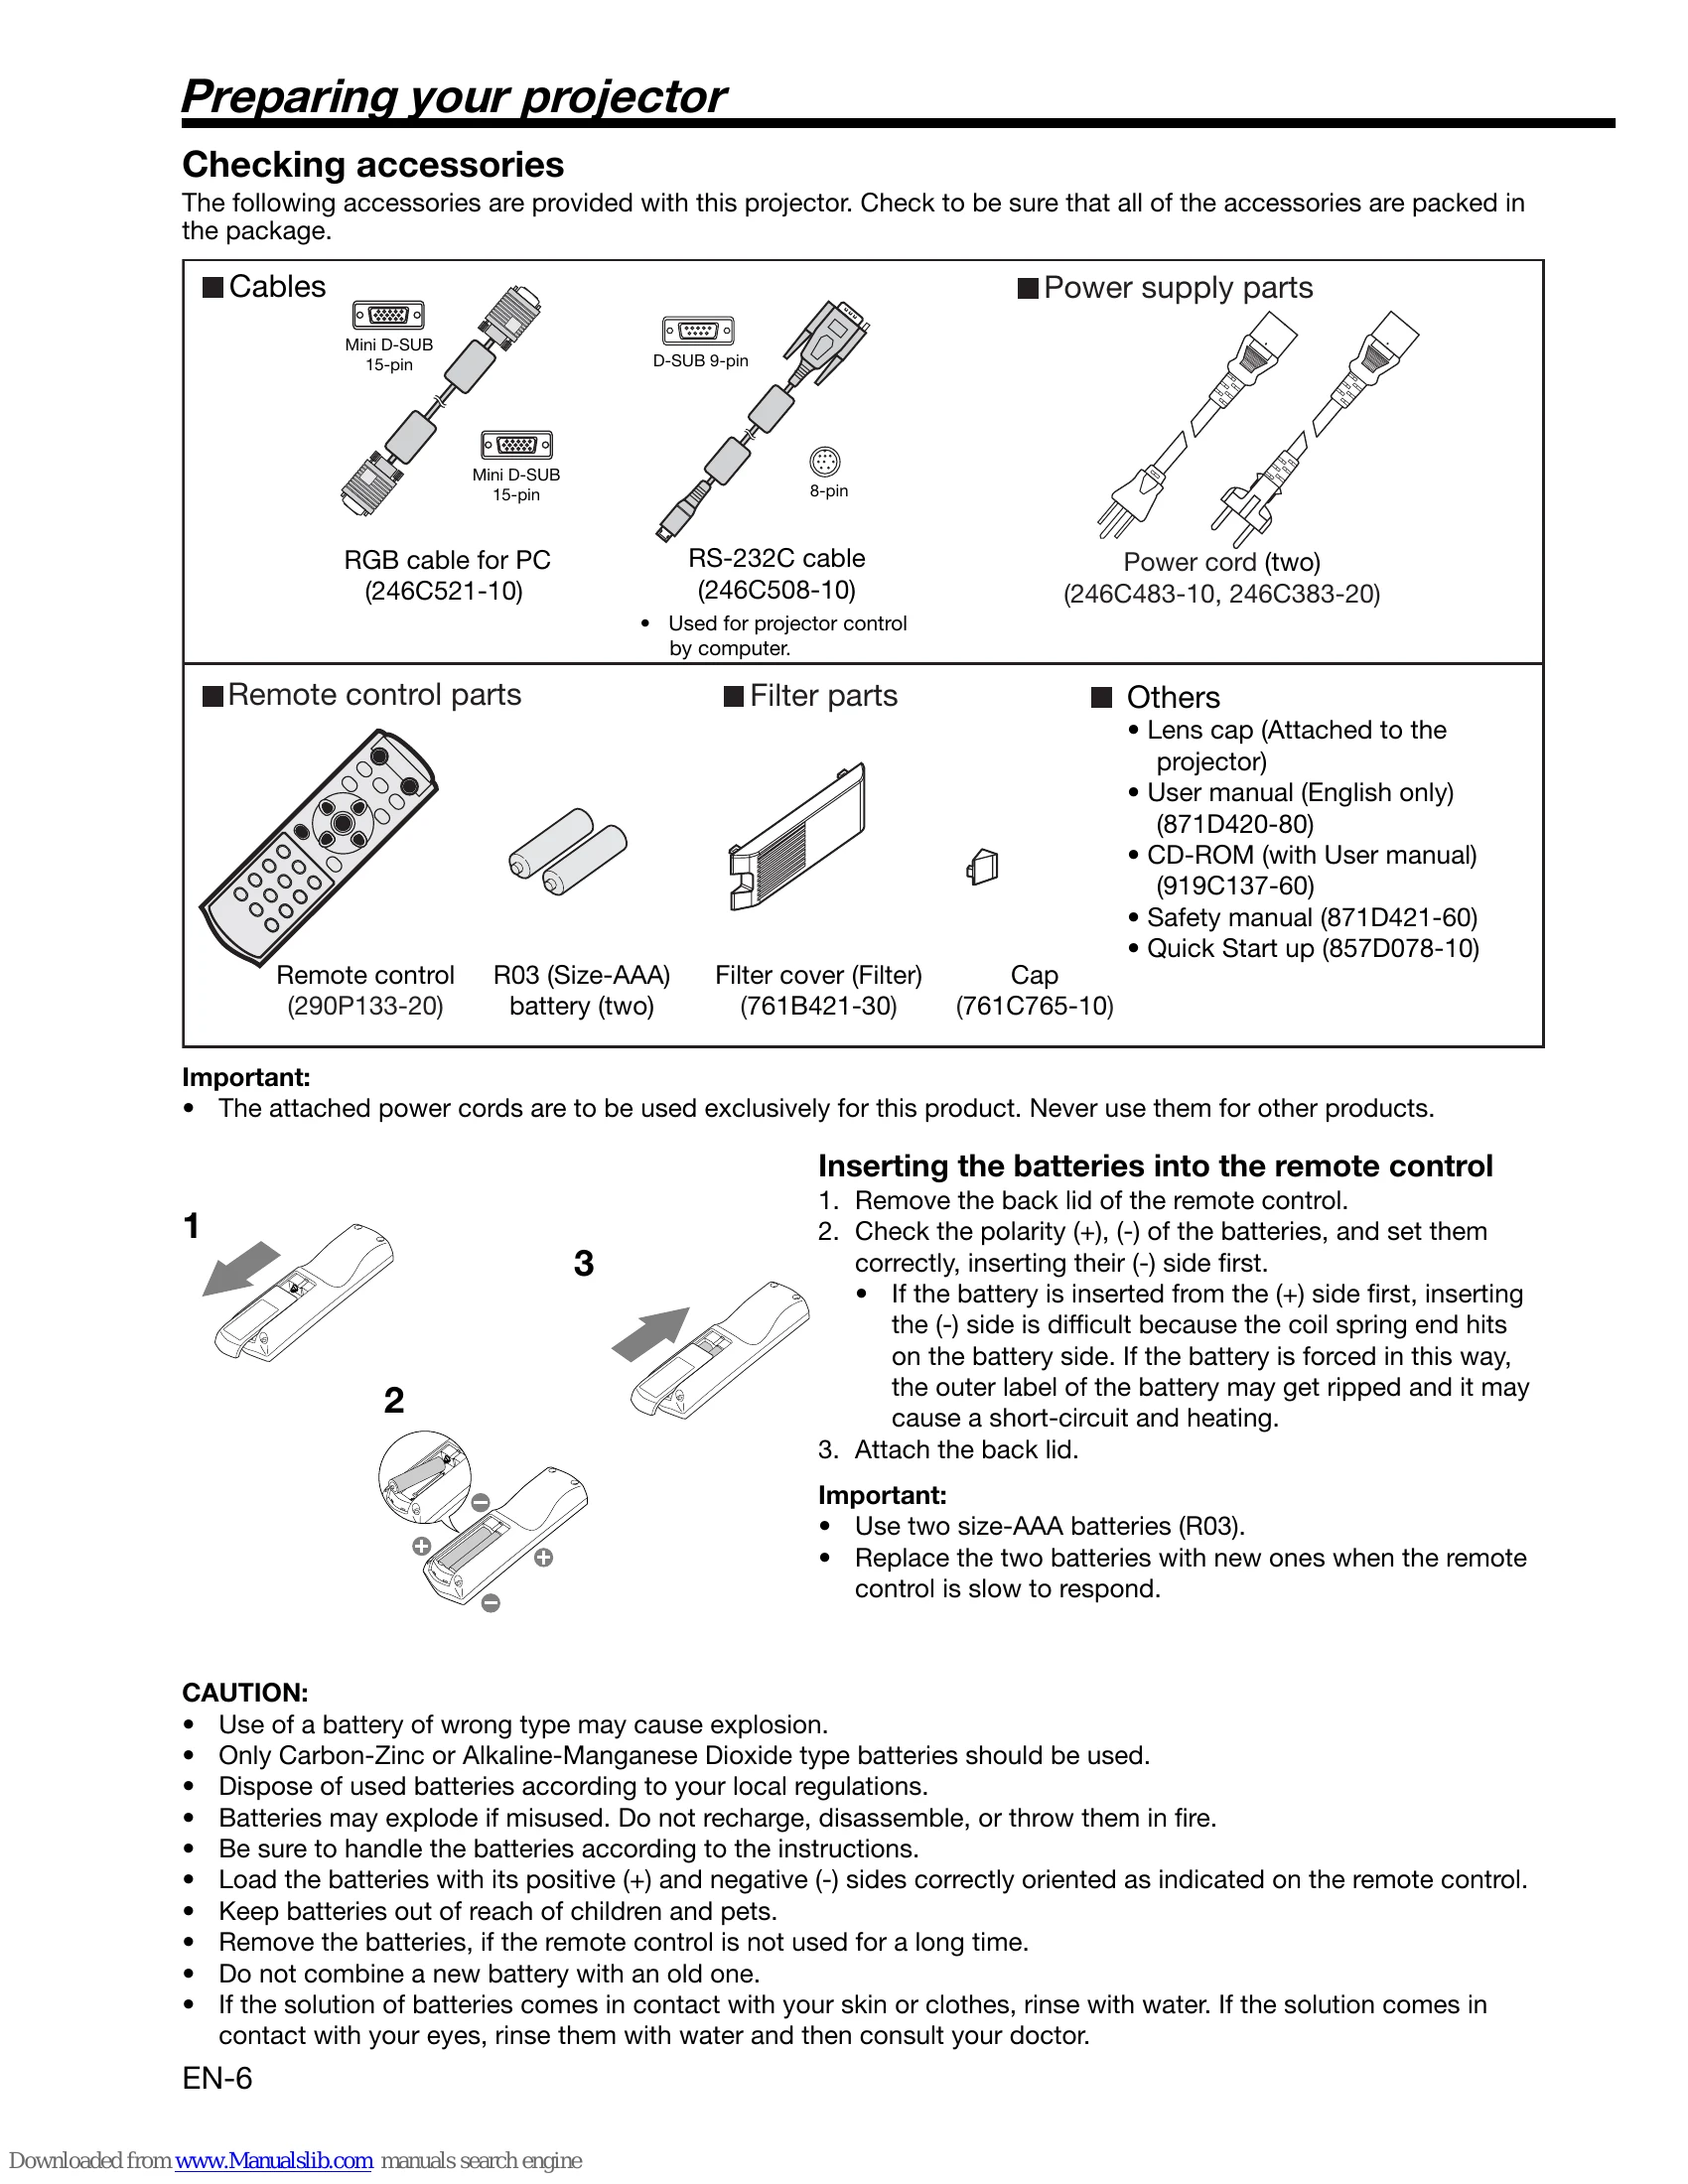
PREPARING YOUR PROJECTOR: Check included accessories. Insert batteries into the remote control, observing polarity. Use the correct battery type (AAA). Ensure proper disposal of used batteries.
SETTING UP YOUR PROJECTOR: Install screen perpendicularly. Set SCREEN SIZE and VERTICAL LOCATION as needed. Adjust projection angle using adjustment feet. Mount on a stable surface. Avoid hot environments and unstable surfaces. For ceiling mounting, use a specialized kit and set IMAGE REVERSE to MIRROR INVERT.
CONNECTING DEVICES: Connect video equipment (DVD players, set-top boxes) via VIDEO, S-VIDEO, COMPONENT VIDEO IN, or HDMI IN terminals. Connect computers via COMPUTER IN/COMPONENT VIDEO IN (analog RGB) or HDMI IN (digital). Ensure power is off during connections.
PROJECTING IMAGES: Remove lens cap. Turn on connected equipment. Press POWER button. Select input source. Adjust projector position and orientation. Adjust image size with ZOOM ring and focus with FOCUS ring. To stop projecting, press POWER or OFF button, wait for cooling, then unplug.
ADJUSTING IMAGES: Use remote control or menu for CONTRAST, SHARPNESS, GAMMA, BRIGHTNESS, COLOR TEMP., KEYSTONE, ASPECT RATIO, and IRIS adjustments.
TROUBLESHOOTING: Check indicators, power connections, vents, and filter for issues. Refer to the table for specific problems and solutions.
| Problem | Solution |
|---|---|
| Power can not be turned on. | Check indicator status. Connect power cord properly. Remove obstructions from air inlets/outlets. Clean filter if clogged. Wait for cooling after unplugging before turning on again. Replace lamp if near end of life. Attach lamp cover. Unplug and contact dealer if persists. |
| No image appears on the screen. | Check lens cap removal. Allow time for lamp to light up. Check if fan is running and power button is unresponsive (wait for fan to stop). Check intake vent cleanliness. Ensure SCART INPUT is OFF. Check lamp cover closure. Verify cables are not broken. Use supplied cable or RGB amplifier if needed. Check video device connection. Remove obstructions from vents and restart. Replace lamp if STATUS indicator is steady red. Enter password if prompted. |
| Projected images suddenly disappear. | Remove obstructions from air vents. Wait for fan to stop. Unplug, wait 10 minutes, plug in, and press POWER. Replace lamp if STATUS indicator is steady red. |
| The screen for entering the password appears. | Enter the correct password or contact the person in charge of management. |
| "NO SIGNAL" is displayed. | Turn on the connected device. Check external device output signals. Verify cable integrity and correct terminal use. Ensure correct input source is selected. Use supplied cable or RGB amplifier. |
| Images are not displayed correctly. | Projected images are shaking: Check cable connection, press AUTO POSITION. Adjust SIGNAL menu. Adjust projector/screen perpendicularity. Projected images are displaced: Adjust projector/screen perpendicularity. Projected images are distorted: Adjust BRIGHTNESS/CONTRAST. Replace lamp. Adjust focus. Clean lens. Adjust projector/screen perpendicularity. Projected images are dark: Adjust BRIGHTNESS/CONTRAST. Replace lamp. Projected images are blurred: Adjust focus. Clean lens. Press remote buttons to eliminate flicker. Adjust TRACKING/FINE SYNC. Adjust projector/screen perpendicularity. |
| White dots / Black dots are seen on projected images. | This is normal for DLP™ projectors and not a malfunction. |
| Rainbow effect is seen on projected images. | This is due to color breaking noise and not a malfunction. |
| Fine streaks are seen on projected images. | Due to interference; replace screen or adjust focus slightly. |
| Projected images become wavy. | Connect plugs securely. Keep projector away from devices emitting radio waves. Adjust keystone minimally. |
| Hue is not appropriate. / Tint in projected images is incorrect. | Check cables. Check COMPUTER INPUT setting. |
| Only the motion areas in the images supplied from the computer aren't displayed. | Caused by the computer; contact manufacturer. |
| Projected images are obscured. | Match computer output resolution to projector resolution. Do not apply keystone adjustment if images are obscured. |
| The exhaust vents emit warm air. | Normal after cooling. |
| The menu can't be used. | Reset projector by turning off and unplugging, then restarting. |
| "TEMPERATURE!!" is displayed. | Ambient temperature is high or air inlet/outlet grille is blocked. Eliminate causes and clean filter. |
| The © mark appears. | Ineffective operation; not a malfunction. |
| The remote control doesn't function easily or at all. | Check batteries (type and weak). Ensure sensor is not exposed to direct light. Use within operating range and at appropriate distance. |
| The buttons on the control panel (except for the POWER button) don't function. | Password function is set to MENU ACCESS. Cancel password lock or contact administrator. |
| Abnormal sound is heard. | Color wheel spinning at high speed; metallic sounds are normal. |
| Projector does not turn on after lamp replacement. | Fit lamp cover securely. Reset lamp operating time. |
| STATUS indicator blinks after lamp replacement. | Reset lamp operating time. |